


Are you tired of grainy, pixelated video during calls and streams? This guide provides comprehensive, actionable strategies to combat common webcam noise. Discover how to optimize your lighting, fine-tune webcam settings, and even consider hardware upgrades to achieve crystal-clear, professional-looking video effortlessly.
How to Reduce Webcam Noise
Ever jump on a video call only to find your face looks like it’s made of tiny, shimmering pixels? That grainy, blotchy appearance is what we call “webcam noise.” It’s a common problem that can make your video look unprofessional, unflattering, and frankly, distracting. Whether you’re streaming, attending virtual meetings, or just chatting with friends, a clear, crisp image makes a huge difference.
Good news! You don’t need to be a tech wizard or buy an expensive new camera right away. Most issues causing webcam noise can be fixed with simple adjustments to your environment, your webcam’s settings, or a few smart upgrades. This comprehensive guide will walk you through everything you need to know, step-by-step, to significantly reduce webcam noise and achieve the best possible video quality.
By the end of this guide, you’ll understand why webcam noise happens and have a toolkit of practical solutions to make your video look sharp, clear, and professional. Let’s dive in!
Key Takeaways
- Light is King: Insufficient or poor lighting is the primary cause of webcam noise. Add more soft, diffused light to drastically improve image quality.
- Adjust Settings: Fine-tune your webcam’s ISO/gain, exposure, and sharpness settings through its companion software or operating system controls to reduce digital grain and improve clarity.
- Clean Lens & Stable Setup: A dirty webcam lens or an unstable USB connection can contribute to blurry images and visual artifacts. Keep your lens pristine and ensure all connections are secure.
- Leverage Software: Utilize built-in noise reduction features available in video conferencing applications (like Zoom or Teams) or external streaming software (like OBS Studio) for real-time improvements.
- Upgrade When Necessary: If older or low-budget hardware consistently produces poor results, investing in a newer, higher-quality webcam or an external lighting kit can significantly reduce persistent webcam noise.
- Update Drivers & Firmware: Regularly keeping your webcam’s drivers and firmware updated ensures optimal performance, compatibility, and access to the latest image processing enhancements that can combat noise.
- Avoid Backlighting: Always position your primary light source in front of you, not behind. Backlighting forces your webcam to overcompensate, often leading to a darker, grainier image of yourself.
Understanding Webcam Noise: Why Does It Happen?
Before we fix it, let’s quickly understand the enemy. Webcam noise, or “digital noise,” typically appears as random speckles, grain, or color distortion in your video. It’s often most noticeable in darker areas of the image. Here are the main culprits:
- Low Light: This is the biggest factor. When there isn’t enough light, your webcam’s sensor struggles to capture a clear image. It tries to compensate by increasing its “gain” (like ISO on a regular camera), which amplifies the signal but also amplifies the noise.
- Small Sensor Size: Most webcams have tiny sensors compared to dedicated cameras. Smaller sensors inherently capture less light and are more prone to noise, especially in suboptimal conditions.
- Compression Artifacts: Sometimes, the compression used to send your video stream can introduce artifacts that look like noise, particularly with lower bandwidth or aggressive compression settings.
- Software Processing: The webcam’s internal software, or your computer’s processing, can sometimes introduce or fail to adequately remove noise.
Now that you know the ‘why,’ let’s tackle the ‘how to fix’ webcam noise.
Method 1: Optimize Your Lighting Environment
This is by far the most impactful step you can take. Excellent lighting can make even an average webcam look good, while poor lighting will make an expensive one look bad. Reducing webcam noise starts here.

Visual guide about How to Reduce Webcam Noise
Image source: d11ovvaxdf1k5p.cloudfront.net
Add More Light
Your webcam loves light! The more ambient light you have, the less your webcam has to work to brighten the image, and thus, less noise will be introduced. Think about adding dedicated light sources.
- Desk Lamps: Position a desk lamp or two behind your monitor, facing you.
- Ring Lights: These are popular for a reason. They provide even, flattering light directly in front of your face and are excellent for reducing webcam noise.
- Softboxes/LED Panels: For more professional setups, small softboxes or LED panels can provide powerful, diffused light.
Remember, your face should be the brightest part of the scene.
Use Soft, Diffused Lighting
Harsh, direct light can create unflattering shadows and hot spots. Diffused light spreads out evenly, reducing shadows and making your image look much smoother and more professional.
- Diffusers: If using a lamp, try bouncing its light off a wall or using a diffuser (like a white cloth or paper) over the lamp.
- Natural Light: If possible, sit facing a window. Natural light is often the best light, but be mindful of direct sunlight, which can be too harsh.
Avoid Backlighting
This is a crucial mistake many people make. If your primary light source (like a bright window) is behind you, your webcam will try to expose for the bright background, making you appear dark, silhouetted, and full of webcam noise.
- Reposition: Always ensure your main light source is in front of you, illuminating your face directly.
- Block Light: If you can’t reposition, use blinds or curtains to block strong light coming from behind.
Control Ambient Light
While you want light on your face, too much uncontrolled ambient light can also be tricky. Minimize distracting light sources from the sides or above that might create odd shadows or reflections.
- Turn off Overhead Lights: Often, overhead lights cast harsh shadows on your face. Try relying on frontal desk or ring lights instead.
- Minimize Screen Glare: Ensure your monitor isn’t casting a strong glare onto your face or glasses, which can confuse your webcam.
Method 2: Adjust Webcam Settings
Even with great lighting, your webcam’s internal settings play a huge role in image quality. Many webcams come with their own software, or you can access settings through your operating system or video conferencing app. Tweak these to combat webcam noise.
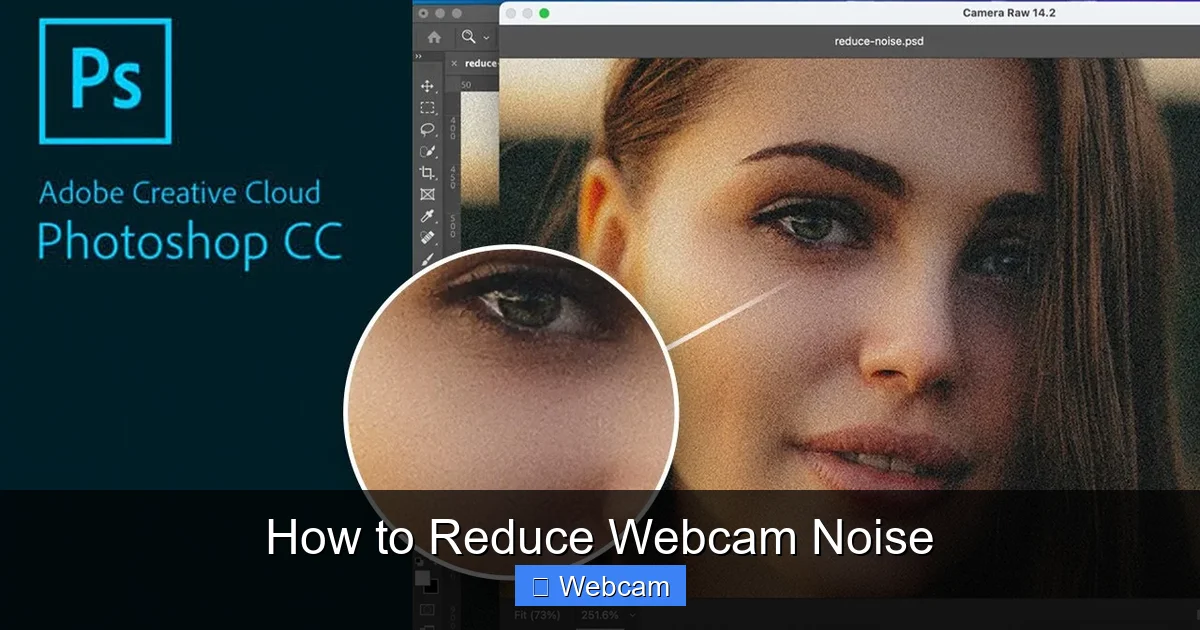
Visual guide about How to Reduce Webcam Noise
Image source: ashley-cameron.com
Lower ISO/Gain
This is arguably the most important setting for reducing webcam noise. ISO or Gain determines your webcam’s sensitivity to light. Higher gain means a brighter image in low light, but also much more noise.
- Find the Setting: Look for “ISO,” “Gain,” or “Exposure” controls in your webcam’s software or video settings within your application (e.g., Zoom, OBS).
- Adjust Gradually: Lower the ISO/Gain setting until the webcam noise is minimized, even if the image gets a little darker. Then, use Method 1 (lighting) to compensate for the darkness. The goal is to get a bright, clear image with the lowest possible ISO.
Adjust Exposure/Shutter Speed
Exposure and shutter speed are related to how long your webcam’s sensor is open to light. A longer exposure means more light but can introduce motion blur.
- Manual Control: If available, try increasing the exposure slightly (making the image brighter) before resorting to increasing gain. Find a balance that brightens your image without causing excessive motion blur or introducing webcam noise.
- Frame Rate: Sometimes, reducing your frame rate (e.g., from 60fps to 30fps) can allow for longer exposure times per frame, potentially reducing noise, especially in low light.
White Balance
Incorrect white balance won’t directly cause webcam noise, but it can make your video look unnatural or give a color cast that emphasizes existing noise. Adjust it to make whites look truly white.
- Auto White Balance: Most webcams have an auto white balance feature, but it’s not always perfect.
- Manual Adjustment: If your software allows, manually set the white balance to match your light source (e.g., “Daylight” for natural light, “Fluorescent” for office lighting). This ensures accurate colors.
Sharpness and Noise Reduction Filters
Some webcam software or third-party tools offer sharpness and noise reduction settings.
- Sharpness: Be careful with this. Too much sharpness can actually make existing webcam noise more apparent, giving edges an unnatural look. Use sparingly.
- Noise Reduction: If your webcam software has a built-in noise reduction filter, enable it. Start with a moderate setting, as aggressive noise reduction can sometimes make your image look overly smooth or “plastic.”
Update Drivers and Software
Outdated drivers or firmware can lead to suboptimal performance and a lack of access to the latest image processing algorithms designed to combat webcam noise.
- Check Manufacturer’s Website: Visit your webcam manufacturer’s support page to download the latest drivers and firmware updates.
- Operating System Updates: Ensure your operating system (Windows, macOS) is also up to date, as it often includes generic webcam driver improvements.
Method 3: Improve Your Physical Setup
Sometimes the simplest things make a big difference in reducing webcam noise.
Clean Your Webcam Lens
It sounds obvious, but a smudged or dusty lens can seriously degrade image quality, making your video look hazy or blurry, which can be mistaken for or exacerbate webcam noise.
- Use a Microfiber Cloth: Gently wipe the lens with a clean, dry microfiber cloth. Avoid harsh chemicals or abrasive materials.
- Compressed Air: Use a can of compressed air to remove any stubborn dust particles before wiping.
Ensure Stable Connection
A loose or faulty USB connection can lead to data loss or intermittent performance, causing visual glitches or quality degradation that mimics webcam noise.
- Secure Connection: Make sure the USB cable is firmly plugged into both your webcam and your computer.
- Try Another Port: If you suspect an issue, try a different USB port on your computer, preferably a high-speed one (USB 3.0 or higher).
- Avoid USB Hubs: If possible, plug your webcam directly into your computer rather than through an unpowered USB hub, which can sometimes limit bandwidth.
Close Background Applications
If your computer is struggling with resources, it might not be able to process your webcam’s video stream efficiently, leading to dropped frames or reduced quality, which can appear as noise.
- Task Manager/Activity Monitor: Close unnecessary programs, especially those that consume a lot of CPU or GPU resources, before starting your video call or stream.
Method 4: Consider External Hardware Upgrades
If you’ve tried everything above and still struggle with persistent webcam noise, it might be time to think about upgrading your gear.
Upgrade Your Webcam
Built-in laptop webcams are often low quality. Even older external webcams might not have the best sensors or processing capabilities.
- Look for Larger Sensors: Higher-end webcams (e.g., Logitech Brio, Razer Kiyo Pro) typically feature larger sensors that capture more light and produce less noise.
- Higher Resolution & Frame Rate: While not directly reducing noise, a webcam capable of higher resolutions (1080p, 4K) and frame rates (60fps) often comes with better internal processing and sensors that inherently produce a cleaner image.
- Glass Lenses: Webcams with glass lenses tend to offer better clarity than those with plastic lenses.
Use External Lighting Kits
As we established, light is king. A dedicated lighting setup can drastically improve your image and combat webcam noise.
- Ring Lights: Easy to set up and very effective for flattering facial lighting.
- LED Panels: Offer more control over brightness and color temperature. Many are battery-powered and portable.
- Softboxes: Larger and more professional, providing the softest, most even light.
Method 5: Post-Processing and Software Solutions
Even if your raw webcam feed has some noise, you can often clean it up using software.
Use Video Conferencing Software Noise Reduction
Many popular platforms offer built-in video enhancements that can help with webcam noise.
- Zoom: In your video settings, look for “Adjust for low light” and “HD” options.
- Microsoft Teams: Check video device settings for options that might improve quality.
- Google Meet: Similar settings might be available, often related to bandwidth optimization which can affect perceived quality.
Be aware that these features sometimes sacrifice a bit of sharpness for a smoother look.
Apply Noise Reduction Filters (OBS Studio, Post-Production Software)
For streamers, content creators, or those using virtual camera software, advanced filters are available.
- OBS Studio: If you use OBS Studio for streaming or virtual camera output, you can add “Noise Reduction” filters directly to your webcam source. Experiment with different reduction methods and strengths.
- Video Editing Software: If you record videos, post-production software like Adobe Premiere Pro, DaVinci Resolve, or Final Cut Pro often have powerful noise reduction tools you can apply after recording.
Troubleshooting Common Webcam Noise Issues
Sometimes, even after following these steps, you might still encounter problems. Here are a few troubleshooting tips:
Still Seeing Noise in Good Light?
If your lighting is excellent but the webcam noise persists, double-check your webcam’s internal settings. Ensure ISO/Gain is set to the absolute lowest possible, and avoid aggressive sharpness settings in your software, which can make noise more visible. Also, consider the age of your webcam; it might be time for an upgrade.
Noise Appears After a Software Update?
A recent operating system or webcam driver update can sometimes introduce new issues. Try rolling back your webcam driver to a previous version if possible. Alternatively, check online forums or the manufacturer’s website for known issues with the update and potential fixes.
Webcam Not Responding to Settings Changes?
If your adjustments aren’t taking effect, try closing all applications that might be using your webcam (Zoom, Teams, OBS) and then reopening your webcam’s dedicated settings application. Sometimes, an active application can override or lock certain settings. A full computer restart can also clear up temporary software glitches.
Image Looks Blurry or Out of Focus?
While not strictly webcam noise, blurriness can compound the issue. Ensure your lens is clean. If your webcam has autofocus, make sure it’s working correctly; sometimes manual focus (if available) can give better results. Also, ensure your webcam is positioned steadily and not vibrating.
Conclusion
Reducing webcam noise is a journey of optimization, not a one-time fix. By systematically addressing your lighting, fine-tuning your settings, ensuring a clean and stable physical setup, and leveraging software tools, you can dramatically improve your video quality.
A clear, professional-looking video makes a stronger impression, enhances communication, and boosts your confidence in any virtual interaction. Take these steps, experiment with the settings, and enjoy the benefits of a crystal-clear image. Say goodbye to grainy video and hello to a sharp, professional you!



