


Taking a picture with your laptop webcam is simple and useful for video calls, online classes, or capturing memories. This guide walks you through the easiest methods, from using built-in apps to third-party software, so you can get sharp, clear photos quickly. Whether you’re new to webcams or just need a refresher, you’ll find everything you need to master your laptop’s camera.
Key Takeaways
- Your laptop webcam can take photos: Most modern laptops come with built-in webcams that can capture still images, just like a digital camera.
- Use built-in tools first: On Windows or macOS, you can take photos using the Camera app or Photo Booth without installing extra software.
- Adjust settings for better quality: Lighting, angle, and resolution matter—position yourself in natural light and check your webcam settings.
- Save photos directly to your device: Once taken, images are usually saved in your Pictures or Photos folder for easy access.
- Troubleshoot common issues: If your webcam isn’t working, check permissions, drivers, or try a different app.
- Use third-party software for more control: Apps like OBS or ManyCam offer advanced features like filters, overlays, and manual focus.
- Protect your privacy: Cover your webcam when not in use to prevent unauthorized access, especially with online security risks.
How to Take a Picture with Laptop Webcam: A Simple Step-by-Step Guide
Have you ever wanted to take a quick photo using your laptop’s built-in webcam? Whether you’re recording a memory, joining a video call, or just need a snapshot for a project, your laptop webcam can do the job—no extra camera needed. In this guide, you’ll learn exactly how to take a picture with laptop webcam using easy, built-in tools and simple steps. No technical skills required. By the end, you’ll be capturing clear, well-lit photos directly from your device.
This guide covers everything from turning on your webcam to saving your image, with helpful tips and troubleshooting advice. You’ll also learn how to improve photo quality and avoid common mistakes. Whether you’re using Windows or macOS, this method works on most laptops made in the last decade. Let’s get started!
Step 1: Check if Your Laptop Webcam Is Working
Before taking a picture, make sure your webcam is active and functioning. Most laptops have a small camera indicator light that turns on when the webcam is in use. If you don’t see a light, your webcam might be off or not properly connected.
Visual guide about How to Take a Picture with Laptop Webcam
Image source: vidmore.de
How to Test Your Webcam
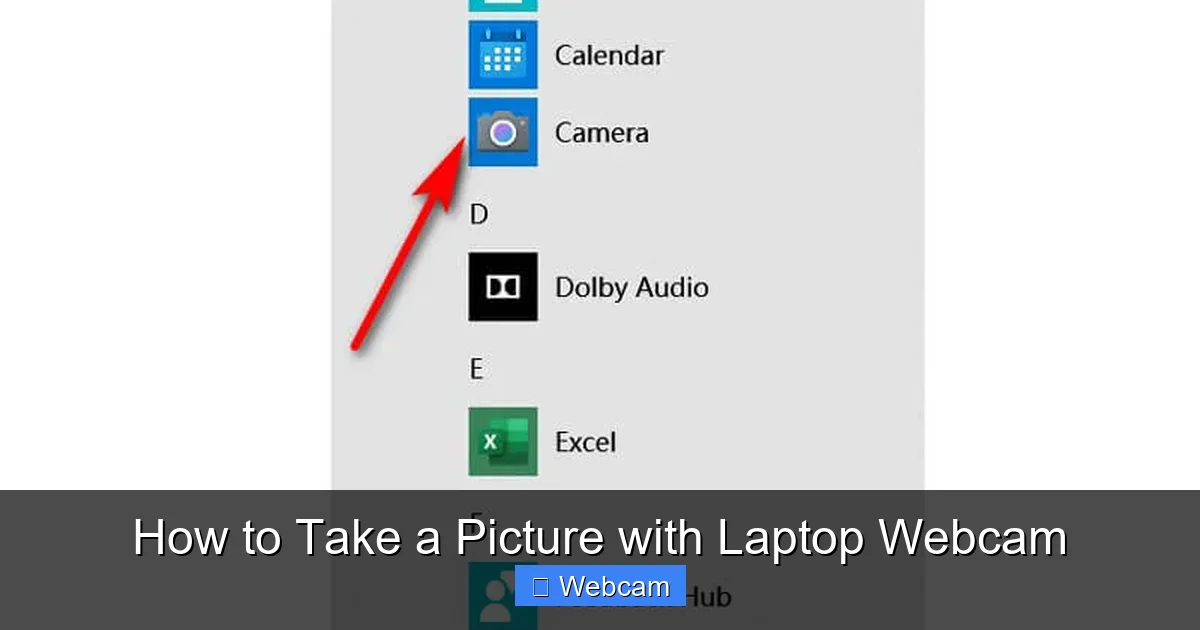
- Open your operating system’s built-in camera app. On Windows, search for “Camera” in the Start menu. On Mac, open “Photo Booth” from Applications.
- Allow the app to access your camera when prompted. This is important—without permission, the app can’t use the webcam.
- Look at the preview window. If you see your image, your webcam is working.
If you don’t see anything, try restarting your laptop or checking the camera settings in your system preferences. Some laptops have a physical switch or function key (like Fn + F6 or F9) to enable the webcam. Consult your laptop manual if you’re unsure.
Step 2: Position Yourself for the Best Photo
Good lighting and framing make a big difference in your photo quality. Since you’re using a laptop webcam, your face will be the center of attention—so let’s make it look great.

Visual guide about How to Take a Picture with Laptop Webcam
Image source: dignited.com
Tips for Better Framing
- Sit about an arm’s length from the laptop. This keeps your face clear and avoids distortion.
- Look directly at the webcam lens—not the screen—to avoid a “fish-eye” effect.
- Position your laptop so the camera is at eye level. If it’s too low, tilt the screen up slightly or use a book under the bottom.
Lighting Matters Most
- Natural light is your best friend. Sit near a window with soft, indirect light.
- Avoid harsh overhead lights or backlighting (light behind you), as this creates shadows.
- If it’s dark, turn on a lamp in front of you instead of behind.
Remember: your webcam has a fixed focus, so don’t try to zoom in. Just sit close enough to keep your face clear.
Step 3: Open the Built-In Camera App
Most laptops come with a pre-installed camera app that lets you take pictures quickly. These apps are simple, fast, and don’t require internet or extra downloads.

Visual guide about How to Take a Picture with Laptop Webcam
Image source: imobie-resource.com
On Windows: Use the Camera App
- Press the Windows key and type “Camera” in the search bar.
- Click the app to open it.
- Allow camera access when prompted. Click “Allow” for microphone and camera.
- You’ll see a live preview. Adjust your position and lighting if needed.
On Mac: Use Photo Booth
- Open “Photo Booth” from your Applications folder or Spotlight (press Command + Space and type “Photo Booth”).
- Grant camera access if the system asks.
- You’ll see yourself in real time with fun effects.
These apps are designed for quick snapshots, so they’re perfect for taking a single picture with your laptop webcam.
Step 4: Take the Picture
Now comes the fun part—capturing your image. Both Camera (Windows) and Photo Booth (Mac) make it easy with one click.
How to Capture the Photo
- In the Camera app (Windows), click the large white circle in the bottom-right corner.
- In Photo Booth (Mac), click the red “Take Picture” button at the bottom of the screen.
- A shutter sound may play. Wait a second for the image to save.
You’ll see a preview of the photo right after taking it. If it’s blurry or poorly lit, try again with better lighting or a different angle.
Pro Tip: Use a Timer
If you’re alone, use the timer feature to give yourself time to smile or adjust your expression. In Photo Booth, click the clock icon to set a 3- or 10-second delay. On Windows, you may need to use a third-party app for a timer.
Step 5: Save and Access Your Photo
Once you’ve taken the picture, it’s automatically saved to your computer. You can find it in your default photos folder.
Where Are the Photos Stored?
- Windows: Go to Pictures > Camera Roll or Pictures > Screenshots depending on your version.
- Mac: Open the “Photos” app (formerly iPhoto or Aperture) and look under “Photo Booth Library.”
You can also right-click (or Control-click on Mac) the photo in the app and choose “Save to” to pick a custom folder.
Check the File Size and Quality
Webcam photos are usually smaller than professional camera images—often around 2 to 5 MB. If the image looks pixelated, it might be due to low resolution. You can improve this by updating your webcam drivers or using a higher-quality app.
Step 6: Improve Photo Quality (Optional)
If your photos look blurry, dark, or too small, you can take steps to improve them. While laptop webcams aren’t as advanced as DSLRs, there are still ways to get better results.
Upgrade to a Higher-Quality Webcam (If Needed)
Some older laptops have low-resolution webcams (720p or less). Consider using an external HD webcam (like Logitech C920) for sharper images. Plug it in via USB, and it’ll work like a built-in camera.
Update Webcam Drivers (Windows Only)
- Press Windows + X and select “Device Manager.”
- Expand “Cameras” or “Imaging devices.”
- Right-click your webcam and select “Update driver.”
Outdated drivers can cause poor performance. This simple step often fixes blurry or laggy video.
Use Third-Party Software for More Control
If you want filters, manual focus, or better resolution, try apps like:
- OBS Studio: Free, open-source software with high-quality recording and photo capture.
- ManyCam: Adds virtual backgrounds, effects, and better image settings.
- Webcamoid: Cross-platform tool with advanced controls.
These apps let you adjust brightness, contrast, and even simulate a DSLR-like photo mode.
Troubleshooting Common Webcam Issues
Even the best webcams can run into problems. Here’s how to fix the most common issues when taking a picture with laptop webcam.
Webcam Won’t Turn On
- Check if the camera is disabled in your BIOS or system settings.
- On some laptops, the webcam can be turned off via a physical switch or function key.
- Restart your laptop—sometimes a simple reboot fixes driver issues.
Black or Gray Screen in Camera App
- This usually means the camera is in use by another app (like Zoom or Teams). Close all apps and try again.
- Check privacy settings: On Windows, go to Settings > Privacy > Camera and ensure camera access is on. On Mac, go to System Settings > Privacy & Security > Camera.
Blurry or Low-Quality Images
- Clean the webcam lens gently with a soft cloth.
- Improve lighting—avoid backlighting and use front-facing light.
- Update your webcam drivers (Windows) or reset Photo Booth (Mac).
No Sound When Taking a Picture
Most webcam photos don’t record audio, so this isn’t usually a problem. But if you’re using an app that records video, check your microphone settings in the app.
Protecting Your Privacy
Webcams can be accessed without your knowledge if not secured. Here’s how to stay safe.
- Cover your webcam: Use a sliding cover, sticky note, or privacy sticker when not in use.
- Disable the camera in settings: On Windows, turn off camera access for apps you don’t trust.
- Be cautious with downloads: Only install apps from trusted sources to avoid malware that hijacks your camera.
Remember: a hidden camera app can take photos or record video without your permission. Staying vigilant helps protect your privacy.
Conclusion: You’re Ready to Capture Photos!
Taking a picture with laptop webcam is easier than you think. With just a few steps—opening the camera app, positioning yourself, and clicking a button—you can capture clear, usable photos anytime. Whether you’re documenting a moment, joining a virtual meeting, or creating content, your laptop’s built-in camera is a quick and convenient tool.
By following this guide, you’ve learned how to use your webcam effectively, improve photo quality, and avoid common pitfalls. And don’t forget: always prioritize your privacy. Cover the lens when not in use, and only grant camera access to trusted apps.
Now go ahead—open your camera app, smile, and take your first webcam photo. You’ve got this!



