Quick Answer: To change the default webcam on Windows 10, you can follow a few simple steps.
Introduction:
Have you ever wondered how to change the default webcam on your Windows 10 system? Whether you have multiple webcams connected to your computer or you simply prefer one camera over another, setting a webcam as the default option can make your video calls and online meetings much smoother. Thankfully, the process of changing the default webcam is relatively straightforward and can be done in just a few clicks. In this article, we will guide you through the steps to change the default webcam on Windows 10, allowing you to effortlessly switch between different cameras according to your preference. So, let’s get started and ensure that your preferred webcam is set as the default option on your Windows 10 device.
How to Change Default Webcam in Windows 10
In today’s digital age, webcams have become a vital tool for communication, whether it’s for video conferencing, online streaming, or simply staying connected with loved ones. Windows 10, being one of the most popular operating systems, offers a variety of features and customization options, including the ability to change default webcams. In this article, we will guide you through the process of changing the default webcam in Windows 10, step by step.
Understanding Default Webcams in Windows 10
Before we dive into the process of changing the default webcam, let’s take a moment to understand what it means. The default webcam is the camera that Windows 10 automatically selects to use when an application requires video input. By default, Windows 10 chooses the first webcam it detects as the default one. However, you may have multiple webcams connected to your computer, and you might want to choose a specific one as the default for certain applications.
Checking Available Webcams
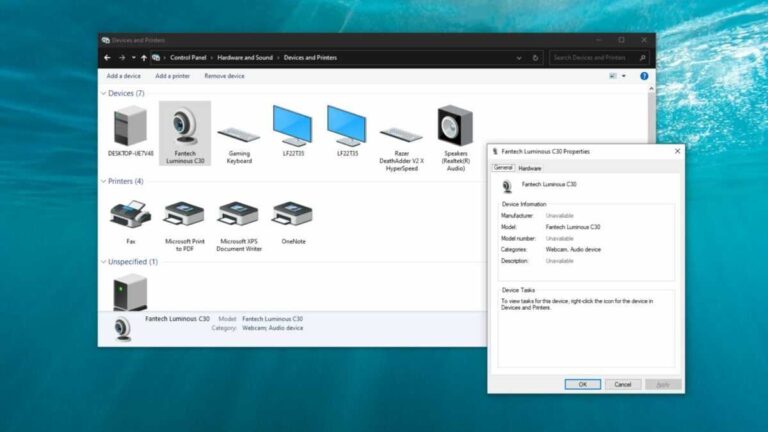
The first step in changing the default webcam is to check the webcams that are currently connected to your Windows 10 computer. Here’s how you can do it:
- Click on the “Start” button located on the bottom left corner of your screen.
- Type “Camera” in the search bar and click on the “Camera” app from the search results. This will launch the built-in Windows 10 Camera app.
- In the Camera app, you’ll see the video feed from your default webcam. To check for additional webcams, click on the gear icon in the top left corner of the app. This will open the settings menu.
- In the settings menu, you’ll find a dropdown that lists all the available webcams connected to your computer. Take note of the names and positions of the webcams listed here.
- To exit the Camera app, simply click on the “X” button in the top right corner.
Changing the Default Webcam
Now that you know which webcams are available, it’s time to change the default webcam in Windows 10. Follow these steps:
- Go to the Windows 10 “Settings” by clicking on the “Start” button and selecting the gear icon.
- In the Settings menu, click on the “Devices” option.
- From the left-hand side menu, choose “Camera.”
- Under the “Camera” settings, you’ll see a dropdown labeled “Choose which Microsoft apps can access your camera.” Click on it.
- A list of Microsoft apps that can access your camera will appear. Find the app or apps for which you want to change the default webcam.
- Click on the app name, and a submenu will expand. Here, you’ll find a dropdown labeled “Camera.” Click on it.
- A list of all available webcams will appear. Select the webcam you want to set as the default for this particular app.
- Repeat steps 6-8 for each app where you want to change the default webcam.
- Once you have made all the necessary changes, close the Settings menu.
Verifying the Default Webcam
After changing the default webcam settings, it’s essential to verify that the changes have taken effect. Here’s how you can do it:
- Open any application that requires video input, such as Skype or Zoom.
- Navigate to the settings or preferences section of the application. Look for the camera settings.
- If the application provides a dropdown for selecting the camera, ensure that the new default webcam is selected.
- Test the webcam by initiating a video call or recording a video. If you see the video feed from the newly selected webcam, then congratulations! You have successfully changed the default webcam.
Changing the default webcam in Windows 10 is a straightforward process that can greatly enhance your video chatting and video recording experiences. By following the step-by-step instructions outlined in this guide, you can select the webcam that best suits your needs for different applications. Remember to check the available webcams, change the default webcam in the Windows 10 Settings, and verify the changes in your preferred applications.
We hope this article has helped you learn how to change the default webcam in Windows 10. Happy video chatting!
How to Change Default Camera in Windows 10 (Quick & Easy)
Frequently Asked Questions
How do I change the default webcam on Windows 10?
To change the default webcam on Windows 10, follow these steps:
Can I change the default webcam for specific applications only?
Yes, you can change the default webcam for specific applications. Here’s how:
What do I do if my desired webcam is not listed under the default options?
If your desired webcam is not listed as a default option, you can try these troubleshooting steps:
How can I test if my new default webcam is functioning correctly?
To test if your new default webcam is functioning correctly, you can use the Camera app on Windows 10:
Can I switch back to the previous default webcam?
Yes, you can switch back to the previous default webcam if needed. Follow these steps:
Is it possible to disable the default webcam and use an external one instead?
Yes, you can disable the default webcam and use an external one instead. Here’s what you need to do:
Final Thoughts
To change the default webcam on Windows 10, follow these simple steps. First, open the Settings app by clicking on the Start menu and selecting the gear icon. Then, navigate to the Devices section and click on the Camera tab. Here, you will find the option to select your preferred webcam from the drop-down menu. Make sure to save the changes, and your new default webcam will be set. By following these steps, you can easily change the default webcam on Windows 10 and enhance your video conferencing and recording experiences.


