
Installing Night Owl wired security cameras provides robust surveillance and peace of mind. This comprehensive guide walks you through the entire process, from strategic planning and tool gathering to mounting, wiring, connecting to your DVR/NVR, and finally, configuring your system for optimal performance and remote viewing. You’ll gain the confidence to set up your wired security system effectively and efficiently.
Thinking about enhancing your home or business security with a reliable, always-on surveillance system? Night Owl wired security cameras are an excellent choice, offering dependable 24/7 monitoring without the worry of battery life or Wi-Fi signal drops. While the idea of running cables might seem a bit daunting at first, installing Night Owl wired security cameras is a thoroughly achievable DIY project with the right guidance.
This comprehensive guide will walk you through every step of the process, making it easy to understand and follow. We’ll cover everything from planning your system layout to mounting your cameras, running the necessary wires, connecting them to your DVR or NVR, and getting everything configured. By the end, you’ll have a fully operational Night Owl security system that provides peace of mind and robust protection for your property.
Key Takeaways
- Thorough Planning is Crucial: Before drilling, map out camera locations for optimal coverage and identify power sources and cable routes to save time and effort.
- Gather the Right Tools: Having all necessary tools, from drills to cable ties, ensures a smooth and efficient installation process for your Night Owl wired security cameras.
- Safety First: Always prioritize safety when working with tools, ladders, and electrical components. Disconnect power if necessary and wear appropriate protective gear.
- Protect Your Cables: Shielding cables from the elements and potential damage is vital for the longevity and reliability of your Night Owl wired security system.
- Test System Components: Before final installation, test cameras, cables, and the DVR/NVR to confirm everything is working correctly and avoid re-dos.
- Configure for Optimal Performance: Utilize your Night Owl DVR/NVR’s settings for motion detection, recording schedules, and remote viewing to maximize your security system’s effectiveness.
- Patience and Persistence Pay Off: While installing Night Owl wired security cameras can take time, following steps carefully ensures a professional-grade setup.
Quick Answers to Common Questions
How far can I run Night Owl camera cables?
Most Night Owl wired security camera kits include cables that are 60-100 feet long. For longer runs, you may need to purchase specialized, higher-gauge BNC cables or consider a video balun for distances up to several hundred feet.
Do Night Owl wired cameras need internet to record?
No, Night Owl wired security cameras record directly to the local hard drive in your DVR/NVR without an internet connection. An internet connection is only needed for remote viewing via the app or for receiving push notifications.
What type of cables do Night Owl wired cameras use?
Night Owl wired cameras typically use BNC (Bayonet Neill-Concelman) cables for video transmission and power delivery. These all-in-one cables simplify the installation process.
Can Night Owl wired cameras see in the dark?
Yes, Night Owl wired security cameras come equipped with infrared (IR) LEDs that automatically activate in low-light conditions, providing clear black-and-white night vision up to a certain range, depending on the model.
How long does it take to install Night Owl wired security cameras?
The installation time for Night Owl wired security cameras varies greatly depending on the number of cameras and the complexity of your property. For a typical 4-camera system, expect anywhere from 4-8 hours for a DIY installation, including planning and configuration.
📑 Table of Contents
Gathering Your Tools and Planning Your System
Before you even think about drilling a hole, a little preparation goes a long way. The key to a smooth installation for your Night Owl wired security cameras is thorough planning and having the right equipment on hand.
Essential Tools You’ll Need
You’ll be glad you gathered these before you start:
- Drill and Assorted Bits: For pilot holes and mounting.
- Screwdriver Set: Philips and flathead for various screws.
- Ladder: For reaching high mounting points.
- Cable Ties or Clips: For neat and secure cable management.
- Measuring Tape: To estimate cable lengths and camera placement.
- Pencil/Marker: For marking drilling spots.
- Stud Finder: If mounting to walls to avoid electrical wires or pipes.
- Wire Strippers/Crimpers (if needed): For custom cable lengths.
- Electrical Tape: For securing connections or protecting wires.
- Safety Glasses and Gloves: Always prioritize personal safety!
- Your Night Owl Security Camera System: Unboxed and ready to go!
Strategic Placement for Optimal Coverage
This is arguably the most critical step when you install Night Owl wired security cameras. Walk around your property, imagining yourself as both the homeowner and a potential intruder. Where are the vulnerable points? Common areas include:
- Entrances: Front door, back door, garage door.
- Windows: Especially ground-floor windows or those easily accessible.
- Driveways and Yards: To monitor vehicles and property perimeter.
- Valuable Areas: Sheds, detached garages, or areas where valuables are stored.
Aim for a viewing angle that covers entry points entirely without significant blind spots. Consider the camera’s field of view (FOV) – typically listed in the specifications – and adjust height and angle accordingly. You want enough height to prevent tampering but low enough to capture clear facial features if needed.
Power Considerations
Since these are wired cameras, they need power. Night Owl wired security cameras typically use a single BNC cable for video and power, or sometimes separate power adapters. Map out where your cameras will draw power from. This might mean extending existing outlets or routing power cables carefully. Remember, power outlets can be scarce outside, so planning this ahead is crucial.
Mounting Your Night Owl Cameras
With your plan in place and tools ready, it’s time to physically install Night Owl wired security cameras. Take your time to ensure secure mounting.
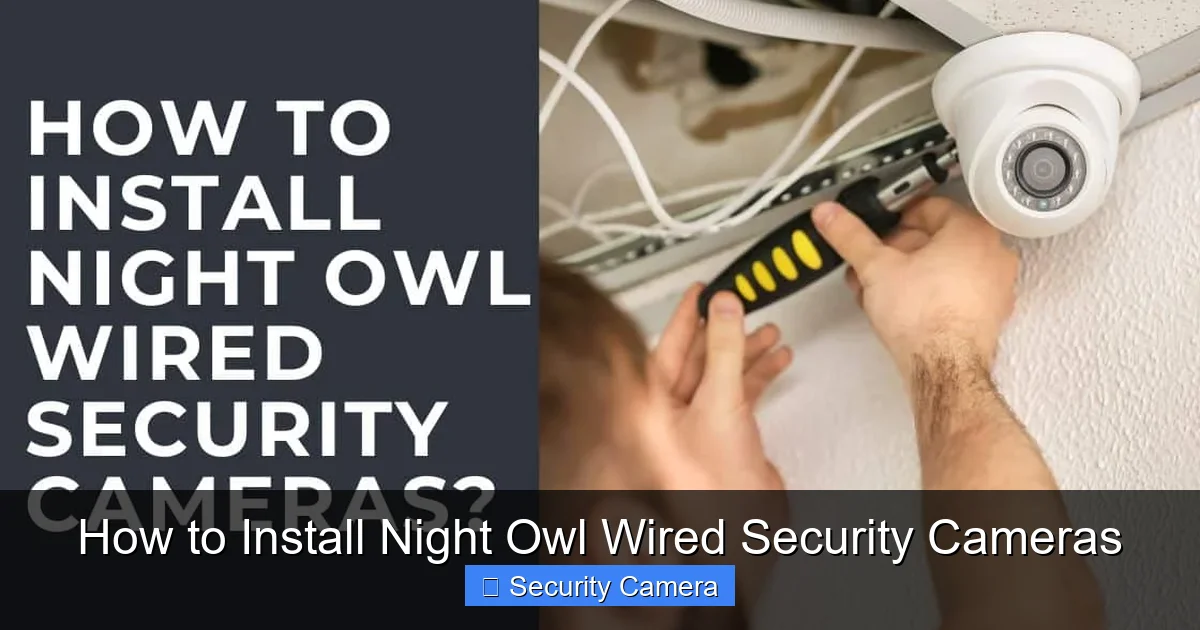
Visual guide about How to Install Night Owl Wired Security Cameras
Image source: technowifi.com
Choosing the Right Mounting Surface
Most Night Owl cameras come with screws and wall anchors designed for various surfaces. Common mounting locations include:
- Exterior Walls: Ensure the wall can support the camera’s weight and that you’re not drilling into electrical lines or plumbing. A stud finder is invaluable here.
- Eaves or Soffits: These locations often provide good overhead coverage and some protection from the elements.
- Under Overhangs: Ideal for protecting cameras from direct rain and sun, which can extend their lifespan.
Before drilling, hold the camera in your chosen spot and visually confirm the coverage. Use a pencil to mark the drill holes. If mounting to masonry, you’ll need a hammer drill and appropriate masonry bits and anchors.
Securely Attaching the Cameras
Once your pilot holes are drilled, insert any necessary wall anchors. Then, align the camera base with the holes and screw it firmly into place. Don’t overtighten, as this can strip screws or damage the camera casing. Ensure the camera is stable and doesn’t wiggle. Once mounted, adjust the camera’s angle to match your planned coverage area.
The Wiring Journey: Running Cables
This is often the most intimidating part, but with a bit of patience, it’s very manageable. Night Owl wired security cameras rely on a physical connection for reliable video transmission.

Visual guide about How to Install Night Owl Wired Security Cameras
Image source: technowifi.com
Best Practices for Cable Routing
Your goal is to get the cables from each camera back to your Night Owl DVR/NVR location (usually near a TV or monitor, and an internet router). Here are some tips:
- Indoor vs. Outdoor: If routing cables indoors, try to tuck them along baseboards, behind furniture, or through attics/crawl spaces to keep them out of sight. For outdoor runs, follow the contours of your house, underneath eaves, or through conduit.
- Drilling Through Walls: If you need to drill through an exterior wall, choose a spot where the hole will be discreet and easy to seal. Drill a small pilot hole from the inside first, then go outside to drill a larger hole for the cable, drilling slightly downwards to prevent water from entering. Use a grommet or silicone caulk to seal the hole once the cable is through.
- Estimate Cable Lengths: Measure the distance from each camera to the DVR/NVR, adding a little extra for slack and routing. It’s always better to have a bit too much cable than too little.
- Neatness Counts: Use cable clips or ties every few feet to secure the cables, preventing them from dangling or becoming a tripping hazard. This also makes your installation look professional.
Protecting Your Cables
Especially for outdoor runs, cable protection is paramount. Exposure to UV rays, extreme temperatures, and curious critters can degrade cables over time. Consider:
- Conduit: For runs along walls or fences, PVC conduit offers excellent protection against the elements and physical damage.
- Weatherproof Connections: Ensure all outdoor connections are sealed from moisture. Night Owl often provides weatherproof caps or connections, but additional electrical tape can add extra security.
- Avoid Heat Sources: Keep cables away from hot pipes, exhaust vents, or direct sunlight if possible.
Connecting to the DVR/NVR
At the end of each cable, you’ll find BNC connectors for video and a power jack. Connect the BNC end to the corresponding BNC input on your Night Owl DVR/NVR. Then, connect the power jack to the power splitter provided with your system, which in turn plugs into a wall outlet.
Connecting to Your Night Owl DVR/NVR
Once all your cameras are mounted and their cables are run back to your central recording unit, it’s time to get the DVR or NVR up and running.
Powering Up the DVR/NVR
First, make sure all camera cables are securely plugged into the back of your Night Owl DVR/NVR. Next, connect the provided power adapter to the DVR/NVR and plug it into a reliable power outlet. The unit should power on automatically, often indicated by a light and possibly a fan sound.
Connecting to Your Display
To view your camera feeds and configure the system, you’ll need to connect the DVR/NVR to a monitor or TV. Most Night Owl systems have HDMI and VGA outputs. Use an HDMI cable for the best picture quality, connecting one end to the DVR/NVR and the other to your display. Make sure your display is set to the correct input (e.g., HDMI 1).
Initial Setup Wizard
Upon its first boot, your Night Owl DVR/NVR will likely launch an initial setup wizard. This guides you through essential configurations:
- Language Selection: Choose your preferred language.
- Password Creation: Create a strong, unique password for your system. This is crucial for security!
- Time and Date Settings: Ensure these are accurate for proper recording timestamps.
- Hard Drive Formatting: The system may ask to format the hard drive, which prepares it for recording. Follow the prompts.
Follow these steps carefully. Skipping or rushing through them could lead to issues later on.
Configuration and Fine-Tuning Your System
With the basic setup complete, it’s time to customize your Night Owl wired security cameras to suit your specific needs.
Adjusting Camera Settings (Motion Detection, Recording)
Access the main menu of your Night Owl DVR/NVR (usually by right-clicking on the screen and entering your password). Here, you’ll find options to:
- Motion Detection: Set specific areas within each camera’s view for motion detection. This prevents recording unnecessary movement (like trees swaying) and conserves hard drive space. Adjust sensitivity levels.
- Recording Schedule: Decide if you want continuous recording, motion-activated recording, or scheduled recording. Motion-activated recording is often the most efficient.
- Video Quality: While wired systems generally offer excellent quality, you might be able to adjust resolution or frame rate to balance storage space and video fidelity.
- Camera Name: Rename your cameras (e.g., “Front Door,” “Driveway”) for easy identification.
Remote Viewing Setup (Night Owl Protect App)
One of the biggest advantages of a modern security system is remote access. Night Owl systems typically use the “Night Owl Protect” app. To set this up:
- Connect DVR/NVR to Internet: Connect an Ethernet cable from your router to the LAN port on your Night Owl DVR/NVR.
- Download the App: Get the Night Owl Protect app from your smartphone’s app store.
- Create an Account: Register for a free Night Owl Protect account.
- Add Your Device: In the app, choose to “Add Device” and follow the on-screen instructions. You’ll likely scan a QR code displayed on your DVR/NVR’s screen or enter its device ID.
- Access Feeds: Once connected, you can view live feeds, playback recordings, and receive motion alerts directly on your phone or tablet.
Testing and Troubleshooting
Before you call it a day, thoroughly test your Night Owl wired security cameras. Trigger motion in front of each camera to ensure recording starts. Check playback. Verify that remote viewing works on your mobile device. If any camera isn’t showing a picture:
- Check Cables: Ensure BNC and power connections are secure at both the camera and DVR/NVR ends.
- Power Source: Confirm the camera is receiving power.
- DVR/NVR Input: Make sure the camera is connected to the correct input port.
Sometimes a simple restart of the DVR/NVR can resolve minor glitches.
Congratulations! You’ve successfully completed the installation of your Night Owl wired security cameras. You now have a robust and reliable surveillance system watching over your property 24/7. Remember to regularly check your system, keep the software updated, and clean camera lenses periodically for optimal performance.
Enjoy the enhanced security and peace of mind that comes with knowing your home or business is protected by a professional-grade Night Owl system!
Frequently Asked Questions
Do I need professional help to install Night Owl wired security cameras?
While installing Night Owl wired security cameras can seem challenging, it’s designed to be a DIY-friendly process for most homeowners with basic tool knowledge. This guide provides comprehensive steps to empower you to do it yourself, potentially saving you money on professional installation fees.
Can I expand my Night Owl wired security system later?
Yes, most Night Owl DVR/NVR systems come with multiple video input channels, allowing you to add more cameras up to the maximum capacity of the recorder. Simply purchase additional compatible Night Owl wired cameras and connect them to available ports.
How do I maintain my Night Owl wired security camera system?
Regular maintenance for your Night Owl wired security cameras includes periodically cleaning the camera lenses to ensure clear images, checking cable connections for any wear or damage, and ensuring the DVR/NVR is free from dust and has adequate ventilation. It’s also wise to check for firmware updates for your DVR/NVR occasionally.
Are Night Owl wired cameras weatherproof?
Night Owl wired security cameras designed for outdoor use are typically rated as weatherproof, meaning they can withstand various outdoor conditions like rain, snow, and dust. Always check the IP rating (e.g., IP66) in your specific camera’s specifications to confirm its resistance level.
Do Night Owl wired cameras record audio?
Some Night Owl wired security camera models include built-in microphones for audio recording, while others are video-only. Check your specific camera model’s specifications or product description to confirm if it supports audio recording.
What happens if the hard drive fills up on my Night Owl DVR/NVR?
When the hard drive on your Night Owl DVR/NVR fills up, most systems are configured to automatically overwrite the oldest footage to make space for new recordings. This ensures continuous recording without manual intervention. You can often adjust settings to stop recording when full or receive alerts.

With experience in IT support and consumer technology, I focus on step-by-step tutorials and troubleshooting tips. I enjoy making complex tech problems easy to solve.