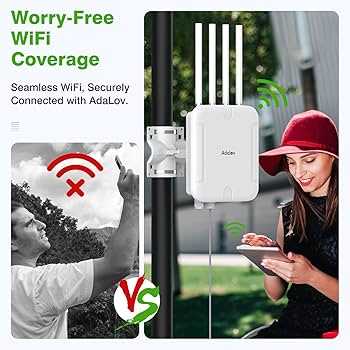
To ensure smooth and uninterrupted video calls throughout your home, setting up your WiFi extender correctly is essential. First, position the extender halfway between your router and the area with poor coverage, and connect it to your existing network following the device instructions. Then, optimize its placement for the best signal strength and stability. A properly configured extender can dramatically improve your connection quality, making video calls clearer and more reliable.
In short, to set up a WiFi extender for seamless video calling, place it strategically between your router and the call area, connect it properly, and ensure it has a strong signal. Regularly check and update its firmware to maintain optimal performance.
When it comes to working from home or staying connected with loved ones, a strong, stable WiFi connection is a must. However, many homes have dead zones or weak spots where signals falter, leading to frustrating interruptions during video calls. Installing a WiFi extender can bridge these gaps, but setting it up correctly is key to getting the most out of your investment. In this guide, we’ll walk you through simple steps to set up your WiFi extender so that your video calls are smooth, clear, and hassle-free. Whether you’re a tech novice or just want a quick refresher, these tips will help you enjoy consistent connectivity throughout your home.

How to Set Up WiFi Extenders for Seamless Video Calling
Having a strong and reliable WiFi connection is essential for smooth video calls. WiFi extenders can help eliminate dead spots and improve signal strength in tricky spots of your home or office. Proper setup ensures your video calls stay clear, uninterrupted, and high quality.
Understanding WiFi Extenders and Their Benefits
WiFi extenders, also called repeaters, boost your existing wireless signal. They receive your WiFi signal and rebroadcast it farther into your space. This extension helps prevent lag, buffering, and disconnections during important video conversations.
Using a WiFi extender can significantly improve your online experience by:
- Increasing coverage area
- Enhancing signal strength
- Reducing dead zones in your home
- Providing a more stable connection for video calling apps
Preparing for WiFi Extender Setup
Before you start connecting your extender, it’s important to gather some information. You will need your WiFi network name (SSID) and password. Also, ensure your router is working properly and is connected to the internet.
Ensure your extender is compatible with your router. Check its specifications for compatibility to avoid connection problems later. Clear a spot near your main WiFi router to position the extender during setup.
Choosing the Right Location for Your WiFi Extender
Placement determines how well your extender boosts your WiFi signal. Place the extender about halfway between your router and the area where your video calls are most frequent. Avoid placing it near large metal objects, microwaves, or cordless phones which can interfere with signals.
Use your device to test signal strength in different spots. Many extenders have LED indicators that show if placement is optimal. Aim for a location where the extender receives a strong WiFi signal from the router but can still reach the target area.
Connecting the WiFi Extender Step-by-Step
Method 1: Using WPS Button
- Press the WPS button on your router.
- Within two minutes, press the WPS button on your extender.
- Wait for the indicator lights to confirm a successful connection.
- Test your connection in the area where you need better WiFi for video calls.
Method 2: Manual Setup via Web Browser
- Plug your extender into a power outlet near your router.
- Connect your computer or phone to the extender’s default WiFi network (check the label for details).
- Open a web browser and enter the extender’s setup URL (usually printed on the device or included in the manual).
- Follow the on-screen instructions to select your home WiFi network and enter its password.
- Wait for the setup to complete and confirm the connection.
Configuring Your WiFi Extender for Optimal Performance
After initial setup, adjust settings to boost your video call quality. Some extenders allow you to change the network name (SSID) and password. Creating a separate network for your extender can help manage connections better.
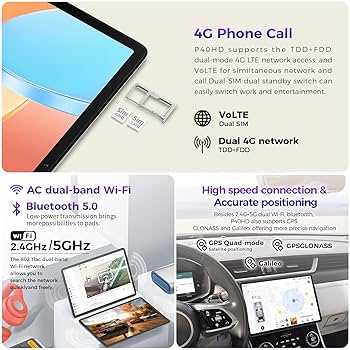
Enable features like band steering if available. This routes devices onto the 5 GHz band, which is typically faster and less congested, perfect for video calls.
Testing Your Connection and Troubleshooting
Once set up, test your WiFi signal strength in the area where you conduct calls. Use tools like Speedtest or the built-in diagnostics in your device to compare before and after setup speeds.
If video calls lag or freeze, consider repositioning the extender. Ensure it is not too far from the router or the call area. Also, reboot your router and extender as needed to refresh connections.
Additional Tips for Better Video Calling Experience
- Use a wired Ethernet connection if possible, especially for your computer. This provides the most stable connection.
- Limit the number of devices using the WiFi during calls to prevent bandwidth congestion.
- Update your router and extender firmware regularly for security and performance improvements.
- Prioritize your video call device in your network settings if your router supports Quality of Service (QoS).
Managing Multiple WiFi Extenders in Your Home
If you have a large space or multiple dead zones, you might need more than one extender. Use a mesh WiFi system if possible for seamless coverage. When using multiple extenders, ensure they are on the same network and properly spaced for efficient coverage.
Coordinate placement carefully to avoid overlaps that can cause interference. Use network analysis tools to monitor signal quality and optimize positions.
Keeping Your Network Secure
Change default passwords on your WiFi extender to prevent unauthorized access. Enable WPA3 or WPA2 encryption for your network. Keep firmware up-to-date to patch security vulnerabilities.
Consider creating a separate guest network for visitors to keep your main network secure. This is especially helpful if you’re sharing WiFi during video calls or meetings.
Summary
Proper setup and placement of your WiFi extender can make a huge difference in the quality of your video calls. Follow the step-by-step instructions, test signal strength, and adjust as needed. Keeping your network optimized ensures clear, interruption-free communication every time.
DON'T Buy A Wi-Fi Range Extender!
Frequently Asked Questions
What are the best practices for placing WiFi extenders to improve video call quality?
Position your WiFi extender halfway between your router and the area where you make video calls. Avoid placing the extender near thick walls, metal objects, or appliances that may interfere with the signal. Keep it elevated on a shelf or high furniture to maximize coverage and ensure a strong, stable connection during calls.
How can I ensure my WiFi extender is configured correctly for seamless video communication?
Connect your extender to your existing WiFi network using the setup instructions provided. Use the extender’s management app or web interface to select your main network, and enable features like bandwidth prioritization for video calls. Confirm the extender is connected with a strong signal and test the connection by making a video call to verify stability.
What steps should I take if I experience frequent disconnections during video calls?
First, check if the extender is receiving a strong signal from your router. If the signal is weak, reposition the extender closer to the router. Restart both your router and extender to refresh connections. Reduce interference from other electronic devices, and consider updating the firmware of your extender to the latest version for improved performance.
Can I set up multiple extenders to cover a larger area for better video call experiences?
Yes, deploying multiple extenders can help eliminate dead zones in large spaces. Place each extender strategically to ensure they are within the coverage range of the main router or other extenders. Use the same network SSID and password for seamless roaming, and verify each one maintains strong signal strength to support uninterrupted video calls.
How do I verify if my WiFi network is sufficient for high-quality video calls after setting up the extender?
Run a speed test from the area where you make video calls to check upload and download speeds. Use network diagnostic tools to assess latency and jitter. Make sure your network delivers consistent bandwidth and low latency, which are essential for smooth video communication. Adjust the extender placement if necessary to improve these metrics.
Final Thoughts
To set up WiFi extenders for seamless video calling, place the extender halfway between your router and the area with weak signal. Ensure the extender’s placement avoids interference from walls and other devices. Connect the extender to your WiFi network using the setup instructions provided.
Adjust the extender settings if necessary to optimize performance. Test your connection by making a video call to ensure stability and quality. Following these steps will improve your experience and prevent disconnections during calls.