To set up your router without a CD, simply connect your device to the router, access the admin panel through a web browser, and follow the on-screen setup instructions. No CD needed! Just ensure your computer or smartphone is connected to the router either via Ethernet or Wi-Fi, then open a browser, enter the router’s IP address (like 192.168.1.1), and configure your network settings effortlessly.
Setting up a router without a CD is easier than you might think. With just a few simple steps—connecting your device, accessing the admin interface, and inputting your network details—you can have your Wi-Fi up and running in minutes. This method eliminates the need for any installation discs, making the process quick and user-friendly for anyone, whether you’re tech-savvy or a beginner. Keep reading to learn the straightforward steps to get your network online hassle-free!

How to Setup Router Without CD: A Complete Step-by-Step Guide
Setting up a router without a CD may seem tricky at first, but it’s actually quite straightforward. Most modern routers are designed to be user-friendly and can be configured easily through a web browser. This method is especially useful if you’ve misplaced the CD or if your computer doesn’t have a CD drive. Here’s everything you need to know to get your router up and running without a CD.
Gather the Necessary Equipment and Information
Before starting the setup, ensure you have all the essential equipment. You will need the router, an Ethernet cable, and a device like a computer or smartphone. Additionally, gather your internet service provider (ISP) account details such as username and password if required.
- Router: Confirm it’s plugged in and powered on.
- Ethernet cable: Used for a wired connection during setup.
- Device: Laptop, desktop, tablet, or smartphone with internet access.
- ISP details: Account username, password, and any specific settings.
Connect Your Devices Properly
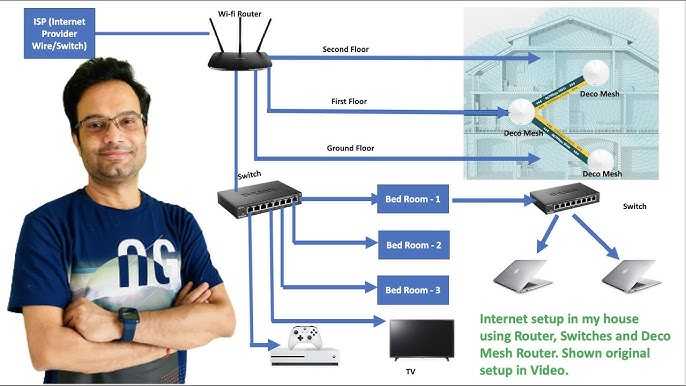
Start by physically connecting your router to the modem. Plug the Ethernet cable into your modem’s Ethernet port, then connect the other end to the WAN port on your router. Turn on the router and wait for the indicator lights to stabilize.
Next, connect your device to the router. You can do this either through a Wi-Fi network or using another Ethernet cable connected to your computer. For initial setup, a wired connection is often more stable and easier.
Access the Router’s Web Interface
Open a web browser on your device and type the default IP address of the router into the address bar. Common IP addresses include 192.168.1.1 or 192.168.0.1. You can find this IP in the router’s manual or on a label on the back of the device.
Press Enter, and you should see the router’s login page. If prompted for a username and password, check the manual or look for a sticker on the router. Typical defaults are admin for both username and password.
Login and Start Configuration
Login with the default credentials. Once logged in, you’ll see the router’s web interface. This dashboard allows you to customize your network settings easily.
If you’ve changed the default credentials before, use your new username and password. Always remember to change default login details for security reasons after setup.
Configure Internet Connection Settings
The next step is to input your ISP settings. These settings vary depending on your provider. Follow these common steps:
- Select Internet Setup or WAN from the menu.
- Choose the connection type: PPPoE, Dynamic IP, or Static IP.
- If using PPPoE, enter your ISP username and password.
- For Dynamic IP, typically no additional information is needed.
- If Static IP, input the IP address, subnet mask, gateway, and DNS server details provided by your ISP.
- Save your settings and reconnect to the internet.
Set Up Wireless Network
Now that your internet connection is configured, you can set up your Wi-Fi network. Navigate to the Wireless or Wi-Fi Settings tab in the router interface.
Here, you can change your network name (SSID) to something recognizable. Set a strong password using WPA2 encryption to protect your network from unauthorized access.
- SSID: Your Wi-Fi name.
- Password: A secure, unique password.
- Encryption: WPA2 or WPA3 if available.
Update Firmware and Change Default Passwords
Check for firmware updates in the router’s interface. Keeping your firmware current ensures better security and performance. Follow the prompts to download and install updates.
Don’t forget to change default admin passwords to something secure. Disable remote management unless necessary for added security.
Test Your Network Connection
Once all settings are saved, restart the router. Connect your device to the Wi-Fi network and test the internet connection by visiting a website. If you encounter issues, double-check all settings, especially the IP and DNS configurations.
Use online speed tests to verify your connection’s speed. Adjust settings as needed to optimize performance.
Additional Tips for Smooth Setup
Here are some extra tips to make your setup process easier:
- Use a wired connection during setup for stability.
- Have your ISP information ready before starting.
- Consult your router’s manual if default IPs or login data don’t work.
Troubleshooting Common Setup Issues
If you can’t access the router’s web interface, check your device’s connection. Reset your router to factory settings if needed, usually by pressing a small reset button for 10 seconds. Ensure you’re using the correct IP address and login credentials.
For connection problems, verify your cables and restart your modem and router. Contact your ISP if port or configuration issues persist.
Summary of Key Tools and Settings
| Element | Description |
|---|---|
| Default IP Address | 192.168.1.1 or 192.168.0.1 |
| Default Username | admin |
| Default Password | admin or password |
| Connection Type | PPPoE, Dynamic IP, Static IP |
| Encryption | WPA2 or WPA3 |
By following these steps carefully, you can set up your router without a CD efficiently. The key is to understand your device’s web interface and your ISP’s requirements. With practice, this process becomes quick and simple, ensuring your home network is secure and ready to use.
Networking Basics| Set up Router without CD
Frequently Asked Questions
How can I access my router’s settings without using a CD?
To access your router’s settings without a CD, connect your computer or device to the router using an Ethernet cable or Wi-Fi. Open a web browser and type the router’s default IP address, commonly 192.168.1.1 or 192.168.0.1, into the address bar. Log in with the default username and password provided in the router’s manual or on the device itself. You can then configure your network settings directly through the web interface.
What steps should I take to set up my router manually on a Windows PC?
Start by connecting your router to your computer via Ethernet or Wi-Fi. Open the Network and Internet settings on your Windows PC, then navigate to the Network and Sharing Center. Select your active network, click on Properties, and choose Internet Protocol Version 4 (TCP/IPv4). Set your IP address manually to match your router’s subnet, such as 192.168.1.x, and specify the default gateway as the router’s IP address. Save your settings, open a browser, and access the router’s login page to complete the setup.
Is it possible to configure my router using a mobile device without a setup CD?
Yes, you can configure your router on a mobile device by connecting to its Wi-Fi network. Launch a web browser on your device and enter the router’s IP address into the address bar. The login page will appear, prompting you for credentials. Once logged in, you can change wireless settings, password, security options, and update firmware as needed. This method works with most smartphones and tablets without the need for any installation discs.
How do I reset my router if I don’t have the setup CD?
If your router isn’t configured properly or you need to start fresh, press and hold the reset button on the back of the device for about 10-15 seconds. This action restores factory default settings, including the default IP address, username, and password. After resetting, reconnect to the router’s Wi-Fi or Ethernet connection, and use a web browser to access the default login page. From there, you can set up your router from scratch.
Final Thoughts
To set up your router without a CD, connect it to your modem using an Ethernet cable. Access the router’s web interface through a browser by entering its IP address, usually 192.168.1.1. Follow the setup wizard to configure your network settings and secure your Wi-Fi.
Knowing how to setup router without cd saves time and simplifies the process, especially with modern routers that support web-based setups. This method ensures you quickly get your network up and running without additional software.

I specialize in process engineering and system optimization. I enjoy writing guides that simplify troubleshooting and help improve efficiency in everyday tech use.