If your router isn’t assigning IP addresses, your devices won’t connect to the internet smoothly, causing frustration and delays. The good news is that this common issue can often be fixed quickly by restarting the router, checking for firmware updates, or adjusting network settings. In most cases, a simple reset or configuration tweak can get your devices back online without the need for technical expertise.
To solve the problem of your router not assigning IP addresses, start by restarting your router and devices, ensure your DHCP server is enabled, and update your router’s firmware. If these steps don’t work, resetting the router to factory settings or checking network configurations can help resolve the issue.
When your router stops assigning IP addresses, it prevents devices from connecting to your network properly, which can be caused by software glitches, incorrect settings, or hardware issues. Troubleshooting involves identifying and fixing these problems through a series of simple steps, allowing your network to function seamlessly again. Understanding the root cause and applying targeted fixes can save you time and restore your internet connection swiftly.

How to Solve Router Not Assigning IP Addresses
If your router isn’t assigning IP addresses to your devices, it can be frustrating. Devices won’t be able to connect to the internet or access network resources smoothly. The good news is there are simple steps you can take to fix this issue and get your network working properly again.
Understanding Why Your Router Isn’t Assigning IP Addresses
Before fixing the problem, it helps to know why it happens. IP address assignment mainly relies on a feature called DHCP, or Dynamic Host Configuration Protocol. If DHCP isn’t working correctly, your router won’t give IP addresses to devices.
Common causes include misconfigured settings, DHCP server being disabled, IP conflicts, or firmware errors. Knowing what causes the problem makes troubleshooting easier and more effective.
Check If DHCP Is Enabled on Your Router
The first step is to verify if DHCP is active. If DHCP is turned off, your devices will not get IP addresses automatically. You can check this by logging into your router’s admin panel.
- Open a web browser and type your router’s IP address, usually 192.168.1.1 or 192.168.0.1.
- Log in with your username and password. The default credentials are often “admin” / “admin”.
- Navigate to the DHCP or LAN settings section.
- Ensure that DHCP Server is enabled or set to “On”.
If DHCP is disabled, enable it, save changes, and restart your router. This often fixes the IP assignment issue.
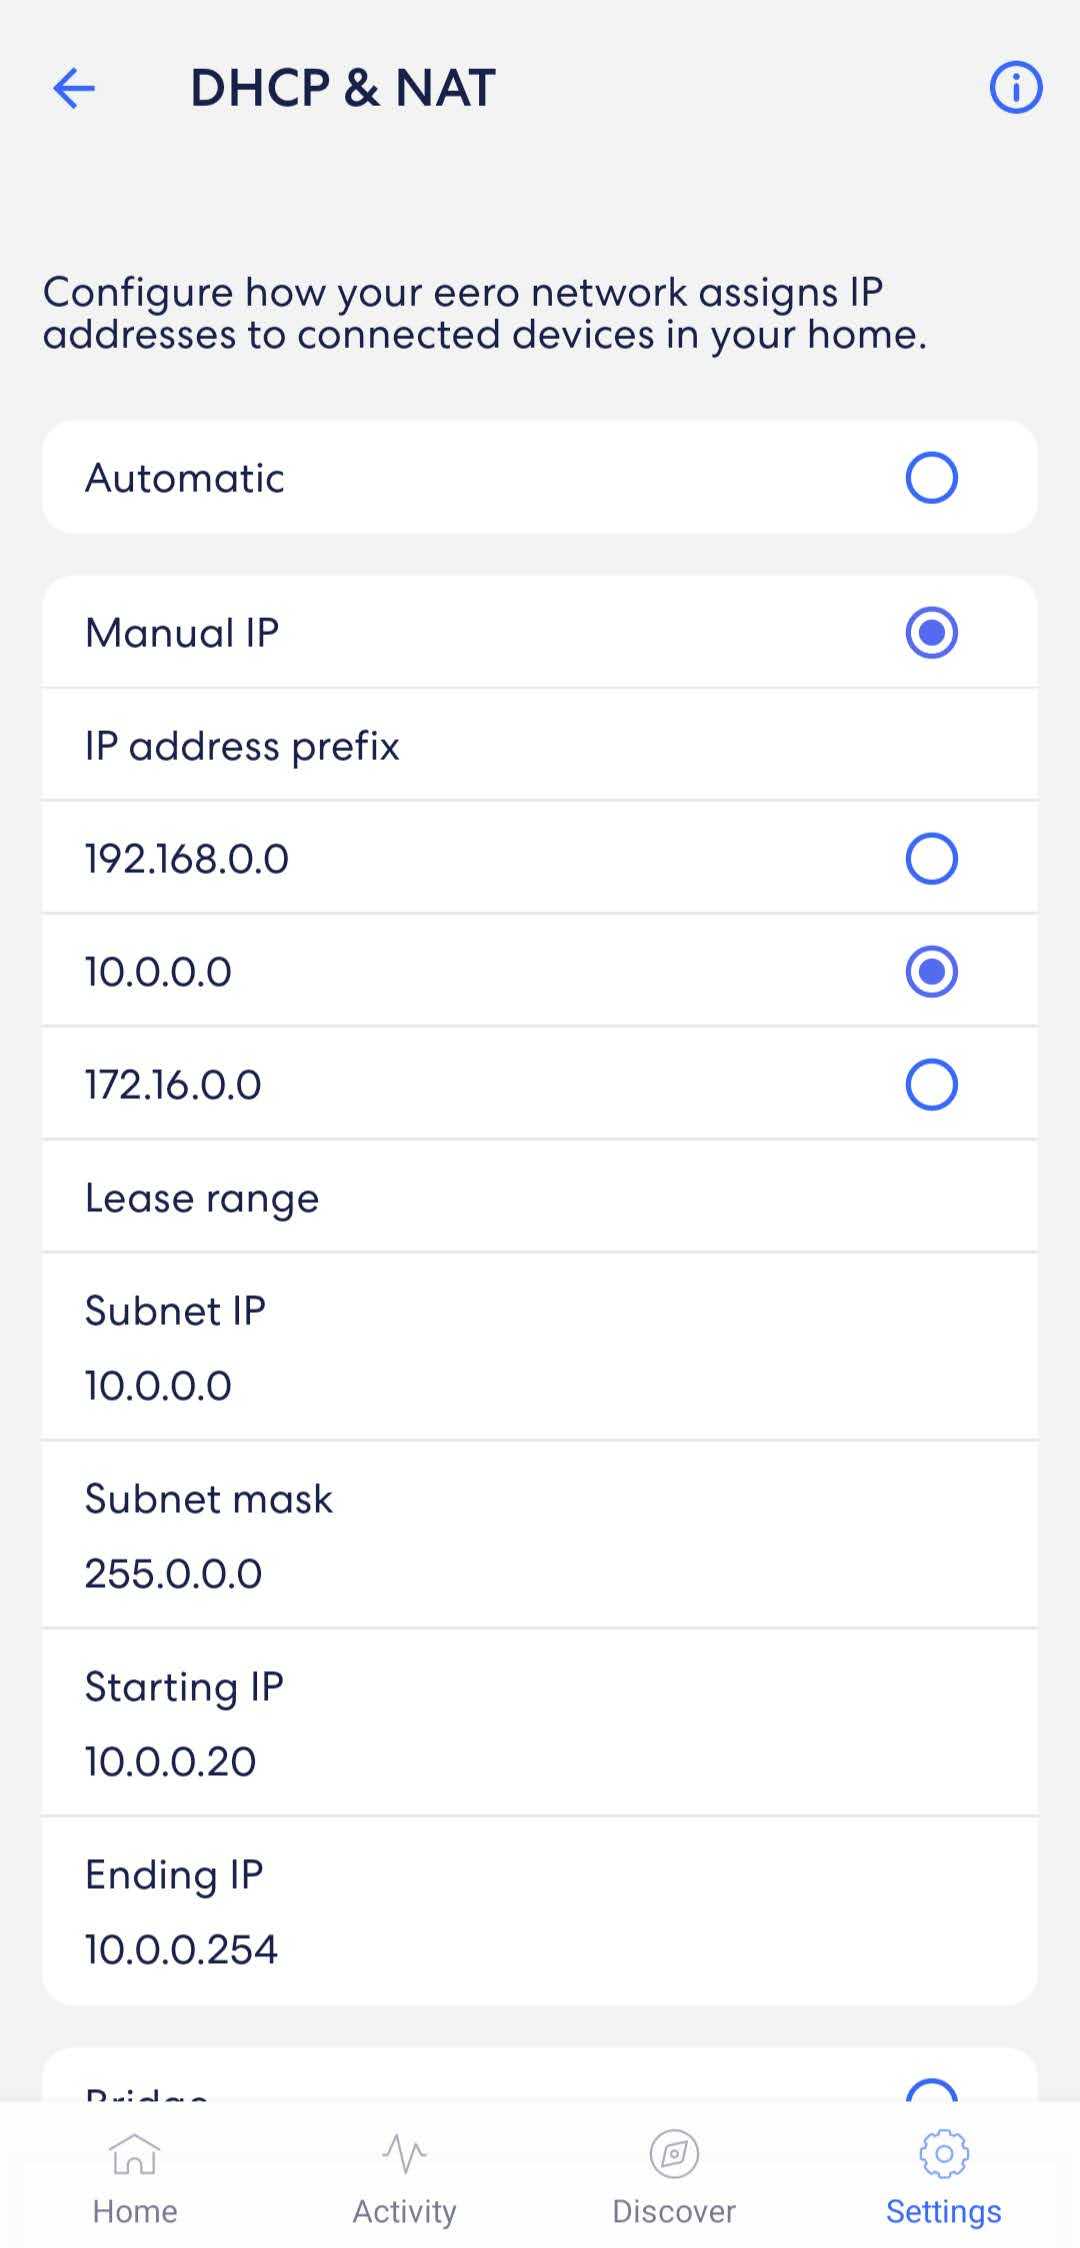
Verify DHCP Settings and IP Address Range
Sometimes, DHCP is enabled but misconfigured. Check the IP address range allocated for DHCP. The range should be large enough to assign addresses to all devices.
For example, if your network uses 192.168.1.1, the DHCP range might be from 192.168.1.100 to 192.168.1.200.
Ensure the range doesn’t overlap with manually assigned static IP addresses. Adjust the range if necessary and save the settings.
Restart Your Router and Devices
A simple restart can often resolve temporary glitches. Turn off your router and unplug it from power. Wait for at least 30 seconds before plugging it back in and turning it on.
Also, restart your devices, such as laptops or smartphones, to refresh their network settings. After rebooting, check if IP addresses are assigned properly.
Check for IP Conflicts and Duplicate Addresses
IP conflicts happen when two devices are assigned the same IP address. This can prevent devices from connecting properly. To resolve this:
- Log into your router’s admin panel and view connected devices list.
- Identify any devices with duplicate IP addresses.
- If duplicates exist, assign static IP addresses to some devices outside the DHCP range.
This helps prevent conflicts and ensures each device has a unique IP address.
Update or Reinstall Router Firmware
Firmware issues can cause DHCP failures. Visit your router manufacturer’s website and check for firmware updates. Follow their instructions to download and install the latest firmware.
If updating doesn’t help, consider resetting the router to factory settings. Be aware that this will erase custom configurations, so back up settings first.
Perform a Factory Reset
If none of the above solutions work, resetting your router can often resolve deep-seated issues. Locate the small reset button on the router.
- Press and hold the reset button for about 10 to 30 seconds using a paperclip.
- Release the button and wait for the router to reboot.
- Set up your router again, ensuring DHCP is enabled and configured correctly.
This process rewrites the router’s settings to default, clearing any corrupt or misconfigured options that may block IP address assignment.
Configure Network Devices Correctly
Ensure that your devices are set to obtain IP addresses automatically. On Windows, check this in network settings under TCP/IP properties. On smartphones, reset network settings if necessary.
Incorrect device configurations can prevent IP address assignment even when the router works fine. Making sure devices are set to DHCP ensures smooth connection.
Check Cables and Hardware Connections
Loose or damaged cables can disrupt the connection between your devices and the router. Make sure all Ethernet cables are securely connected and undamaged.
If using a wired connection, try replacing the cable or connecting to a different port on the router. Hardware issues can sometimes mimic DHCP problems.
Identify and Resolve Network Interference
Wireless interference can cause network instability, affecting DHCP functions. Keep your router away from other electronic devices, microwaves, or cordless phones.
Switching to a different Wi-Fi channel can reduce interference. Access your router’s wireless settings and select a less congested channel.
Additional Tips for Maintaining a Healthy Network
Regularly update your router’s firmware to patch bugs and security vulnerabilities. Use strong, unique passwords to prevent unauthorized access.
Disable unused features like WPS or UPnP if not needed, as they can sometimes cause conflicts. Monitor your network periodically for issues.
When to Seek Professional Help
If you’ve tried all these steps and your router still won’t assign IP addresses, it might be time to contact your internet service provider. Your ISP can check your connection and help troubleshoot further.
Alternatively, consider replacing your router if it’s old or malfunctioning. A new device can often eliminate persistent DHCP or hardware issues.
Router Access Point not assigning IP addresses
Frequently Asked Questions
What should I check if my router isn’t assigning IP addresses to connected devices?
Ensure that the DHCP server feature is enabled on your router. Access the router’s settings through its admin panel and verify that DHCP is turned on. Additionally, confirm that the IP address range allocated for devices is large enough to accommodate all connected devices. If necessary, restart the router to reset its configuration.
How can I troubleshoot conflicts that prevent IP address assignment?
Check if multiple devices on your network have static IP addresses that overlap with the DHCP range. Remove or change these static IPs to avoid conflicts. You can also release and renew the IP addresses on your devices to prompt the router to assign new ones, helping to resolve any conflicts present.
What steps should I take if the router’s firmware might be causing IP assignment issues?
Visit the manufacturer’s website to see if a firmware update is available for your router. Download and install the latest firmware following the provided instructions. Updating firmware can fix bugs or glitches that may interfere with DHCP functionality, leading to proper IP address distribution.
Why does resetting my router sometimes resolve IP address assignment problems?
Resetting your router clears temporary configurations and refreshes the network settings. This can resolve issues caused by misconfigurations or software glitches that prevent the router from assigning IP addresses. After resetting, ensure that DHCP is enabled and the network settings are correctly configured.
How can I verify if the DHCP server on my router operates correctly?
Access the router’s admin interface and locate the DHCP settings section. Check if the DHCP server is active and configured to assign IP addresses within the correct range. You can also connect a device and check if it receives an IP address automatically. If not, disable and re-enable DHCP or manually restart the router to troubleshoot further.
Final Thoughts
To solve router not assigning IP addresses, start by restarting your router and modem. Ensure DHCP settings are enabled in your router’s configuration. Check for firmware updates to improve functionality.
Verify that your device is set to obtain an IP address automatically. If issues persist, reset your router to factory settings and reconfigure.
In summary, understanding how to solve router not assigning IP addresses involves basic troubleshooting steps like restarting, updating firmware, and checking configuration settings. Applying these simple measures can resolve most IP assignment problems efficiently.
I’m passionate about hardware, especially laptops, monitors, and home office gear. I share reviews and practical advice to help readers choose the right devices and get the best performance.