


Is your gaming chair slowly sinking, making your gaming sessions uncomfortable and frustrating? This common issue is almost always due to a faulty gas lift cylinder, which loses its ability to hold pressure over time. Don’t worry, there are effective solutions! From temporary hacks to permanent replacements, you can fix your chair and reclaim your perfect ergonomic setup without needing to buy a brand new one immediately.
How to Stop Gaming Chair from Moving Down
Picture this: You’re deep into an intense gaming session, focused on clutch plays and strategic moves. Suddenly, you notice your eye level dropping. Slowly, inexorably, your gaming chair begins to sink, inch by agonizing inch, pulling you further from the action and ruining your perfect ergonomic setup. Frustrating, right? It’s a common problem that plagues many a gamer, turning what should be a comfortable experience into a battle against a stubborn piece of furniture.
A gaming chair that constantly moves down isn’t just an annoyance; it can seriously impact your posture, comfort, and even your gaming performance. Constant readjusting breaks your concentration, and poor posture can lead to back pain, neck strain, and fatigue over extended periods. But before you throw your hands up in despair and start shopping for a new chair, know that this issue is often fixable. With a bit of know-how and some simple tools, you can learn how to stop gaming chair from moving down and get back to gaming in comfort.
In this comprehensive guide, we’re going to dive deep into why your gaming chair might be sinking, how to diagnose the problem, and most importantly, provide you with both temporary fixes and permanent solutions. We’ll walk you through everything from quick DIY hacks to replacing the core component that keeps your chair aloft. So, let’s get ready to empower you with the knowledge to conquer that sinking feeling and ensure your gaming throne stays exactly where you want it.
Key Takeaways
- The Gas Lift Cylinder is Key: Almost all sinking gaming chair issues stem from a failing pneumatic gas lift cylinder that can no longer hold pressure.
- Proper Diagnosis is Crucial: Before attempting a fix, confirm that the gas lift is indeed the culprit and not another part of the chair’s mechanism.
- Temporary Solutions Can Help: Methods like using a hose clamp, PVC pipe, or duct tape can provide a short-term fix to keep your chair at the desired height while you plan a permanent repair.
- Gas Lift Replacement is the Permanent Fix: The most effective and lasting solution for a sinking chair is to replace the faulty gas lift cylinder with a new one.
- Measure Carefully Before Buying: Ensure you measure your existing gas lift cylinder’s diameter, length (fully extended and compressed), and tapered ends to purchase the correct replacement.
- Maintenance Prevents Future Issues: Regularly cleaning, avoiding exceeding weight limits, and making smooth adjustments can extend the life of your chair’s components and help stop gaming chair from moving down in the future.
Quick Answers to Common Questions
How do I know if my gas lift is broken?
If your chair gradually or quickly sinks when you sit on it, even after you’ve raised it to your desired height, it’s almost certainly a broken gas lift cylinder. You might also notice a greasy residue around the cylinder.
Can I repair a broken gas lift cylinder?
No, gas lift cylinders are sealed units and are not designed to be repaired. Once they fail, the only permanent solution is to replace the entire cylinder with a new one.
What size gas lift do I need?
You’ll need to measure your existing gas lift’s outer cylinder diameter (typically 2 inches or 1.75 inches), the rod diameter (usually 1.1 inches), and its overall length when fully extended and compressed. Look for any model numbers on the old cylinder if possible.
Are temporary fixes safe for my chair?
Temporary fixes like hose clamps or PVC pipes are generally safe for the chair itself, as they just physically block the cylinder from retracting. However, they are not permanent and merely stop the chair from sinking, not fix the underlying issue.
How long does a gas lift cylinder typically last?
The lifespan of a gas lift cylinder varies greatly depending on usage, weight applied, and quality. Most last anywhere from 2 to 5 years, but higher quality (Class 4) cylinders can last much longer.
📑 Table of Contents
- Understanding Why Your Chair Sinks: The Root Causes
- Diagnosing the Problem: Pinpointing the Faulty Component
- Temporary Fixes to Keep You Gaming (for now!)
- Permanent Solutions: Replacing the Gas Lift Cylinder
- Maintenance Tips to Prevent Future Sinking
- When to Call It Quits: Is a New Chair Needed?
- Conclusion
Understanding Why Your Chair Sinks: The Root Causes
To fix a problem, you first need to understand it. When your gaming chair starts to move down on its own, it’s almost always a mechanical failure, and specifically, one component is typically to blame: the gas lift cylinder.
The Heart of the Problem: The Gas Lift Cylinder
Most modern office and gaming chairs use a pneumatic gas lift cylinder for height adjustment. This clever device is essentially a sealed cylinder filled with compressed nitrogen gas. When you operate the height adjustment lever, a valve opens, allowing gas to move in or out, pushing or releasing a piston that controls your chair’s height. The gas inside is under significant pressure, and its ability to maintain that pressure is what keeps your chair at your desired level.
Wear and Tear: Why Cylinders Fail
Over time and with constant use, these gas lift cylinders can fail for several reasons:
- Seal Degradation: The most common reason is that the internal seals or O-rings within the cylinder wear out. These seals are critical for containing the pressurized nitrogen gas. Once they degrade, the gas slowly leaks out, causing the cylinder to lose its ability to hold pressure. Think of it like a slow leak in a tire – eventually, it goes flat.
- Material Fatigue: The components themselves, like the piston rod or the cylinder housing, can weaken over years of use. This fatigue can lead to microscopic cracks or structural weaknesses that allow gas to escape.
- Exceeding Weight Limits: Regularly exceeding your chair’s recommended weight limit puts immense stress on the gas lift cylinder. This continuous strain accelerates wear and tear on the seals and internal mechanisms, leading to premature failure.
- Manufacturing Defects: While less common, sometimes a gas lift cylinder might have a manufacturing defect that causes it to fail earlier than expected.
Beyond the Gas Lift: Other Potential Culprits (Though Rare for Sinking)
While the gas lift is almost always the cause of a chair moving down, it’s worth briefly considering other possibilities, though they are usually associated with different chair issues:
- Faulty Adjustment Lever Mechanism: In very rare cases, the lever mechanism that actuates the gas lift might be stuck in an “open” position or be physically broken, preventing it from properly engaging the gas lift and holding height. However, this typically results in the chair not being able to hold any height at all, rather than a slow sink.
- Loose Base Connections: If the chair is also wobbly or unstable, it’s possible that the connection between the gas lift and the chair base (the star base with wheels) or the seat plate is loose. However, this usually doesn’t cause a slow sink, but rather general instability.
For the vast majority of “gaming chair moving down” problems, the faulty gas lift cylinder is the primary suspect.
Diagnosing the Problem: Pinpointing the Faulty Component
Before you start applying fixes, it’s important to confirm that the gas lift cylinder is indeed the problem. This diagnosis is usually quite straightforward.
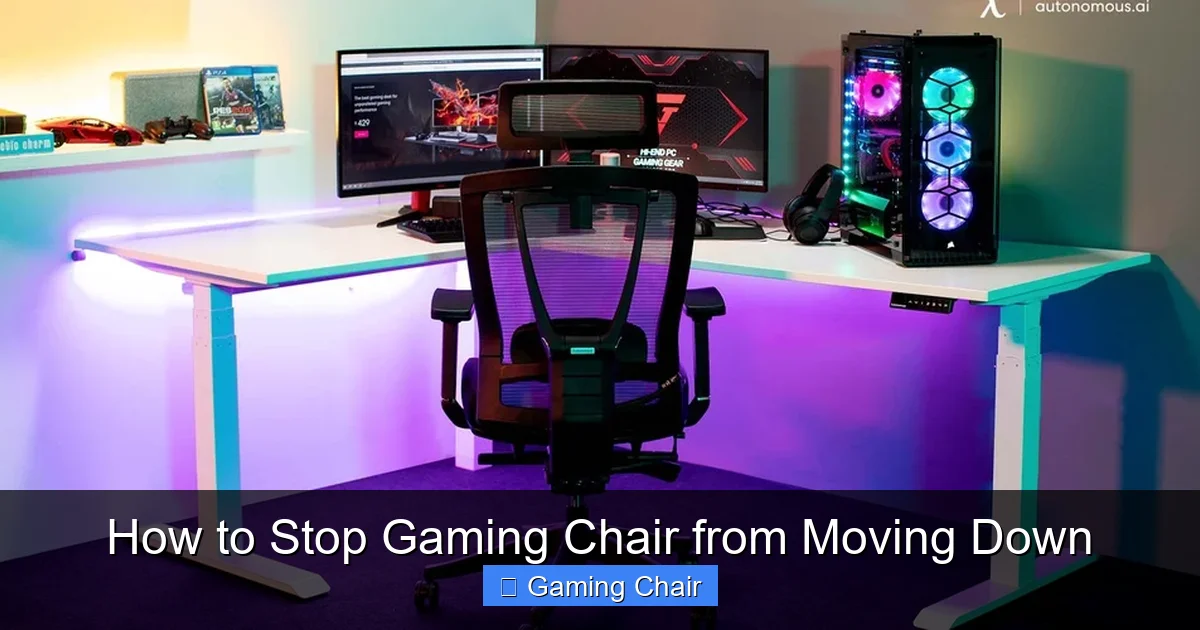
Visual guide about How to Stop Gaming Chair from Moving Down
Image source: thumbor.autonomous.ai
The Wiggle Test
The simplest way to confirm a failing gas lift is to sit in your chair and try to adjust its height. If you can raise it, but it immediately starts sinking under your weight (or even without it, over time), then the gas lift is definitely the issue. If it sinks slowly and intermittently, that also points to the gas lift.
Visual Inspection
Sometimes, a failing gas lift might show external signs. Look for:
- Greasy Residue: A dark, greasy or oily residue around the lower part of the gas lift cylinder (where it meets the chair base or the plastic sleeve) can indicate a leaking seal. This is the pressurized gas mixed with lubrication escaping.
- Visible Damage: While rare, check for any visible dents, bends, or cracks in the metal cylinder itself.
Check the Lever
Gently operate the height adjustment lever. Does it feel normal? Does it move freely? Is it actually engaging the gas lift mechanism? Sometimes, a lever might be bent or partially stuck, preventing it from fully closing the valve. If the lever seems fine and fully engages/disengages the gas lift, then it’s almost certainly the cylinder itself.
Temporary Fixes to Keep You Gaming (for now!)
So, you’ve diagnosed the problem: your gas lift is failing. But what if you can’t replace it right away, or you need a quick solution to get you through a crucial gaming marathon? Fear not! There are several ingenious temporary fixes you can employ to stop gaming chair from moving down, at least for a while.

Visual guide about How to Stop Gaming Chair from Moving Down
Image source: cdn.autonomous.ai
The Hose Clamp Method
This is one of the most popular and effective temporary fixes. It works by physically preventing the gas lift cylinder from collapsing past a certain point.
- What you’ll need: A large hose clamp (available at hardware stores, make sure it’s big enough to wrap around the gas lift cylinder), a flathead screwdriver or socket wrench (depending on the clamp).
- How to do it:
- Raise your chair to your desired gaming height.
- Locate the shiny metal rod of the gas lift cylinder. This is the part that extends and retracts.
- Slide the plastic sleeve that usually covers the gas lift upwards, if your chair has one, to expose the cylinder.
- Wrap the hose clamp around the exposed part of the cylinder, just below where the shiny rod enters the main body of the gas lift.
- Tighten the hose clamp firmly with your screwdriver or wrench. The clamp acts as a physical barrier, preventing the rod from fully retracting into the cylinder.
- Lower the plastic sleeve back into place.
- Result: Your chair will still sink slightly until it hits the hose clamp, but then it will stop at that fixed height. You won’t be able to lower it below this point, but it will maintain your preferred gaming height.
The PVC Pipe Sleeve
This method offers a more stable and often more aesthetically pleasing temporary fix than a hose clamp, though it requires a bit more effort.
- What you’ll need: A section of PVC pipe with an internal diameter just slightly larger than your gas lift cylinder’s main body (usually 1.5 inches to 2 inches, but measure yours!), a saw (hacksaw or PVC cutter), a measuring tape.
- How to do it:
- Raise your chair to your desired gaming height.
- Measure the exposed length of the gas lift cylinder’s main body (the thicker, outer part) when the chair is at your preferred height, from the bottom of the seat mechanism to the top of the chair base (the star base).
- Cut a piece of PVC pipe to this measured length.
- Remove your chair’s seat from its base (usually just a few screws underneath). This will allow you to slide the PVC pipe over the gas lift cylinder.
- Slide the cut PVC pipe piece over the gas lift cylinder, resting it on the top of the star base.
- Reattach the seat to the base.
- Result: The PVC pipe acts as a rigid sleeve, preventing the gas lift from collapsing. Your chair will be fixed at the height determined by the PVC pipe’s length.
The Duct Tape “Stabilizer”
This is a quick, desperate, but sometimes effective measure if you’re really in a bind and don’t have other tools. It’s less reliable and less durable than the other temporary fixes.
- What you’ll need: A roll of strong duct tape or electrical tape.
- How to do it:
- Raise your chair to your desired height.
- Take multiple wraps of duct tape around the shiny metal rod of the gas lift cylinder, just below where it enters the main cylinder body. Build up several layers.
- Press the tape firmly to ensure it’s tightly bound.
- Result: The accumulated tape tries to create a friction point or a slight barrier that impedes the downward movement. It’s a quick fix that might work for a very light person or very slow leak, but it’s prone to slipping or tearing.
Remember, these are all temporary solutions. While they can help you stop gaming chair from moving down for a while, they don’t fix the underlying problem of the failing gas lift cylinder. For a lasting solution, you’ll need to consider replacement.
Permanent Solutions: Replacing the Gas Lift Cylinder
The most effective and permanent way to stop your gaming chair from moving down is to replace the faulty gas lift cylinder. It might sound daunting, but it’s a very manageable DIY project for most people, and much cheaper than buying a whole new chair.

Visual guide about How to Stop Gaming Chair from Moving Down
Image source: cdn.autonomous.ai
Is It Worth Replacing?
For a good quality gaming chair where everything else (frame, casters, upholstery) is still in excellent condition, replacing the gas lift is almost always worth it. Gas lift cylinders are relatively inexpensive (usually $20-$50), and the replacement process takes less than an hour for most people.
Measuring Your Existing Gas Lift: Crucial Steps
This is the most critical step. Gas lifts come in various sizes, and you need to get one that fits your chair and your desired height range. Measure these dimensions precisely:
- Outer Casing Diameter: The thickest part of the cylinder. Most common diameters are 2 inches (50mm) or 1.75 inches (45mm).
- Rod Diameter: The thinner, shiny part that goes into the seat mechanism. Most are 1.1 inches (28mm).
- Extended Length: Measure the overall length of the gas lift when it’s fully extended (from top of rod to bottom of outer casing).
- Compressed Length: Measure the overall length when it’s fully compressed.
- Tapered Ends: Most gas lifts have a slight taper at both ends where they fit into the chair base and the seat mechanism. This is generally standard, but sometimes variations exist.
It’s often easiest to remove the old gas lift first, then take all measurements directly from it. Look for any labels or model numbers on the old cylinder, as these can help you find a direct replacement.
Tools You’ll Need
- Rubber Mallet or Hammer
- Pipe Wrench (or large adjustable wrench)
- Gloves (for grip and protection)
- Penetrating Lubricant (like WD-40 or similar)
- Safety Glasses
Step-by-Step Replacement Guide
Here’s how to replace your gas lift cylinder safely and effectively:
- Prepare Your Workspace: Find a clear, open area. Lay down an old towel or blanket to protect your floor and chair.
- Remove the Seat from the Base: Most gaming chair seats are attached to the chair’s tilt mechanism (which then sits on the gas lift) with 4-6 screws. Flip the chair over and unscrew these. Set the seat aside.
- Remove the Gas Lift from the Base: Turn the chair base (the star base with wheels) upside down. The gas lift cylinder will be inserted into the center hole.
- Spray penetrating lubricant around the top and bottom of the gas lift where it meets the star base. Let it sit for 5-10 minutes.
- Using your rubber mallet or hammer, gently but firmly tap the bottom of the gas lift cylinder (the part sticking out of the star base). Tap evenly around the circumference. The goal is to jar it loose from its tapered fit.
- Once it starts to move, you might be able to pull it out. If stubborn, you might need to use the pipe wrench on the lower part of the cylinder, twisting and pulling. Be careful not to damage the plastic base.
- Remove the Gas Lift from the Seat Mechanism: Now you have the gas lift cylinder still attached to the seat’s tilt mechanism.
- Spray lubricant around the top of the gas lift where it enters the seat mechanism.
- Holding the seat mechanism securely (you might need to brace it between your feet), use the rubber mallet to tap the top of the gas lift rod downwards. Again, tap firmly but carefully until it pops out of the seat mechanism.
- Alternatively, if you removed the seat with the tilt mechanism still attached to the gas lift, you can try to separate the gas lift from the tilt mechanism first, using the same tapping method.
- Insert the New Gas Lift into the Base: Take your new gas lift cylinder. Insert the narrower, tapered end into the center hole of your chair’s star base. It should slide in easily. Give it a gentle tap with the mallet or press down firmly to seat it.
- Attach the Seat to the New Gas Lift: Place the seat (with its tilt mechanism attached) onto the top of the new gas lift cylinder’s rod. The tapered end of the rod should fit snugly into the corresponding hole on the underside of the tilt mechanism.
- Reattach the Seat to the Tilt Mechanism (if you separated them earlier): If you removed the tilt mechanism from the seat, reattach it with the screws you removed in step 2.
- Test Your Chair: Sit in your chair and test the height adjustment. It should now hold its position perfectly!
Choosing the Right Replacement
- Class Rating: Gas lifts are often rated by “Class” (e.g., Class 2, 3, 4). Class 3 and Class 4 are generally considered higher quality and more durable, especially for gaming chairs which see heavy use. Class 4 cylinders are recommended for heavier users.
- Heavy-Duty Options: If you’re a heavier individual or your previous gas lift failed quickly, consider investing in a heavy-duty gas lift cylinder designed for higher weight capacities.
- Height Range: Ensure the replacement cylinder offers the height range you prefer. Some gas lifts are “short” or “tall” versions.
Maintenance Tips to Prevent Future Sinking
Once you’ve fixed your chair, you’ll want to keep it in top condition to prevent the dreaded sinking problem from recurring. A little preventative maintenance goes a long way to stop gaming chair from moving down.
Respect Weight Limits
This is paramount. Every chair has a maximum weight capacity specified by the manufacturer. Regularly exceeding this limit places undue stress on the gas lift cylinder, the base, and other components, dramatically shortening their lifespan. Be honest about your weight and choose a chair (or replacement gas lift) designed for your needs.
Regular Cleaning and Lubrication
While gas lifts are sealed units, keeping the exposed parts clean can help.
- Wipe Down: Periodically wipe down the exposed shiny metal rod of the gas lift cylinder with a clean cloth. This removes dust and grime that could potentially interfere with seals over time.
- Avoid Direct Lubrication: Do NOT spray lubricant directly into the gas lift mechanism itself, as this can interfere with the internal seals and actually cause more harm than good. Lubrication is mainly for removal purposes.
Avoid Sudden Drops or Impacts
Try to make height adjustments smoothly. Avoid forcefully dropping your chair from its maximum height to its minimum height. Sudden impacts can stress the internal components and seals of the gas lift.
Inspect Periodically
Every few months, take a moment to inspect your chair:
- Check for Leaks: Look for any greasy residue around the gas lift cylinder.
- Tighten Screws: Ensure all screws connecting the seat to the mechanism, and the armrests, are tight. While not directly related to sinking, loose screws can contribute to overall chair instability and wear.
- Test Height Adjustment: Ensure the height adjustment lever feels responsive and engages the gas lift properly.
By following these simple maintenance tips, you can significantly extend the life of your chair’s gas lift and keep it performing optimally, ensuring your gaming chair doesn’t move down unexpectedly.
When to Call It Quits: Is a New Chair Needed?
While fixing a sinking gaming chair is often straightforward, there comes a point where investing in repairs might no longer be the most sensible option. Understanding when to replace your chair entirely can save you time, money, and future frustration.
Beyond Repair? When the Frame or Other Major Components Are Failing
If your gas lift is failing, but other parts of your gaming chair are also showing significant wear, it might be time for a new one. Look for:
- Wobbly Frame: If the metal or plastic frame of the seat or backrest is cracked, bent, or excessively wobbly even after tightening all screws, the chair’s structural integrity is compromised.
- Broken Tilt Mechanism: If the mechanism that allows the chair to recline or rock is broken, or if the locking function no longer works, this can be a more complex and expensive fix than just the gas lift.
- Severely Worn Upholstery: While aesthetic, if the padding is completely flat, the fabric is torn beyond repair, or the faux leather is peeling extensively, the chair might no longer be comfortable or hygienic.
- Damaged Casters/Base: If the star base is cracked or multiple wheels are broken or don’t roll smoothly, these can be replaced, but it adds to the repair cost.
Cost vs. New Chair
Do a quick cost-benefit analysis. A new gas lift is usually $20-$50. If you also need new casters ($15-$30), perhaps a new tilt mechanism ($40-$80), the costs start adding up. Compare the total estimated repair cost with the price of a brand new, entry-level to mid-range gaming chair. If repairs approach or exceed 50% of the cost of a decent new chair, it’s often more economical and less hassle to buy new.
Upgrade Opportunity
Sometimes, a failing chair is a perfect excuse for an upgrade! If your current chair is old, lacks modern features, or no longer meets your ergonomic needs, consider investing in a new chair that offers better support, more adjustability, or a higher weight capacity. Newer gaming chairs often come with improved ergonomics, materials, and features that can significantly enhance your comfort and gaming experience.
Ultimately, the decision to repair or replace comes down to the extent of the damage, your budget, and your personal preference. For a simple gas lift failure, repair is almost always the smart choice to stop gaming chair from moving down. For a chair falling apart at the seams, it might be time for a well-deserved upgrade.
Conclusion
A gaming chair that constantly sinks can turn your ultimate gaming setup into a source of endless frustration. But as we’ve explored, this common problem, primarily caused by a failing gas lift cylinder, is far from insurmountable. Whether you opt for a clever temporary hack to get through your next raid or commit to the satisfying, permanent fix of replacing the gas lift, you now have the knowledge and tools to tackle the issue head-on.
Remember that a little diagnostic work goes a long way in identifying the true culprit. With a bit of patience and the right parts, you can breathe new life into your gaming throne, restore its perfect height, and get back to enjoying uninterrupted, comfortable gaming sessions. And by adopting simple maintenance habits, you can extend the life of your chair and prevent that annoying sink from happening again. So go ahead, fix that chair, sit tall, and game on!
Frequently Asked Questions
What causes a gaming chair to slowly sink?
A gaming chair slowly sinks almost always due to a faulty pneumatic gas lift cylinder. Over time, the internal seals within the cylinder wear out, allowing the pressurized nitrogen gas to slowly leak out, which prevents the cylinder from holding its height under load.
Is it difficult to replace a gaming chair gas lift?
Replacing a gaming chair gas lift is a relatively straightforward DIY task that most people can accomplish with basic tools in under an hour. The most challenging part is often separating the old cylinder from the chair’s base and seat mechanism, which might require some firm tapping or leverage.
Can I use any gas lift as a replacement?
No, you need a gas lift that matches the dimensions of your existing one, specifically the diameter of the cylinder and the rod, and the approximate length. Using the wrong size can lead to an improper fit, instability, or an uncomfortable height range.
Will a temporary fix damage my chair?
Temporary fixes like hose clamps or PVC sleeves are generally harmless to your chair’s overall structure. They provide a physical stop for the gas lift, but they don’t address the internal failure. However, they can prevent your chair from being fully adjustable for a period.
How can I make my new gas lift last longer?
To extend the life of a new gas lift, always stay within the chair’s recommended weight limit, make height adjustments smoothly rather than with sudden drops, and periodically inspect your chair for any signs of wear. Choosing a higher-quality (Class 4) gas lift initially also helps.
When should I just buy a new gaming chair instead of fixing it?
Consider buying a new chair if multiple components are failing beyond just the gas lift (e.g., a wobbly frame, broken tilt mechanism, severely worn upholstery) or if the total cost of repair parts approaches or exceeds 50% of the price of a decent new chair. Sometimes, it’s also a good opportunity to upgrade to a more ergonomic or feature-rich model.



