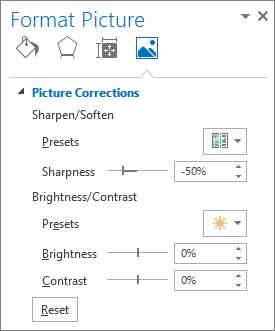
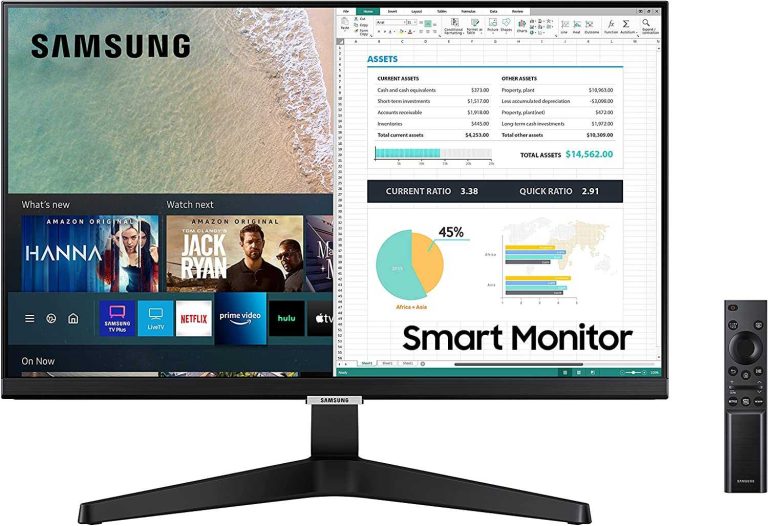
To improve picture clarity instantly, adjusting your device’s brightness and contrast settings is key. Simply tweak these controls to find the perfect balance where details are sharp, and colors are vibrant without being washed out or too dark. This quick adjustment can make a significant difference in your viewing experience, whether you’re watching a movie or working on a detailed project.
Adjusting brightness and contrast is straightforward: increase brightness to lighten dark areas, and adjust contrast to enhance the difference between light and dark parts of the image. Set these controls gradually until the picture appears sharper and more natural. By fine-tuning these settings, you ensure your screen displays images clearly, reducing eye strain and making everything visible and enjoyable.
Getting the perfect picture quality can sometimes be tricky, especially when images look dull or overly harsh. Brightness and contrast settings are foundational to enhancing your screen’s clarity and vibrancy, but knowing how to adjust them properly is essential. Whether you’re using a TV, monitor, or device, understanding these simple adjustments can transform your viewing experience, making images stand out with crispness and detail. This guide will walk you through easy steps to optimize these settings, helping you enjoy clearer, more vibrant visuals every time.
How to adjust brightness and contrast for clearer picture
Understanding Brightness and Contrast
Brightness and contrast are key settings that affect how images appear on your screen. Brightness controls how light or dark the entire image is, while contrast adjusts the difference between the darkest and brightest spots. Properly setting both ensures your picture looks natural and sharp.
Without correct adjustments, images may look washed out, overly dark, or too harsh. Getting these settings right can make a big difference in your viewing experience. It’s important to understand that brightness and contrast work together to create a balanced picture.
Why Adjusting Brightness and Contrast Matters
Adjusting brightness and contrast helps prevent eye strain and makes details easier to see. If the brightness is too high, dark areas may blend into the background, hiding details. If it’s too low, bright areas might look dull or washed out.
Similarly, high contrast emphasizes differences, making images pop, but too much contrast can create harsh edges. Low contrast can make images seem flat and uninteresting. Properly balancing these settings ensures clear, vibrant images that are easy on the eyes.
Effects on Image Quality
Balanced brightness enhances visibility of dark scenes, while optimal contrast maintains depth in images. Proper adjustments can also improve color accuracy and overall picture quality.
When settings are off, images may appear blurry or pixelated. Adjusting brightness and contrast enhances sharpness and clarity, making every detail stand out. This is especially important for activities like editing photos or watching movies.
How to Adjust Brightness and Contrast on Different Devices
Adjusting brightness and contrast varies depending on the device you are using. Below are detailed steps for common devices such as TVs, monitors, and smartphones.
Adjusting on a TV
Most modern TVs allow you to modify these settings through the menu system. Start by pressing the “Menu” button on your remote control. Navigate to the “Picture” or “Display” settings.
Locate the “Brightness” and “Contrast” sliders. Adjust the brightness slider until the dark areas look natural without losing detail. Then, modify the contrast slider to make the bright areas stand out without becoming overly harsh.
Adjusting on a Computer Monitor
For monitors with built-in controls, use the physical buttons usually located on the side or bottom of the screen. Press the menu button to access the OSD (On-Screen Display).
Navigate to the “Picture” or “Color Settings” menu. Use the arrow keys or dial to select “Brightness” and “Contrast.” Increase or decrease these settings incrementally while observing the picture quality.
For software calibration, Windows users can access display settings by right-clicking the desktop and choosing “Display settings.” Then click on “Advanced display settings” and select “Color Calibration” to fine-tune brightness and contrast.
Adjusting on Smartphones or Tablets
On mobile devices, brightness is usually controlled through quick settings or the display submenu in settings. For contrast, some phones offer a “Night mode” or “Reading mode” that adjusts contrast automatically.
For fine-tuning, go to “Settings” > “Display” > “Brightness” to adjust manually. Some devices also have accessibility features to enhance contrast or colors for better clarity.
Tips for Achieving the Perfect Balance
Getting the best picture involves more than just moving sliders. Here are helpful tips to fine-tune your brightness and contrast settings effectively.
- Start with the default settings and adjust gradually while observing different scenes.
- Use test images or videos with a wide range of dark and bright areas to see how adjustments affect details.
- Adjust brightness first to set the overall light level of the image. Then tweak contrast for detail separation.
- Ensure that bright objects do not appear washed out and dark areas retain some detail.
- Make small adjustments to avoid drastic changes that can distort the image quality.
Using Calibration Tools and Test Patterns
For the most accurate results, use calibration tools or test patterns. These are images or videos designed to help fine-tune display settings.
Many monitors and TVs come with built-in test patterns. Display these patterns and modify brightness and contrast until you see details in every zone.
You can also use online test pattern generators or calibration discs to improve your setup. These tools guide you through optimal adjustments step-by-step.
Common Mistakes to Avoid
Avoid setting brightness and contrast too high or too low. High contrast can cause eye strain and lose details in shadows or highlights. Low contrast can flatten the image, making it dull and uninteresting.
Never rely solely on default settings; always customize to your environment’s lighting conditions. Bright rooms require different adjustments than dark rooms.
Also, avoid making quick drastic changes. Instead, tweak settings gradually for the best outcome. This patience ensures you achieve a balanced and natural picture.
Additional Tips for Better Picture Quality
Combine brightness and contrast adjustments with other picture settings such as sharpness, color temperature, and gamma for optimal results.
Adjusting color temperature to “Warm” or “Neutral” can make images appear more natural. Increasing sharpness can make edges clearer but avoid overdoing it to prevent artificial outlines.
Lighting around your device also impacts perception; consider ambient light when making adjustments. A dim room may require different settings than a bright, well-lit space.
Benefits of Regular Adjustment and Calibration
Regularly revisiting your picture settings ensures consistent image quality. Over time, display components may shift, affecting how images appear.
Calibration maintains color accuracy, reduces eye strain, and enhances viewing pleasure. It’s especially useful if you notice colors look off or details seem lost.
Performing adjustments also helps when switching between different content types like movies, gaming, or photo editing. Fine-tuning ensures each activity looks its best.
Properly adjusting brightness and contrast enhances your viewing experience and ensures images appear clear, vibrant, and natural. By understanding your device’s controls and using calibration tools, you can achieve a perfectly balanced picture. Remember to make gradual changes and consider your environment to optimize settings. Regular calibration keeps your display performing at its best, making every viewing session enjoyable and eye-friendly.
How to adjust your TV settings for the best picture quality
Frequently Asked Questions
What steps should I follow to adjust brightness on my display?
Start by opening the display settings on your device. Locate the brightness slider and move it to the right to increase brightness or to the left to decrease it. Make fine adjustments until you see a clear picture without causing eye strain. Test the changes by viewing different types of content to ensure optimal visibility.
How can I modify contrast to improve image clarity?
Access the contrast settings through your device’s display menu. Increase the contrast to make dark areas darker and light areas lighter, enhancing the overall image sharpness. Be cautious not to set the contrast too high, as it can lead to loss of detail. Adjust gradually and review the picture to find the most natural and clear appearance.
What are the best practices for adjusting brightness and contrast together?
Start by setting the brightness at a comfortable level that prevents glare or eye strain. Then, adjust the contrast to accentuate details without losing natural color balance. Make small changes and regularly view different images or videos to ensure the settings work well across various content types. Fine-tune the settings as needed for the most balanced and clear picture quality.
Can automatic brightness and contrast features improve picture quality?
Automatic settings can adjust brightness and contrast based on ambient lighting, providing a quick way to optimize image quality. However, these features might not always cater to your specific preferences or needs. Manually adjusting settings allows for more precise control to achieve consistent clarity tailored to your environment.
What should I do if adjusting brightness and contrast doesn’t improve image clarity?
If changes do not enhance picture quality, check for potential issues such as outdated display drivers or certain hardware limitations. Reset your display settings to default and try adjusting again. Additionally, ensure your monitor or screen is properly calibrated using professional calibration tools or software for the best results.
Final Thoughts
To adjust brightness and contrast for clearer picture, start by opening your display settings. Use sliders to increase or decrease brightness until the image appears natural. Adjust contrast to enhance differences between darks and lights for better clarity. Fine-tune both settings until the picture looks crisp and comfortable to watch. Proper adjustments make a noticeable difference in visual quality, ensuring a better viewing experience. Remember, small tweaks often produce the best results when optimizing your display. Achieving the perfect balance helps you see every detail clearly. How to adjust brightness and contrast for clearer picture is simple with these straightforward steps.
I’m passionate about hardware, especially laptops, monitors, and home office gear. I share reviews and practical advice to help readers choose the right devices and get the best performance.


