


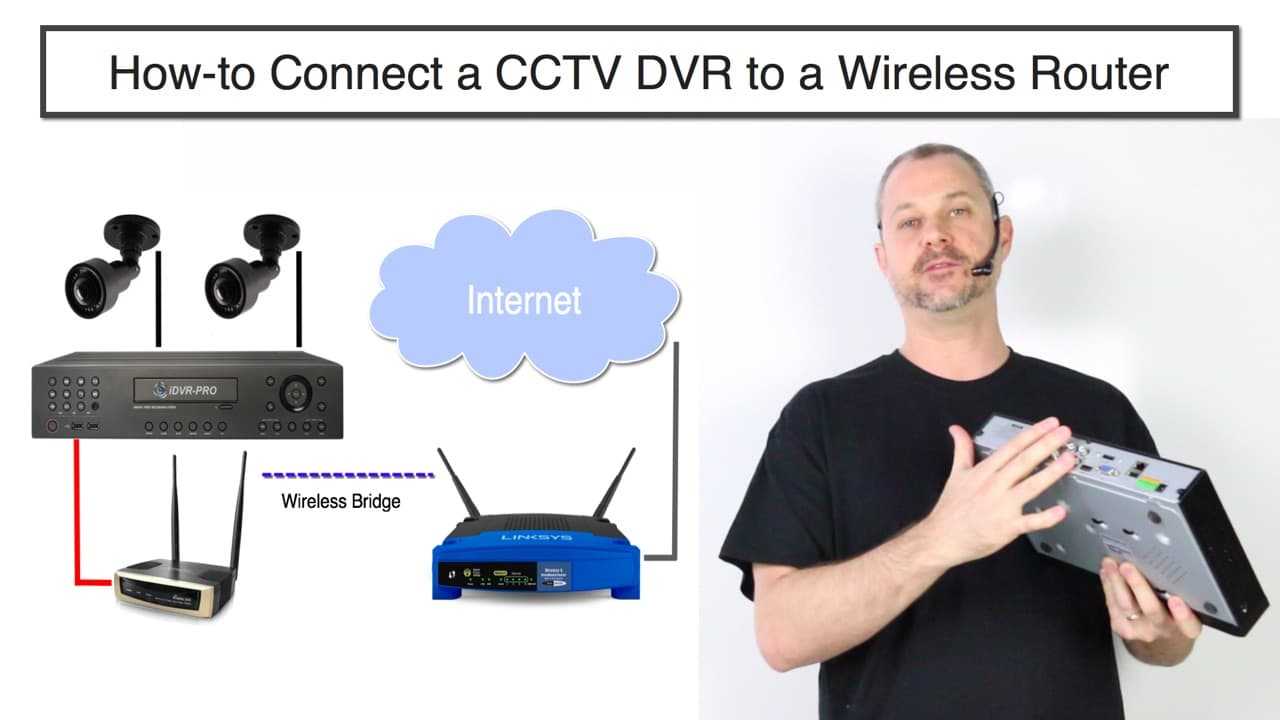
To connect your CCTV to a router quickly and efficiently, simply access your camera’s network settings, connect it to your Wi-Fi network, and ensure your router is configured to allow the camera to communicate with your devices. Use an Ethernet cable for a wired connection or connect wirelessly via Wi-Fi if your CCTV supports it. Make sure to assign a static IP and configure port forwarding if you want remote access.
Connecting a CCTV to a router might sound complicated, but it’s pretty straightforward once you understand the basics. Whether your camera is wired or wireless, the key steps involve linking it to your home network, configuring necessary settings, and ensuring remote viewing is enabled. This guide walks you through the process, helping you set up your security system smoothly so you can monitor your property anytime, anywhere. Let’s make your home safer with easy-to-follow steps!

How to connect CCTV to router: A complete guide
Connecting your CCTV camera system to a router may seem tricky at first, but with the right steps, it becomes straightforward. This process allows you to view your security footage remotely and enhances your home or business security. Let’s explore each step and related topic to help you connect your CCTV to your router successfully.
Understanding the basics of CCTV and routers
CCTV cameras are devices that record video footage to help you monitor your property. Routers link your devices to the internet, allowing remote access to your CCTV system. Before starting, make sure you have a compatible CCTV camera and a reliable internet connection.
Types of CCTV cameras suitable for network connection
Not all CCTV cameras connect directly to routers. There are two main types suitable for network setup:
- IP cameras: These cameras connect directly to your network via Ethernet or Wi-Fi and are ideal for remote viewing.
- Analog cameras with network video recorders (NVRs): These need an NVR that supports network connectivity and can be connected to the router.
Ensure your chosen camera supports network connection features for smooth setup.
Preparing your equipment for connection
Gather all necessary equipment before starting. This includes your CCTV camera, router, Ethernet cables, power adapters, and any installation tools. Make sure your internet connection is stable and fast enough for remote video streaming.
Connecting IP CCTV cameras directly to your router
Step 1: Connect the camera physically
If your IP camera uses Ethernet, connect it directly to one of your router’s LAN ports using an Ethernet cable. For Wi-Fi cameras, ensure they are powered on and have Wi-Fi capabilities.
Step 2: Power up the camera
Plug in your camera’s power adapter and wait for it to initialize. Some cameras have indicator lights that confirm power and network connection status.
Step 3: Find your camera’s IP address
Use your router’s admin panel or network scanning tools to locate the camera’s IP address. This is essential for configuration and remote access.
Configuring your CCTV camera for network access
Step 1: Access camera settings
Open a web browser and enter the camera’s IP address. Log in using default credentials found in the user manual or provided by the manufacturer.
Step 2: Change default passwords
For security reasons, replace default passwords with strong, unique ones to prevent unauthorized access.
Step 3: Set up IP address and network parameters
Assign a static IP address to your camera to prevent it from changing after restart. Configure subnet mask, default gateway, and DNS settings according to your network.
Port forwarding and enabling remote access
Understanding port forwarding
Port forwarding opens specific ports on your router, allowing external devices to communicate with your CCTV camera. This step is crucial for remote viewing from outside your local network.
Steps to set up port forwarding
- Login to your router’s admin panel.
- Identify the port numbers used by your CCTV system, usually HTTP (80), RTSP (554), or custom.
- Create a new port forwarding rule, specifying the internal IP address of your camera and the ports to be forwarded.
- Save the settings and test by accessing your camera from an outside network.
Using Dynamic DNS for easier remote access
If your internet connection uses a dynamic IP address, setting up Dynamic DNS (DDNS) allows you to access your CCTV without needing to check for new IP addresses regularly. Many routers offer DDNS support; sign up with a compatible DDNS provider and configure it in your router settings.
Configuring network security for your CCTV system
Security is vital when connecting CCTV to the internet. Change default passwords, enable encryption protocols, and consider disabling UPnP to prevent unauthorized access. Regular firmware updates of your camera and router can also protect against vulnerabilities.
Troubleshooting common connection issues
Camera not appearing on the network
Ensure the camera is powered on and connected correctly. Check your router’s device list to verify connection. Restart the camera and router if needed.
Unable to access camera remotely
Confirm port forwarding settings and IP address configurations. Check your firewall settings to allow traffic through the specified ports.
Slow streaming or lag
Ensure your internet connection has sufficient bandwidth. Reduce camera resolution or frame rate if necessary.
Advanced topics: integrating with smart home systems
If you want to expand your security setup, many CCTV cameras support integration with smart home systems like Alexa or Google Home. Check your camera’s compatibility and follow specific integration instructions for seamless operation.
Additional tips for a smooth setup process
- Always keep your firmware updated for security and performance improvements.
- Use strong, unique passwords for all devices involved.
- Regularly monitor your network for unauthorized devices.
By following these steps and tips, you can easily connect your CCTV camera system to your router and gain remote access for better security monitoring. Remember to handle your network settings carefully to ensure safety and optimal performance. Staying informed about the latest security practices will help keep your surveillance system secure and functional at all times.
How to Connect a CCTV DVR to a Wireless Router
Frequently Asked Questions
What are the basic steps to connect a CCTV camera to a router for remote access?
Begin by ensuring your CCTV camera supports network connectivity, usually via Ethernet or Wi-Fi. Connect the camera to your router using an Ethernet cable or configure its Wi-Fi settings if it’s wireless. Access the camera’s setup interface through a web browser or dedicated app, and assign it a static IP address or ensure it receives one via DHCP. Next, port forward the camera’s IP address and specific port on your router to allow external access. Finally, test the connection by viewing the camera feed from an external network to confirm successful setup.
How should I configure network settings on my CCTV to connect it to the router properly?
Access your CCTV’s network settings through its menu or web interface. Assign a unique IP address within your network’s range, or set it to obtain one automatically via DHCP. Ensure the subnet mask matches the router’s configuration. Enter the gateway IP address, usually the router’s IP, to enable proper routing. Input your DNS server addresses if needed for domain resolution. Save the settings and restart the camera to apply changes. Verifying the connection through the camera’s status page helps confirm proper network configuration.
What precautions should I take when connecting CCTV cameras to a router for secure access?
Always change default passwords on your CCTV devices to strong, unique ones, preventing unauthorized access. Use encrypted network connections such as WPA2 or WPA3 for Wi-Fi cameras. Enable firewall features on your router to restrict access to the camera’s ports to trusted IPs. Regularly update the camera’s firmware to patch security vulnerabilities. If possible, set up VLANs to isolate your CCTV network from other devices. These steps help maintain a secure and reliable connection between your cameras and the router.
Final Thoughts
Connecting CCTV to your router involves several straightforward steps. First, turn off your CCTV device and connect its Ethernet cable to an available port on your router. Next, power on the CCTV and access your router’s settings through a web browser.
Configure the network settings to assign a static IP to your CCTV if necessary, ensuring easy access later. Once set up, test the connection by viewing the camera feed through your network.
In conclusion, knowing how to connect CCTV to router helps you monitor your property remotely with ease. Following these steps guarantees a smooth setup process for reliable surveillance.



