


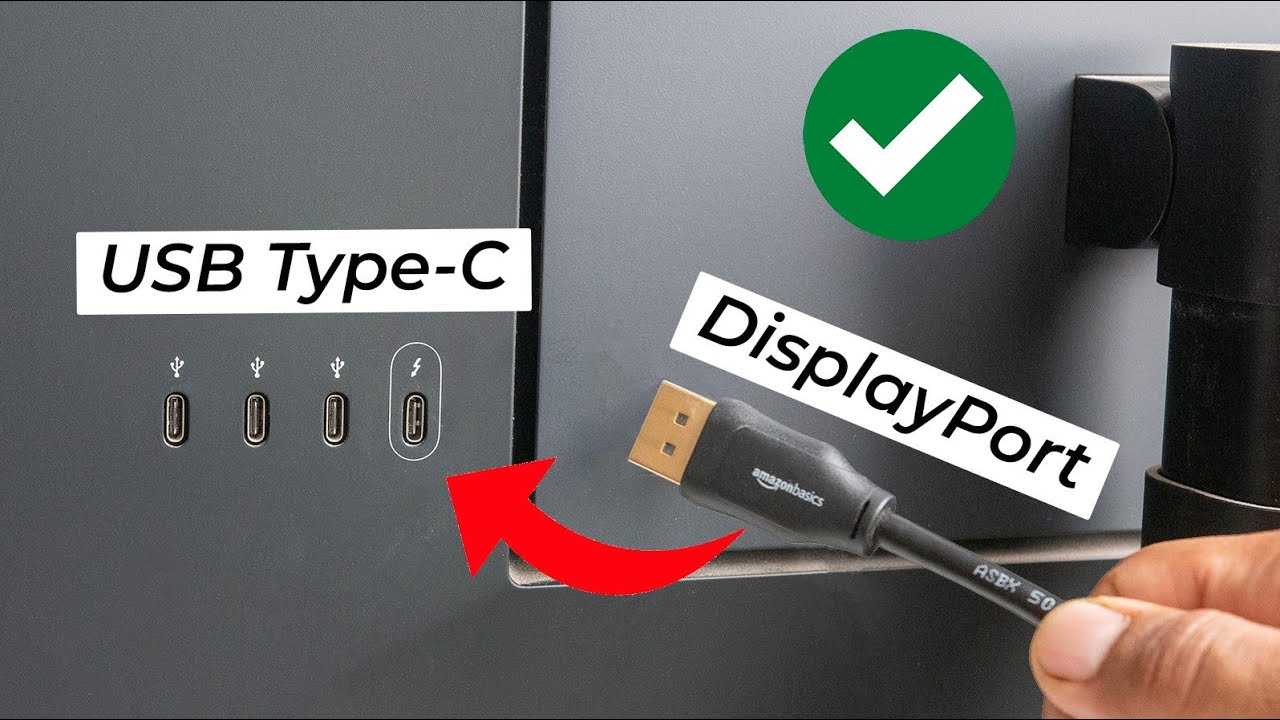
To connect a portable monitor via USB-C, simply plug one end of the USB-C cable into your device and the other into the monitor. If both devices support USB-C with DisplayPort or Thunderbolt, your setup will be plug-and-play with minimal fuss. In some cases, you might need to adjust display settings, but overall, it’s a straightforward process.
Connecting a portable monitor through USB-C is one of the easiest ways to expand your screen real estate on the go. Since many modern laptops and tablets now feature USB-C ports with video capabilities, you can quickly turn a compact monitor into a dual-screen setup without the hassle of extra cables or adapters. Whether you’re working remotely, gaming, or just want more space for your creative projects, understanding how to properly connect your portable monitor via USB-C can significantly enhance your productivity and entertainment experience. Just make sure both your device and monitor support the necessary USB-C standards, and you’ll be all set to enjoy a seamless display extension.

How to Connect Portable Monitor via USB C
Connecting a portable monitor with USB C can seem tricky at first, but once you understand the steps, it becomes a quick process. USB C offers a simple way to extend your screen without needing extra adapters or wires. This section will guide you through the essential points to ensure a seamless connection.
Understanding USB C and Its Benefits for Portable Monitors
USB C is a versatile port that carries power, data, and video signals all in one cable. Its ability to transmit high-definition video makes it perfect for connecting external displays. When used with compatible devices, USB C can deliver sharp visuals and fast data transfer.
Key benefits of using USB C:
- Reduces cable clutter by combining power and data transfer in one cable
- Supports high-resolution displays up to 4K and beyond
- Offers fast charging capabilities for your devices
- Allows for a plug-and-play setup with minimal fuss
Checking Compatibility of Your Devices
Before connecting your portable monitor to your device via USB C, ensure both devices support this technology. Not all USB C ports are created equal, so checking compatibility is vital.
How to verify device compatibility
- Look for the USB C port symbol, which might include a lightning bolt or display icon
- Consult your device’s user manual or specifications sheet
- Test the connection with a USB C cable designed for video transmission
Specifications to consider
| Device Feature | Required |
|---|---|
| USB C port support for video (DisplayPort or Thunderbolt 3/4) | Yes |
| Power delivery capabilities | Depends on your needs (usually 15W-100W) |
| Supported resolution (4K, 1080p, etc.) | Check device documentation |
Gathering the Necessary Equipment
Having the right equipment ensures a smooth connection process. Here’s what you’ll need:
- USB C to USB C cable: Make sure it supports video transfer (not all cables do)
- Portable monitor compatible with USB C
- Device with a USB C port supporting video output: Laptops, tablets, or smartphones
Choosing the right USB C cable
Opt for cables labeled as USB C to USB C with video support, often marked as ‘Thunderbolt compatible’ or ‘USB 3.1/3.2.’ Cheaper cables might only transfer data or charge power, not video signals.
Connecting Your Portable Monitor via USB C Step-by-Step
Step 1: Power off your devices (optional but recommended)
Although most devices auto-detect USB C connections, turning off your devices reduces potential issues during setup.
Step 2: Connect the USB C cable to your device and monitor
Insert one end of the USB C cable into your device’s port and the other into your portable monitor’s USB C port. Ensure both connections are secure.
Step 3: Turn on your monitor and device
Power on your portable monitor first, then your device. The monitor should automatically detect the connection and display the output.
Step 4: Adjust display settings as needed
On your device, go to display settings to customize the resolution, orientation, or extend mode. Windows, Mac, Android, and iOS all have different ways to adjust display options.
Troubleshooting Common Connection Issues
If your monitor doesn’t display an image or the connection is unstable, try these tips:
- Ensure your USB C cable supports video transfer
- Check for software updates on your device and monitor firmware
- Try reconnecting cables or restarting devices
- Verify your device’s support for video output via USB C
Optimizing Performance and Picture Quality
Adjust display resolution and refresh rate
Set your display resolution to match your monitor’s native resolution for the best image quality. Increasing the refresh rate can also improve smoothness, especially for gaming or scrolling.
Manage power settings
Ensure your device provides enough power to the monitor through the USB C port, especially during extended use. Use an external power source if needed.
Additional Tips for a Better Connection Experience
- Use high-quality cables to prevent signal loss
- Keep your devices updated with the latest software and firmware
- Use the monitor’s built-in settings menu to calibrate brightness, contrast, and color
- Place your devices on a flat, stable surface to avoid accidental disconnections
Related Topics: Extending Your Setup
Beyond connecting via USB C, explore options like:
- Using HDMI to USB adapters for older monitors
- Connecting multiple monitors for a multi-screen workspace
- Using docking stations to simplify connections
- Utilizing USB hubs for additional ports and device management
Understanding how to connect a portable monitor via USB C simplifies your workspace and enhances your productivity. By verifying compatibility, choosing the right cables, and following proper setup steps, you can enjoy crisp visuals and a clutter-free environment. Keep your devices updated and use quality accessories to get the most out of your portable monitor experience. Having the right knowledge ensures that connecting and optimizing your portable display is quick and straightforward every time.
Connecting Portable Monitors to Android Smartphones
Frequently Asked Questions
What steps should I follow to connect my portable monitor using a USB-C cable?
Start by ensuring that your portable monitor supports USB-C input and your computer or device has a compatible port. Connect the USB-C cable to your device first, then plug the other end into the monitor. Turn on both devices if necessary. Your device should automatically recognize the monitor and display the extended screen or mirror the current display. If it doesn’t, check your display settings and select the portable monitor as an external display.
Are there any specific requirements for the USB-C cable when connecting a portable monitor?
Yes, use a USB-C cable that supports video transfer and power delivery, often labeled as “USB-C with DisplayPort Alternate Mode.” This type of cable ensures a stable connection capable of transmitting display signals. Avoid using inexpensive or generic cables that might not support video output, as they can cause connection issues or poor display quality.
What should I do if my portable monitor isn’t detected by my device via USB-C?
First, verify that you’re using a compatible and functioning USB-C cable. Then, disconnect and reconnect the cable securely on both ends. Restart your computer or device, and ensure your display drivers are up to date. Check your device’s display settings to see if the monitor appears as an external display. If problems persist, try connecting to a different USB-C port or test the monitor with another device to pinpoint the issue.
Can I connect my portable monitor to a device that only has a USB-C port for charging?
Connecting a portable monitor to a device that only supplies power via USB-C can work if the port supports video output (DisplayPort Alternate Mode). Confirm your device’s specifications to ensure it can transmit video signals through the port. If the port is solely for charging, you may need an alternate connection method or a dedicated video output port to connect your monitor.
Is it necessary to install any drivers to connect my portable monitor via USB-C?
Most modern operating systems recognize USB-C portable monitors automatically and do not require additional drivers. However, if your monitor came with specific software or drivers, install them to ensure optimal performance. Check the manufacturer’s instructions for any software requirements or updates needed to facilitate a smooth connection process.
Final Thoughts
To connect a portable monitor via USB C, first ensure your device supports video output through its USB C port. Connect the monitor using a compatible USB C cable. Once connected, your device should automatically recognize the monitor, and you can adjust display settings as needed.
In summary, connecting a portable monitor via USB C is straightforward: plug in the cable, verify compatibility, and configure your display. Following these steps guarantees a seamless setup for improved productivity and multitasking.



