Looking to enhance your TV audio experience? Wondering how to connect a soundbox to your TV? Look no further! In this article, we’ll guide you through the simple and straightforward steps to seamlessly integrate your soundbox with your television. Whether you’re a movie enthusiast craving that cinematic sound or a music lover seeking an immersive listening experience, connecting a soundbox to your TV is the key to unlocking enhanced audio quality. Follow along as we walk you through the process, step by step. Get ready to elevate your entertainment to a whole new level!
How to Connect a Soundbox to Your TV
Introduction
Connecting a soundbox to your TV can greatly enhance your audio experience while watching movies, TV shows, or playing video games. By adding external speakers to your television setup, you can enjoy immersive sound quality, deep bass, and a richer audio performance. In this comprehensive guide, we will walk you through the step-by-step process of connecting a soundbox to your TV, regardless of the type of soundbox or TV you have. So, let’s get started!
Types of Soundboxes
Before diving into the process, it’s important to understand the different types of soundboxes available on the market. Here are the most common ones:
1. Soundbar
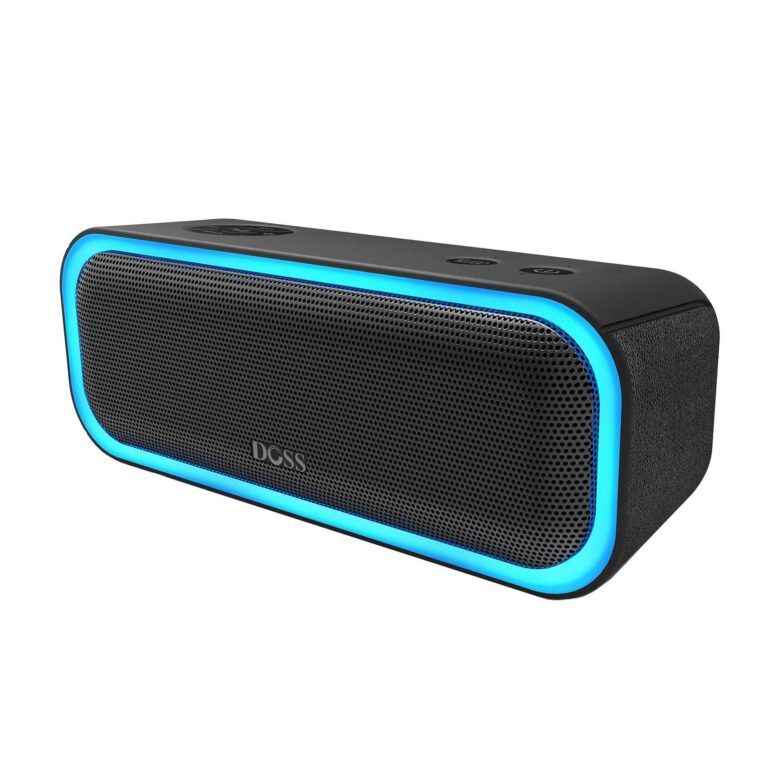
A soundbar is a long, slim speaker that can be placed beneath or mounted on your TV. It usually contains multiple drivers to simulate surround sound. Soundbars are popular due to their convenience and compact size, making them a great choice for small to medium-sized rooms.
2. Home Theater System
A home theater system typically consists of multiple speakers and a subwoofer. It offers a more immersive surround sound experience compared to a soundbar. However, setting up a home theater system can be more complex and requires additional space.
3. Soundbase
Similar to a soundbar, a soundbase is a flat platform that your TV sits on. It can provide better sound quality than built-in TV speakers and is ideal for smaller rooms where space is limited.
Connectivity Options
Now that we have an understanding of the different types of soundboxes let’s explore the various connectivity options available to connect your soundbox to the TV.
1. HDMI ARC
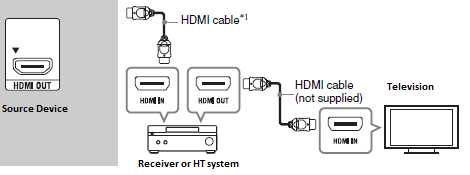
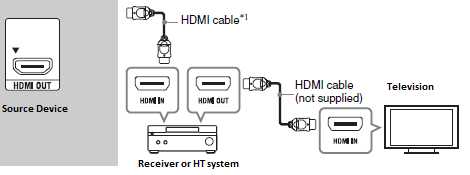
HDMI ARC (Audio Return Channel) is a convenient method for connecting your TV to a soundbox. It allows both audio and video signals to be transmitted through a single HDMI cable. To use HDMI ARC, ensure that both your TV and soundbox support this feature. Simply connect one end of an HDMI cable to the HDMI ARC port on your TV and the other end to the HDMI ARC port on your soundbox. Once connected, you can control the soundbox volume using your TV remote.
2. Optical Cable
An optical cable, also known as TOSLINK or SPDIF, is another popular option for connecting your soundbox to your TV. Most modern TVs and soundboxes have an optical audio output/input, respectively. To connect, plug one end of the optical cable into the optical audio output on your TV and the other end into the optical audio input on your soundbox. Remember to remove any protective caps from the cable ends and ensure a secure connection.
3. RCA/Analog Connection
If your TV or soundbox lacks HDMI ARC or optical audio ports, the RCA or analog connection is a viable alternative. It involves using RCA cables, which come with two or three connectors: red (right audio), white (left audio), and yellow (composite video). Connect the corresponding red and white connectors from the soundbox to the audio output ports on your TV. Make sure to match the colors correctly to avoid any audio imbalance. For video transmission, use the yellow connector if needed.
4. HDMI or Digital Optical Audio Adapter
In cases where the TV lacks HDMI ARC or optical audio output, you can consider using HDMI or digital optical audio adapters. These adapters connect to your TV’s HDMI or optical audio output and offer additional ports for connecting your soundbox. Ensure that the adapters you choose are compatible with your specific TV and soundbox models.
Setting Up the Soundbox
Once you’ve chosen the appropriate connection method for your TV and soundbox, the next step is to set up your soundbox. Here’s a step-by-step guide to get you started:
1. Unbox and Inspect
Carefully unbox your soundbox and inspect its contents for any damage or missing components. Refer to the instruction manual for specific setup instructions and safety precautions.
2. Positioning
Decide on the ideal placement for your soundbox. For soundbars or soundbases, positioning them directly beneath or in front of your TV ensures optimal sound projection. If you’re using a home theater system, follow the guidelines provided in the manual to position the speakers correctly for optimal surround sound.
3. Power Connection
Connect the power cable to your soundbox and plug it into a power outlet. Ensure that the power source is compatible with the voltage requirements of your soundbox.
4. Connection to TV
Using the appropriate cable or adapter discussed earlier, establish the connection between your TV and soundbox. Follow the specific instructions provided in the previous section based on your chosen connection method.
Audio Settings and Troubleshooting
After physically connecting your soundbox to the TV, it’s crucial to configure the audio settings accordingly. Here are a few tips to optimize your setup:
1. Source Selection
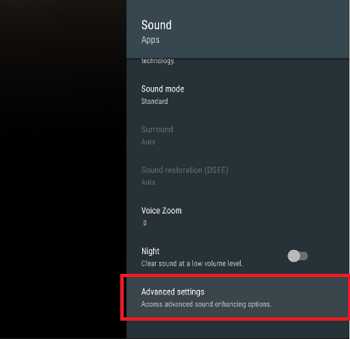
Access your TV’s audio settings menu and select the appropriate audio output source. Choose the option that corresponds to the port you connected your soundbox to (e.g., HDMI ARC, optical, RCA).
2. Sound Modes
Experiment with the different sound modes available on your soundbox to find the one that suits your preferences. Modes like Movie, Music, or Game can enhance the audio experience based on the content you’re watching.
3. Sound Sync
Some soundboxes offer sound sync features to align audio and video playback. If you notice any audio lag or sync issues, consult your soundbox’s manual to adjust the settings accordingly.
4. Troubleshooting
If you encounter any issues during setup or while using your soundbox, consult the troubleshooting section of the instruction manual. Common problems like no sound, audio dropouts, or incorrect connections can often be resolved by following the troubleshooting steps provided.
Connecting a soundbox to your TV is a straightforward process that can significantly enhance your audio experience. By understanding the different types of soundboxes available, the various connectivity options, and the necessary setup steps, you’re well-equipped to enjoy immersive sound while watching your favorite content. Remember to refer to the user manuals for your specific TV and soundbox models for detailed instructions and troubleshooting tips. So, go ahead, connect your soundbox, sit back, and immerse yourself in a world of spectacular sound!
How to Connect Speaker to Tv using RCA
Frequently Asked Questions
How do I connect a soundbox to my TV?
To connect a soundbox to your TV, follow these steps:
What cables do I need to connect a soundbox to my TV?
The cables you need to connect a soundbox to your TV will depend on the available ports on both devices. Most common options include HDMI, optical audio, RCA, or 3.5mm audio cables. Check the available ports on your TV and soundbox, and choose the appropriate cables accordingly.
Can I connect a soundbox wirelessly to my TV?
Yes, you can connect a soundbox wirelessly to your TV if both devices support Bluetooth or Wi-Fi connectivity. Check the user manuals of your TV and soundbox to see if they have these features. If they do, follow the instructions provided to establish a wireless connection between the two devices.
How do I change the audio output on my TV to the connected soundbox?
To change the audio output on your TV to the connected soundbox, go to the audio settings menu on your TV. Look for an option related to audio output or speakers. Select the soundbox as the audio output device, and save the changes. The TV will then route the audio to the connected soundbox.
Why is there no sound coming from my TV after connecting the soundbox?
If there’s no sound coming from your TV after connecting the soundbox, check the following:
1. Ensure that the soundbox and TV are properly connected with the correct cables.
2. Make sure the volume on both the TV and soundbox is turned up.
3. Verify that the TV’s audio output is set to the connected soundbox.
4. Confirm that the soundbox is powered on and working correctly.
If the issue persists, refer to the user manuals of your TV and soundbox for troubleshooting steps specific to your devices.
Do I need any additional settings or adjustments after connecting a soundbox to my TV?
In most cases, connecting a soundbox to your TV should be a straightforward process. However, depending on your TV’s settings, you may need to adjust the audio synchronization or enable specific audio features for optimal sound performance. Review the user manuals of your TV and soundbox for any additional settings or adjustments that may enhance your audio experience.
Final Thoughts
To connect a soundbox to your TV, follow these simple steps. First, locate the audio output on your TV, usually labeled as “Audio Out” or “Digital Out.” Next, determine the type of audio cable required to connect the TV to the soundbox, either RCA, HDMI, or optical cable. Once you have the necessary cable, plug one end into the TV’s audio output and the other end into the corresponding input on the soundbox. Finally, adjust the sound settings on your TV to ensure the sound is routed through the soundbox. Now you can enjoy an enhanced audio experience while watching your favorite shows and movies.

