


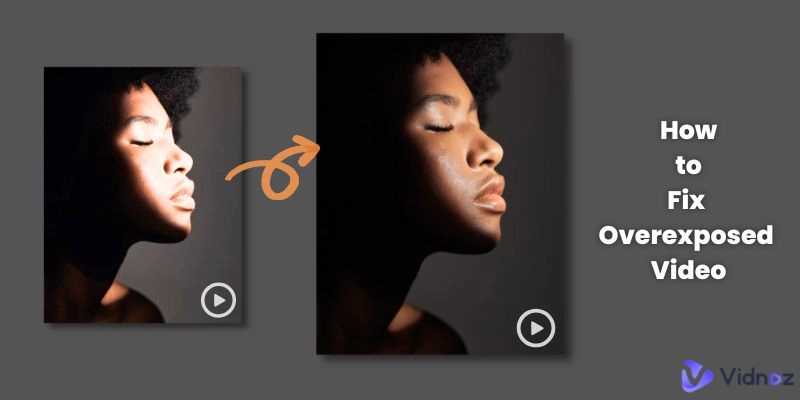
If your webcam is making your face look washed out or your background too bright, don’t worry—there’s an easy fix! Adjusting your webcam settings, controlling the lighting, or using software tools can quickly resolve overexposure issues. Start by reducing the exposure or brightness in your webcam’s settings, and make sure your environment isn’t overly lit. Using soft, diffused lighting can also help prevent highlights from blowing out. These simple tweaks will give you a clearer, more natural-looking image in no time.
Overexposed highlights on your webcam can ruin your video quality and make you appear unprofessional or unrecognizable. To fix this, you need to adjust your camera’s exposure settings, improve your lighting setup, or use editing software to tweak the image after recording. These quick solutions can significantly enhance your webcam’s performance, ensuring you look your best during video calls or recordings.

How to Fix Overexposed Webcam Highlights
Overexposed highlights on your webcam can make your video look washed out and reduce visibility. It happens when too much light hits the camera sensor, causing bright areas to lose detail. Fixing this issue can improve your video quality instantly.
Understanding Why Overexposed Highlights Occur
Overexposure happens when the camera’s exposure settings are too high. Bright light sources like windows or lamps can overwhelm the sensor, leading to blown-out highlights. Knowing the cause helps in choosing the right fix.
Common causes include incorrect camera settings, poor lighting conditions, or auto-exposure adjustments that don’t suit your environment. Recognizing these helps you take targeted steps to fix overexposure.
Adjusting Webcam Settings Manually
Using Built-in Camera Software
Many webcams come with software that allows manual control of exposure and brightness. Open your webcam software or app and look for settings like exposure, brightness, contrast, or highlights. Reduce the exposure or brightness sliders to lessen overexposure.
- Start with small adjustments to see how the video changes.
- Turn off auto-exposure if possible to prevent the camera from auto-adjusting back to overexposed levels.
Adjusting Exposure and Brightness
Find the exposure control and lower it gradually. Reducing exposure allows less light to hit the sensor, which helps retain detail in bright areas. Similarly, decreasing brightness can help darken overly bright regions.
| Settings | How to Adjust | Effect |
|---|---|---|
| Exposure | Lower the slider or toggle manual mode | Reduces light hitting the sensor |
| Brightness | Decrease brightness levels | Darkens overly bright areas |
| Contrast | Adjust for better balance | Enhances image details |
Using Streaming or Conferencing Software Settings
If your webcam software doesn’t provide enough control, check the settings in your video conferencing app like Zoom, Skype, or Teams. These platforms often have options to adjust video appearance in real-time.
- Search for video or camera settings in the app menu.
- Disable auto-enhance features that may cause overexposure.
- Manually lower the exposure or brightness if available.
Optimizing Your Lighting Environment
Controlling Light Sources
Adjust the placement and intensity of your lights to avoid bright spots directly hitting your webcam. Using curtains or blinds to diffuse sunlight reduces harsh lighting. Adding soft, indirect light creates a more balanced environment.
- Position bright lights behind or to the sides of the camera.
- Use lamps with dimmer switches to control brightness.
- Avoid placing strong light sources directly behind you.
Using Diffusers and Reflectors
Diffusers soften intense light, making it less likely to cause overexposure. Reflectors bounce light evenly across your face, creating a uniform glow.
- Place a sheer curtain or white cloth in front of bright lights.
- Use a reflective surface like a whiteboard or foam board to bounce light.
- Experiment with different diffuser materials for best results.
Proper Webcam Placement for Better Exposure
Position your webcam at eye level and avoid pointing it directly towards bright objects or windows. Keep the background evenly lit to minimize high-contrast areas that can cause exposure issues.
- Make sure your face is well-lit but not overexposed.
- Adjust the angle to prevent sunlight from hitting the lens directly.
- Ensure the background is not overly dark or bright compared to your face.
Utilizing External Hardware to Improve Video Quality
Investing in Better Lighting Equipment
Good lighting is key to balancing exposure. Consider purchasing ring lights or softboxes that provide even, adjustable illumination. They help reduce reliance on environmental lighting alone.
Using a Capture Card with Manual Controls
For high-end webcams or external capture devices, you can access advanced settings. These tools often allow precise control over exposure and gain, giving you better management of highlights.
Applying Post-Processing Techniques
Editing Your Video Before Sharing
If you record videos, use editing software to correct overexposed highlights. Tools like Adobe Premiere or DaVinci Resolve have controls for highlights, shadows, and exposure to fine-tune the image.
Using Real-Time Video Filters
Some streaming platforms offer filters to help reduce brightness and enhance details. Applying these filters during live sessions can mitigate overexposure issues.
Preventive Tips for Future Webcam Sessions
- Always test your video setup before important calls.
- Adjust lighting and camera settings in advance.
- Keep your environment evenly lit for consistent exposure.
Regular maintenance of your webcam and updates to drivers or software can prevent exposure problems caused by outdated firmware. Staying proactive ensures your video quality remains high every time you go live.
By understanding each aspect of webcam exposure, from hardware adjustments to environment management, you can significantly improve your video quality. Small changes make a big difference in clarity and overall appearance during your online meetings or recordings.
How To Fix OVEREXPOSED Video In Premiere Pro
Frequently Asked Questions
What steps can I take to reduce overexposure caused by bright backlighting?
If your webcam captures overexposed highlights due to bright backlighting, adjust the position of your light sources or move closer to a natural light source. You can also use curtains or diffuse panels to soften the light coming from behind. Additionally, lowering the overall room lighting or turning off certain lights can help balance the exposure and prevent overexposure of your webcam feed.
How can I manually adjust camera settings to prevent highlights from overexposing?
Access your webcam’s settings through the software you use for video calls or recording. Reduce the exposure setting or shutter speed to limit the amount of light captured. If available, adjust the gain and brightness controls to find a balanced image. Making these changes ensures that bright highlights are controlled, and your video appears more evenly exposed.
Are there specific hardware or software tools that help manage overexposed highlights?
Yes, many webcams come with built-in features like auto-exposure and highlight control, which can be enabled within the device settings. External software such as OBS Studio or ManyCam offers manual controls for exposure, gain, and tone mapping. Using these tools allows you to fine-tune the settings and achieve a better-balanced image, reducing overexposed highlights effectively.
What role does camera positioning play in preventing overexposure issues?
Placing your webcam at an angle that minimizes direct light sources or glare helps prevent overexposure. Position the camera away from bright windows or lights, and face the light source instead of having it behind you. You can also lower the camera height or adjust the framing to ensure that bright areas do not dominate the visual field, resulting in a more balanced exposure.
Can adjusting the environment lighting help fix overexposed highlights on a webcam?
Absolutely. Modifying the lighting environment can significantly reduce overexposure. Use diffused or softer lighting to eliminate harsh highlights. If possible, turn off or dim overly bright lights and optimize the placement of light sources to create a more even illumination. These adjustments help your webcam capture more detailed and natural-looking images without blown-out highlights.
Final Thoughts
To fix overexposed webcam highlights, adjust the exposure settings manually or lower the brightness in your webcam software. Using neutral lighting and avoiding direct light sources helps balance the image. You can also try switching to a different lighting setup or repositioning your webcam.
In conclusion, understanding how to fix overexposed webcam highlights involves tweaking your exposure, lighting, and webcam position for optimal results. These small adjustments can significantly improve your video quality and ensure a clearer, well-balanced image.



