


Is your computer webcam not working? This guide walks you through easy fixes like checking connections, updating drivers, adjusting privacy settings, and troubleshooting software conflicts. Get your webcam working again in minutes!
Key Takeaways
- Check physical connections first: Ensure your webcam is properly plugged in or enabled if built-in.
- Update or reinstall webcam drivers: Outdated or corrupted drivers are a common cause of webcam failure.
- Adjust privacy settings: Windows and macOS block camera access by default for security—make sure apps have permission.
- Test with multiple apps: Determine if the issue is app-specific or system-wide.
- Restart your computer: A simple reboot can resolve temporary glitches affecting hardware detection.
- Check for conflicting software: Antivirus or other camera apps may interfere with webcam functionality.
- Use built-in troubleshooters: Windows and macOS offer automated tools to detect and fix camera issues.
Quick Answers to Common Questions
Is your webcam working in one app but not another?
Check the app’s video settings and ensure it has camera permission in your OS privacy settings.
Why does my webcam show a black screen?
This is often due to blocked access or outdated drivers. Update your drivers and verify app permissions.
Can antivirus software block my webcam?
Yes, some antivirus programs include webcam protection features. Temporarily disable them to test.
How do I clean my webcam lens?
Use a soft, dry microfiber cloth. Avoid liquids—gently wipe in a circular motion to remove dust or smudges.
Should I buy a new webcam if it’s not working?
Try all troubleshooting steps first. If the hardware is faulty, a new webcam is a cost-effective upgrade.
How to Fix Webcam in Computer
Is your webcam showing a black screen, not being detected, or refusing to work in video calls? Don’t worry—webcam issues are common and often easy to fix. Whether you’re using a built-in laptop camera or an external USB webcam, this step-by-step guide will help you diagnose and resolve the problem quickly. You’ll learn how to check hardware, update software, adjust settings, and troubleshoot conflicts so you can get back to video conferencing, streaming, or recording in no time.
Step 1: Check Physical Connections and Hardware
Before diving into software fixes, make sure the issue isn’t physical. For external webcams, unplug and reconnect the USB cable to ensure a secure connection. Try a different USB port—sometimes ports fail or provide insufficient power. If you’re using a laptop, check if the built-in webcam is enabled. Some laptops have a physical switch or function key (like Fn + F10) to disable the camera for privacy.
Visual guide about How to Fix Webcam in Computer
Image source: in.kapilarya.com
Test on Another Device
If possible, plug your external webcam into another computer. If it works there, the issue is likely with your original computer’s settings or drivers. If it doesn’t work anywhere, the webcam itself may be faulty.
Step 2: Restart Your Computer
A simple restart can resolve temporary glitches. Restarting refreshes system processes, reinitializes hardware, and clears minor software conflicts. After rebooting, open your preferred video app (like Zoom, Skype, or Camera) and test the webcam again.

Visual guide about How to Fix Webcam in Computer
Image source: maketecheasier.com
Step 3: Check Camera Privacy Settings
Modern operating systems restrict camera access for security. If apps can’t access your webcam, it may appear offline or black.
Visual guide about How to Fix Webcam in Computer
Image source: in.kapilarya.com
On Windows 10/11
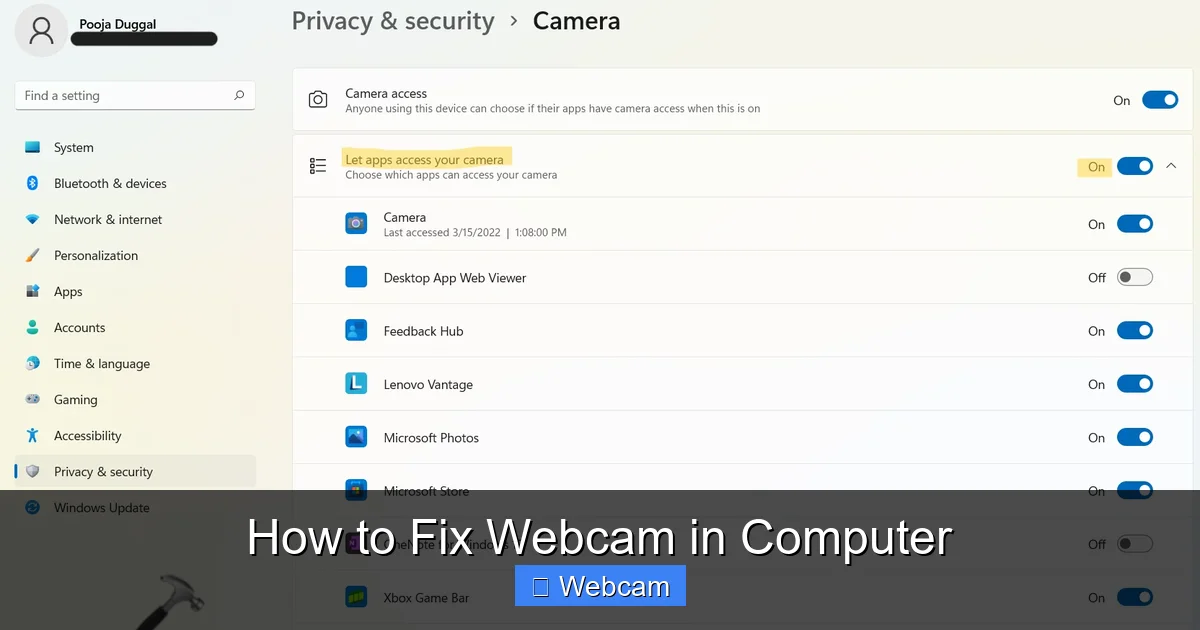
- Go to Settings > Privacy & security > Camera.
- Make sure Camera access is turned on.
- Scroll down to Let apps access your camera and toggle it on.
- Check the list below and ensure your video app (e.g., Zoom, Microsoft Teams) has permission.
On macOS
- Open System Settings > Privacy & Security > Camera.
- Unlock the padlock to make changes.
- Ensure your video app is checked in the list.
Note: Some apps request camera permission only when first used. If you denied access accidentally, revisit these settings to re-enable it.
Step 4: Update or Reinstall Webcam Drivers
Outdated, missing, or corrupted drivers are a leading cause of webcam failure. Updating them often restores functionality.
On Windows
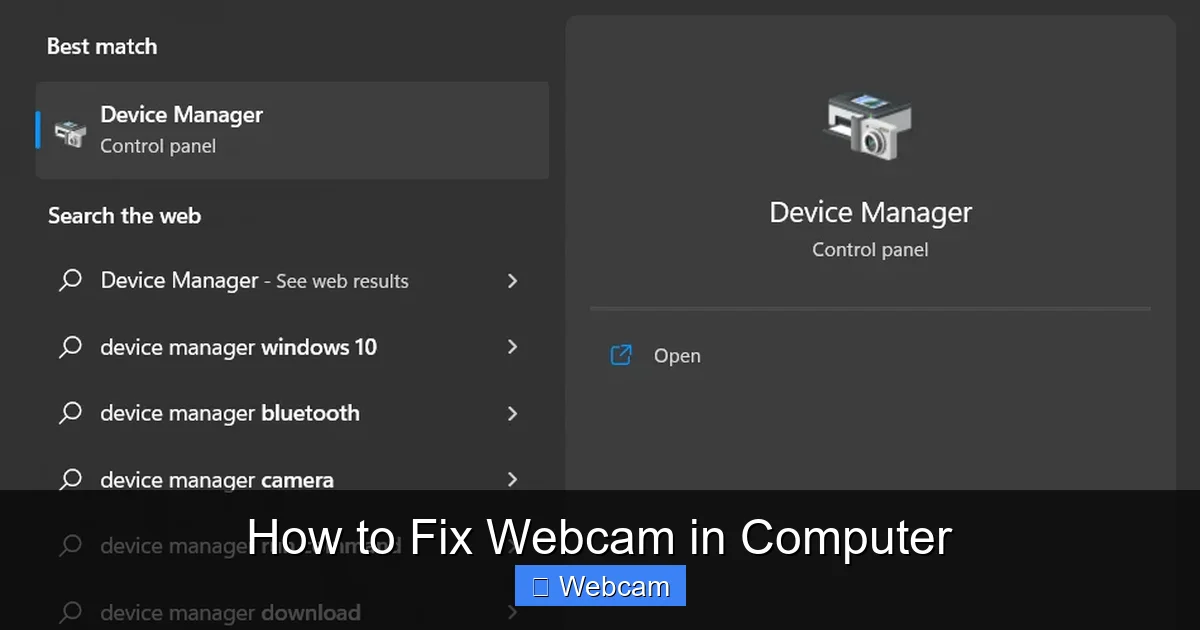
- Press Windows + X and select Device Manager.
- Expand Cameras or Imaging devices.
- Right-click your webcam and select Update driver.
- Choose Search automatically for drivers and follow prompts.
If updating doesn’t work, try reinstalling:
- Right-click the webcam in Device Manager and select Uninstall device.
- Restart your computer. Windows will automatically reinstall the driver.
On macOS
macOS handles drivers automatically, but you can reset system management:
- Restart your Mac and hold Command + Option + P + R for 20 seconds to reset NVRAM.
- This can resolve hardware detection issues.
Step 5: Test with Multiple Applications
Open different apps that use the camera—like the built-in Camera app on Windows or Photo Booth on Mac—to see if the issue is app-specific. For example, if Zoom doesn’t detect the camera but the Camera app does, the problem lies with Zoom’s settings or permissions, not the hardware.
Check App-Specific Settings
- In Zoom: Go to Settings > Video and select your webcam from the dropdown.
- In Skype: Click the gear icon > Audio & Video and choose the correct camera.
Step 6: Run Built-In Troubleshooters
Both Windows and macOS offer automated tools to detect and fix camera problems.
Windows Camera Troubleshooter
- Go to Settings > System > Troubleshoot > Other troubleshooters.
- Find Camera and click Run.
- Follow the on-screen instructions to detect and fix issues.
macOS Diagnostics
- Restart your Mac and hold D during startup to run Apple Diagnostics.
- This checks hardware, including the camera, for faults.
Step 7: Check for Conflicting Software
Antivirus programs, VPNs, or other camera-related apps (like OBS or ManyCam) can block or hijack your webcam. Temporarily disable third-party antivirus software or camera enhancers to see if the webcam starts working.
Close Background Apps
- Open Task Manager (Ctrl + Shift + Esc) on Windows or Activity Monitor on Mac.
- End tasks for any apps that might use the camera.
- Restart your video app and test again.
Step 8: Check for Windows or macOS Updates
Operating system updates often include driver improvements and bug fixes. Make sure your system is up to date.
On Windows
- Go to Settings > Windows Update and click Check for updates.
On macOS
- Open System Settings > General > Software Update.
Step 9: Reset or Reinstall Problematic Apps
If only one app can’t access the camera, try resetting it:
On Windows
- Go to Settings > Apps > Installed apps.
- Find the app, click the three dots, and select Advanced options.
- Click Reset to restore default settings.
On macOS
- Delete the app and reinstall it from the App Store or official website.
Step 10: Consider Hardware Failure
If none of the above steps work, the webcam may be physically damaged. For laptops, contact the manufacturer for repair options. For external webcams, consider replacing them—many affordable, high-quality models are available online.
Troubleshooting Common Webcam Issues
- Black screen: Usually a driver or permission issue. Update drivers and check privacy settings.
- Webcam not detected: Try a different USB port or restart the computer.
- Blurry or poor quality: Clean the lens with a microfiber cloth and check lighting.
- Flickering or freezing: Close other apps using the camera and reduce video resolution in app settings.
Conclusion
Fixing a webcam in your computer doesn’t have to be complicated. Start with the basics—checking connections, restarting, and verifying permissions—then move to driver updates and troubleshooting tools. Most issues are software-related and solvable in minutes. If your webcam still doesn’t work after trying these steps, it may be time for a replacement. With this guide, you’re equipped to handle the most common webcam problems and get back to clear, reliable video communication.



