


If your webcam is not detected, it can be incredibly frustrating, especially when you need it for work or connecting with loved ones. This comprehensive guide provides easy-to-follow, step-by-step instructions to diagnose and fix common issues. You’ll learn how to check physical connections, verify privacy settings, update drivers, and troubleshoot software conflicts to get your webcam working again quickly and efficiently.
How to Fix Webcam Not Detected
There’s nothing quite as annoying as needing your webcam for a video call, online meeting, or just to chat with friends, only to find that your webcam is not detected by your computer. It’s a common problem that can stem from a variety of causes, ranging from simple loose connections to more complex driver conflicts or software settings. Don’t worry, you’re not alone, and in most cases, it’s a fixable issue!
This comprehensive guide will walk you through every possible solution, from the easiest initial checks to more advanced troubleshooting steps. We’ll help you pinpoint why your webcam is not detected and get it up and running again. So, let’s dive in and get your camera back online!
Key Takeaways
- Start with Basics: Always begin by checking physical connections, privacy settings, and simply restarting your computer, as these often resolve the “webcam not detected” issue.
- Device Manager is Key (Windows): For driver-related problems, the Device Manager is your primary tool. You can enable, update, roll back, or even reinstall drivers there.
- Privacy Settings Matter: Operating system privacy settings (like in Windows 10/11) can block apps from accessing your webcam, making it seem like your webcam is not detected. Always verify these settings.
- Keep Software Updated: Ensure your operating system and webcam drivers are up to date. Outdated software is a common cause of detection problems.
- External Webcam Checks: If using an external webcam, try different USB ports and test it on another computer to rule out port issues or a faulty device.
- Built-in Webcam Specifics: For integrated webcams, check for physical privacy shutters, keyboard hotkeys, or settings within your computer’s BIOS/UEFI.
- System Restore as a Last Resort: If all else fails, a System Restore can revert your computer to a previous state where the webcam was working, but always back up important data first.
Step 1: Start with the Basics – Initial Checks
Before diving into complex solutions, it’s always smart to rule out the simplest possibilities. Many times, a quick check here can resolve the “webcam not detected” problem quickly.
Check Physical Connections (External Webcams)
If you’re using an external USB webcam, the first thing to do is ensure it’s properly connected. It might sound obvious, but a loose cable is a common culprit when a webcam is not detected.
- Unplug and Re-plug: Gently unplug your webcam’s USB cable from your computer and then plug it back in firmly. Listen for the sound your computer makes when a new device is connected.
- Check the Cable Itself: Inspect the USB cable for any signs of damage, kinks, or frayed wires. A damaged cable could be preventing detection.
Verify Webcam Privacy Settings
Modern operating systems, especially Windows 10 and 11, have built-in privacy settings that can block applications from accessing your webcam. If your webcam is not detected, these settings are a prime suspect.
- For Windows 10/11:
- Go to “Settings” (Windows Key + I).
- Click on “Privacy & security” (Windows 11) or “Privacy” (Windows 10).
- In the left-hand menu, scroll down and click on “Camera” under “App permissions.”
- Ensure that “Camera access” or “Allow apps to access your camera” is turned “On.”
- Scroll down further and make sure “Let desktop apps access your camera” is also “On” if you’re using a desktop application.
- Check the list of apps below to ensure the specific app you’re trying to use (e.g., Zoom, Microsoft Teams, Skype) has permission to access your camera.
- For macOS:
- Go to “System Settings” (macOS Ventura or later) or “System Preferences” (earlier versions).
- Click on “Privacy & Security.”
- In the left-hand menu, click on “Camera.”
- Ensure the applications you want to use with your webcam have a checkmark next to them.
Give Your Computer a Quick Restart
It’s the classic IT advice for a reason! A simple restart can often resolve temporary glitches that cause a webcam not detected error. This clears up any memory issues or background processes that might be interfering with your webcam’s functionality.
- Save any open work and then perform a full shutdown and restart of your computer.
- After your computer boots up, try to use your webcam again.
Step 2: Dive into Device Manager (Windows Specific)
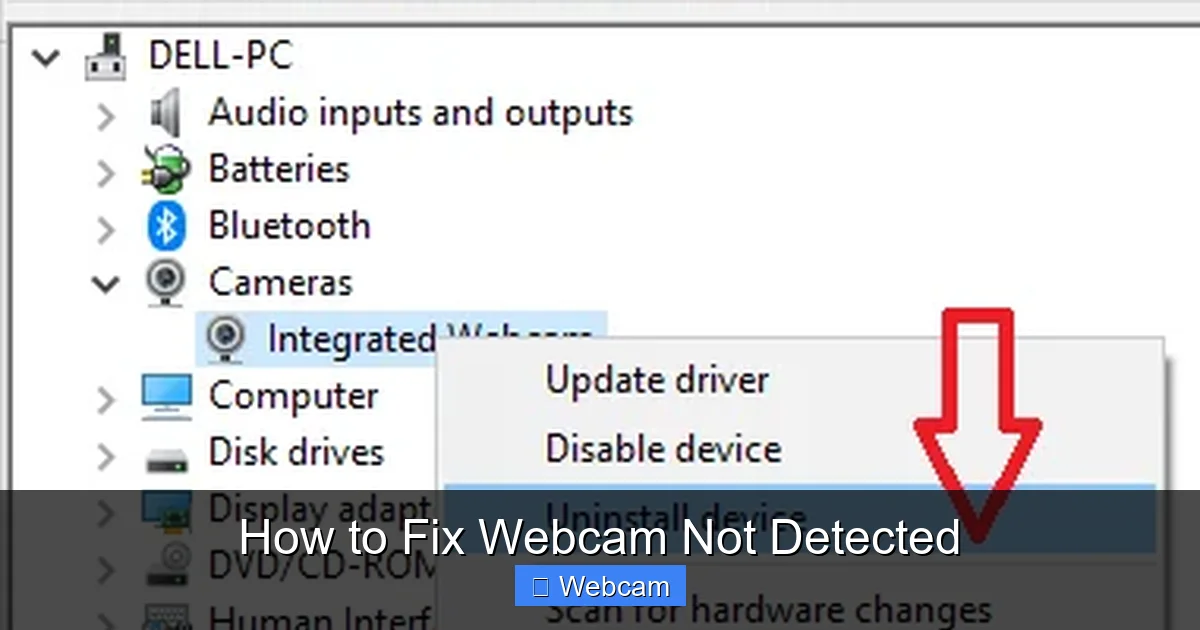
If the basic checks didn’t solve the problem, the Device Manager is your next stop. This tool helps you manage all the hardware connected to your computer, including your webcam. Most driver-related issues that lead to a webcam not detected message can be resolved here.

Visual guide about How to Fix Webcam Not Detected
Image source: fineshare.com
Locate Your Webcam in Device Manager
The first step is to see if your computer even acknowledges the presence of the webcam.
- Press “Windows Key + X” and select “Device Manager” from the power user menu.
- Look for a category called “Cameras,” “Imaging devices,” or “Sound, video and game controllers.” Your webcam should be listed under one of these.
- If you see a yellow exclamation mark next to your webcam, it indicates a problem with the driver. If you don’t see your webcam at all, click “Action” > “Scan for hardware changes” to see if it appears.
- Sometimes, an unknown device might appear if the webcam driver isn’t installed correctly.
Enable the Webcam If Disabled
It’s possible your webcam was accidentally disabled. If your webcam is not detected, this is an easy fix.
- In Device Manager, locate your webcam.
- Right-click on your webcam device.
- If you see an option like “Enable device,” click it. If it says “Disable device,” then your webcam is already enabled, and you can move on.
Update Your Webcam Drivers
Outdated or corrupted drivers are a very common reason for a webcam not detected issue.
- In Device Manager, right-click on your webcam device.
- Select “Update driver.”
- Choose “Search automatically for drivers.” Windows will try to find and install the latest driver.
- If Windows doesn’t find a new driver, visit the manufacturer’s website (e.g., Logitech, Microsoft, your laptop manufacturer like Dell, HP, Lenovo) and download the latest drivers specifically for your webcam model and operating system. Then, go back to “Update driver,” select “Browse my computer for drivers,” and point it to the downloaded file.
Roll Back Webcam Drivers
Sometimes, a recently updated driver can be faulty or incompatible, causing your webcam not detected error. Rolling back to a previous version can help.
- In Device Manager, right-click on your webcam device.
- Select “Properties.”
- Go to the “Driver” tab.
- If the “Roll Back Driver” button is active, click it and follow the prompts.
Uninstall and Reinstall Webcam Drivers
This is a more aggressive step, but it often resolves stubborn driver conflicts. When you uninstall, Windows will usually reinstall a generic driver or allow you to install the manufacturer’s driver from scratch when you restart.
- In Device Manager, right-click on your webcam device.
- Select “Uninstall device.”
- If prompted, check the box to “Delete the driver software for this device.” This is important for a clean reinstall.
- Restart your computer. Windows should automatically detect the webcam and attempt to install a new driver. If not, go back to “Update driver” as described above, or manually install the driver from the manufacturer’s website.
Step 3: Software and System Solutions
Sometimes, the issue isn’t directly with the webcam or its drivers, but with other software or system settings.

Visual guide about How to Fix Webcam Not Detected
Image source: fineshare.com
Check for System Updates
Operating system updates often include new drivers and bug fixes that can resolve hardware compatibility issues, preventing your webcam from being detected.
- For Windows: Go to “Settings” > “Update & Security” (Windows 10) or “Windows Update” (Windows 11) and click “Check for updates.”
- For macOS: Go to “System Settings” > “General” > “Software Update.”
- Install any pending updates and restart your computer.
Troubleshoot Antivirus or Firewall Software
Security software can sometimes be overprotective and block legitimate hardware access. If your webcam is not detected, temporarily disabling your antivirus or firewall might reveal if it’s the cause.
- Temporarily disable your antivirus software (refer to its specific instructions).
- Test your webcam. If it works, you’ll need to add an exception for your webcam or the applications that use it in your antivirus settings.
- Remember to re-enable your antivirus afterward for your computer’s safety.
Test with Another Application
Is the problem specific to one application, or is your webcam not detected by any software? Try using a different application to test your webcam.
- Use Windows’ built-in “Camera” app, or try a different video conferencing tool like Zoom, Skype, or Google Meet in your web browser.
- If it works in one app but not another, the problem might be with the specific application’s settings, not the webcam itself.
Run a Troubleshooter (Windows)
Windows has built-in troubleshooters that can automatically diagnose and fix common problems.
- Go to “Settings” > “Update & Security” (Windows 10) or “System” > “Troubleshoot” (Windows 11).
- Click “Additional troubleshooters” (Windows 10) or “Other troubleshooters” (Windows 11).
- Look for a troubleshooter related to “Camera” or “Video Playback” and run it.
Test in Safe Mode (Windows)
Starting Windows in Safe Mode loads only essential drivers and services. If your webcam is not detected due to a conflict with third-party software, it might work in Safe Mode, helping you isolate the issue.
- Restart your PC while holding down the Shift key to enter the Advanced Startup Options.
- Navigate to “Troubleshoot” > “Advanced options” > “Startup Settings” > “Restart.”
- After restarting, select “Enable Safe Mode with Networking.”
- Once in Safe Mode, try using your webcam. If it works, a recently installed program or driver is likely causing the conflict.
Step 4: Specific Checks for External Webcams
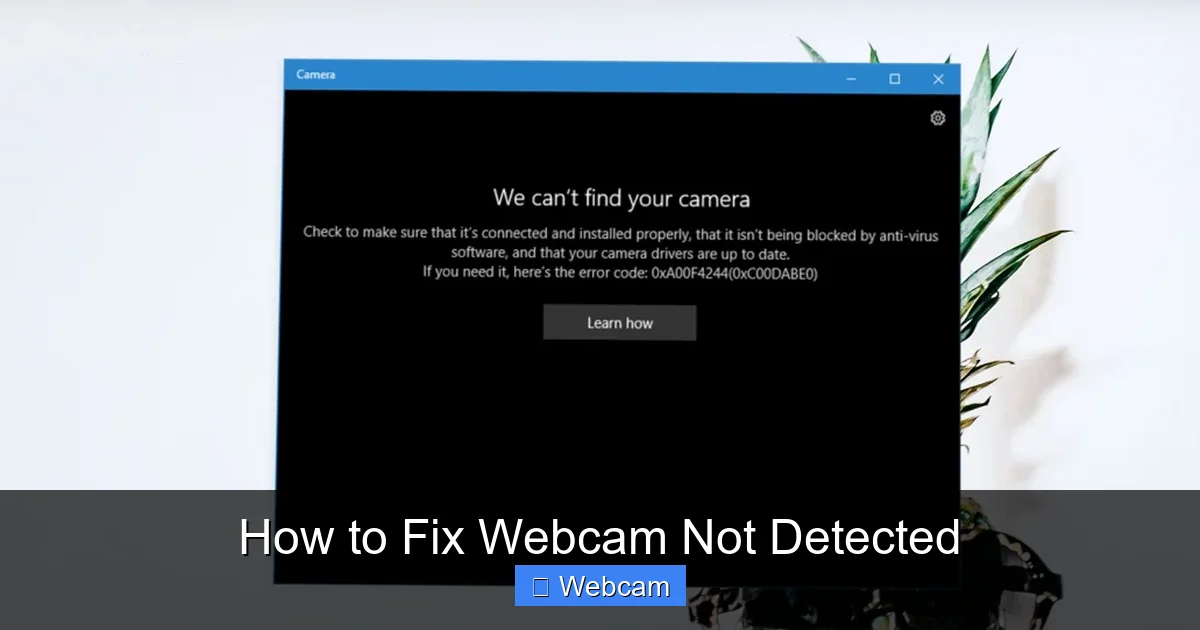
If you’re using an external webcam and it’s still not detected, consider these additional steps.
Visual guide about How to Fix Webcam Not Detected
Image source: fineshare.com
Try a Different USB Port
A faulty USB port can be the reason your webcam is not detected. Try plugging your webcam into a different USB port on your computer, ideally a USB 3.0 port (often blue inside) if available, or a port directly on your computer’s motherboard (for desktops).
Test the Webcam on Another Computer
This is crucial for determining if the problem lies with your webcam or your computer. If your webcam is not detected on another computer as well, then the webcam itself is likely faulty and may need replacement. If it works on another computer, then the problem is definitely with your primary PC.
Step 5: Specific Checks for Built-in Webcams
Integrated webcams on laptops have their own set of potential issues.
Look for a Physical Shutter or Hotkey
Many laptops come with privacy features that can physically block or electronically disable the webcam. If your webcam is not detected, check for these.
- Physical Shutter: Some laptops have a tiny sliding cover directly over the webcam lens. Make sure it’s open.
- Keyboard Hotkey: Look for a function key (often F1-F12) with a webcam icon. You might need to press “Fn” + that function key to toggle the webcam on or off. Refer to your laptop’s manual.
Check BIOS/UEFI Settings
In rare cases, the built-in webcam might be disabled in your computer’s BIOS or UEFI settings. This is more common in business-grade laptops.
- Restart your computer and repeatedly press the key to enter BIOS/UEFI setup (often Del, F2, F10, or F12 – check your manufacturer’s instructions).
- Look for settings related to “Peripherals,” “Integrated Peripherals,” “Onboard Devices,” or “Camera.”
- Ensure the webcam is set to “Enabled.” Be careful not to change other settings you’re unsure about.
- Save changes and exit BIOS/UEFI.
Step 6: Advanced Troubleshooting & Last Resorts
If you’ve tried everything above and your webcam is not detected, these are more drastic steps.
Perform a System Restore
If your webcam stopped working recently, a System Restore can revert your computer’s system files, installed applications, and registry to an earlier point in time when the webcam was working correctly.
- Search for “Create a restore point” in the Windows search bar and open it.
- Click “System Restore…”
- Follow the wizard to choose a restore point before your webcam stopped working.
- Important: System Restore will not affect your personal files, but it will uninstall programs and drivers installed after the restore point was created.
Reinstall Your Operating System (Last Resort)
This is the nuclear option. If you’ve exhausted all other possibilities and confirmed that the webcam hardware itself isn’t faulty (by testing on another PC), a fresh installation of your operating system will typically resolve any software conflicts, driver corruption, or deep-seated issues causing your webcam not detected problem. Always back up all your important data before attempting this.
When to Consider Professional Help
If you’ve gone through all these steps and your webcam is still not detected, especially after testing it on another computer (if external) or ruling out all software issues, it might be a hardware failure. For internal webcams, this could mean a faulty component on the laptop’s motherboard or a damaged internal cable. At this point, it’s best to consult a professional computer technician or your device’s manufacturer for further diagnosis and repair.
Conclusion
It can be frustrating when your webcam is not detected, but as you’ve seen, there are numerous potential solutions. By systematically working through these troubleshooting steps, you significantly increase your chances of getting your webcam back to working order. Most issues are resolved by checking connections, privacy settings, or updating drivers. We hope this guide has helped you diagnose and fix the problem, getting you back to video calls and capturing moments with ease!



