


Want to record just your webcam without capturing your screen? This guide makes it simple. We’ll walk you through using built-in operating system tools, popular free software like *OBS Studio*, and convenient online solutions to capture your face and voice effortlessly. Get ready to create clear, engaging webcam-only videos for any purpose, from tutorials to personal messages.
How to Record Webcam Only
Welcome! Are you looking to create videos where it’s just you, front and center, talking directly to your audience? Maybe you want to record a quick tutorial, a heartfelt message, a vlog, or practice a presentation. The good news is, you don’t need fancy equipment or complex software to make it happen. You simply need to know how to record webcam only.
This comprehensive guide will walk you through everything you need to know to capture your webcam footage with ease. We’ll explore several methods, from using the tools already built into your computer to leveraging powerful free software and convenient online solutions. By the end, you’ll be a pro at creating clear, engaging videos where your face and voice are the stars. Let’s dive in!
Key Takeaways
- Use Built-in Tools for Simplicity: For quick and easy recordings, Windows users can use the *Camera* app, and Mac users can rely on *QuickTime Player*. These are perfect if you just need to record webcam only.
- Leverage Free Software for Control: *OBS Studio* is a powerful, free tool that offers extensive features for higher-quality and more customized webcam-only recordings, including advanced audio and video settings.
- Explore Online Recorders for Convenience: If you prefer not to install software, various web-based tools allow you to record webcam only directly from your browser, often without needing to create an account.
- Prioritize Pre-Recording Preparation: Always check your lighting, audio quality, background, and personal appearance before you hit record. A little preparation goes a long way in producing professional-looking videos.
- Always Do a Test Recording: Before starting your main video, do a short test to ensure your camera, microphone, and settings are working correctly. This helps prevent frustration and re-recording later.
- Understand Export and File Settings: Pay attention to your video resolution, frame rate, and file format. Choosing appropriate settings can balance video quality with manageable file sizes, especially when you record webcam only.
Your Pre-Recording Checklist: Getting Ready to Record Webcam Only
Before you hit that record button, a little preparation can significantly improve the quality of your video. Taking a few moments to set things up properly can make all the difference when you aim to record webcam only.
Check Your Environment
Lighting: Good lighting is crucial. Natural light from a window is often best. Position yourself facing the window, not with the window behind you (this creates a silhouette). If natural light isn’t available, use a soft, diffused light source like a ring light or desk lamp positioned slightly above and in front of you. Avoid harsh overhead lighting that casts shadows.
Optimize Your Audio
Microphone Quality: While your webcam often has a built-in mic, an external microphone (even an affordable lavalier mic or a good headset) will significantly improve your sound quality. Test your microphone beforehand to ensure it’s picking up your voice clearly and that there’s no background noise.
Quiet Space: Find a quiet environment where you won’t be interrupted. Close windows, turn off noisy appliances, and inform others in your household that you’re recording. Eliminating distractions helps you focus and keeps your audio clean when you record webcam only.
Set the Scene
Background: Choose a clean, uncluttered background. A plain wall, a bookshelf, or a tidy workspace works well. Avoid distracting items or messy areas that can draw attention away from you.
Camera Position: Position your webcam at eye level. This creates a more natural and engaging connection with your viewers. You can use books or a small tripod to adjust its height.
Personal Readiness
Appearance: Look presentable, as if you’re meeting someone in person. What you wear can impact how you’re perceived. Ensure your hair is tidy and your face is well-lit.
Energy and Confidence: Practice what you’re going to say. Even if you don’t have a script, having key points in mind helps you speak confidently and naturally. Remember to smile!
Do a Test Recording
This is arguably the most important step. Record a short clip (30-60 seconds) of yourself. Play it back to check your audio, video, lighting, and background. Are you centered? Is the sound clear? Does your lighting look good? Fix any issues before you start your main recording. This quick check ensures your efforts to record webcam only yield high-quality results.
Method 1: Using Built-in Tools to Record Webcam Only
Your computer likely has tools already installed that can easily record webcam only. These are often the quickest and simplest options for basic recordings.
How to Record Webcam Only on Windows (Windows Camera App)
Windows 10 and 11 come with a built-in *Camera* app that can record both photos and videos using your webcam.
Step 1: Open the Camera App
Click on the Start menu and type “Camera.” Select the *Camera* app from the search results to open it. If it’s your first time, you might need to grant permission for the app to access your camera and microphone.
Visual guide about How to Record Webcam Only
Image source: techviral.net
Step 2: Switch to Video Mode
By default, the *Camera* app might open in photo mode. Look for the “Video” icon (usually a small camcorder or play button icon) on the right side of the window. Click it to switch to video recording mode.
Step 3: Configure Settings (Mic, Resolution)
Before you record webcam only, you might want to check a few settings. Look for the gear icon (settings) in the top-left corner. Here, you can select which microphone to use if you have multiple, and sometimes adjust video quality or resolution. Ensure your preferred microphone is selected.
Step 4: Start Recording
Once you’re in video mode and your settings are good, click the large video recording button (often a white circle with a red dot) to start capturing your webcam footage. You’ll see a timer appear, indicating that you are now recording.
Step 5: Stop and Access Your Video
When you’re finished, click the recording button again to stop. Your video will automatically be saved to your computer’s “Camera Roll” folder, typically found within your “Pictures” library. You can click on the small thumbnail that appears in the bottom right corner of the *Camera* app to quickly view your recording.
How to Record Webcam Only on Mac (QuickTime Player)
Mac users have an equally straightforward option with *QuickTime Player*, a versatile media player that also doubles as a screen and webcam recorder.
Step 1: Open QuickTime Player
You can find *QuickTime Player* in your Applications folder or by searching for it using Spotlight (Cmd + Space, then type “QuickTime Player”). Open the application.
Step 2: Start a New Movie Recording
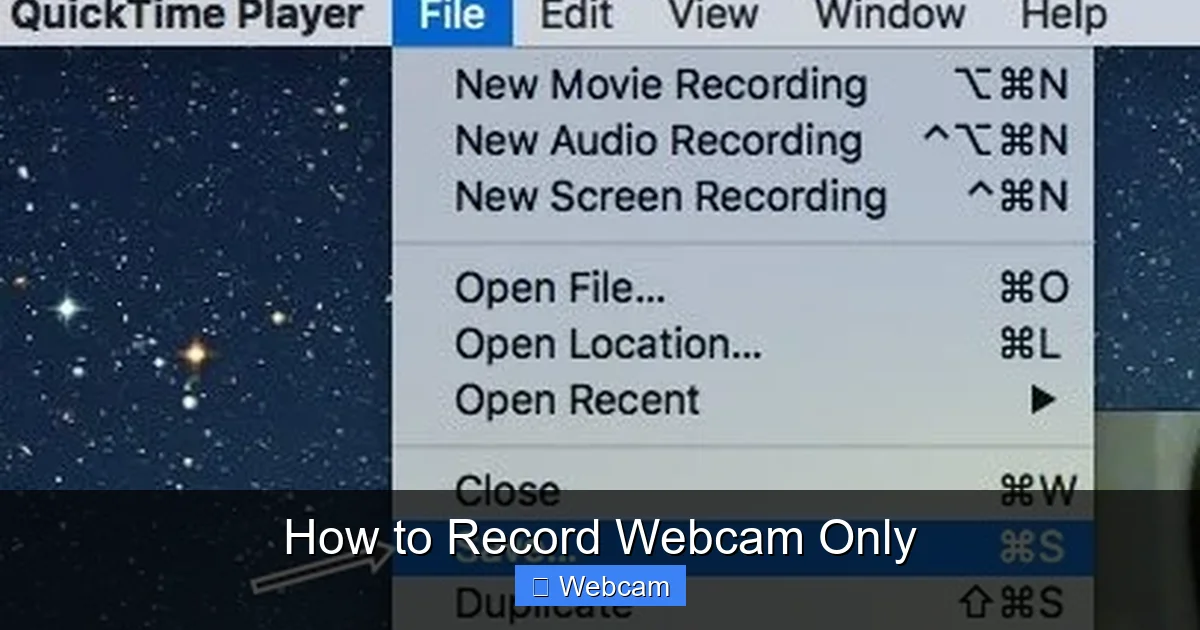
Once *QuickTime Player* is open, go to the top menu bar. Click on “File” and then select “New Movie Recording.” A window showing your webcam feed will appear.
Step 3: Select Your Camera and Microphone
Below the webcam preview window, you’ll see a small arrow pointing down (next to the record button). Click this arrow to open a drop-down menu. Here, you can choose which camera and microphone you want to use if you have multiple options connected to your Mac. Select your preferred webcam and microphone to record webcam only.
Step 4: Adjust Volume and Quality
In the same drop-down menu from Step 3, you can also adjust the recording quality (e.g., High, Maximum). “Maximum” will give you the best quality but result in larger file sizes. There’s also a volume slider to monitor your audio input levels.
Step 5: Begin and End Recording
When you’re ready, click the large red record button in the center of the webcam window to start recording. To stop, click the square stop button (which replaces the record button). A timer will show you the duration of your recording.
Step 6: Save Your Recording
After stopping, the recorded video will open in a *QuickTime Player* window. To save it, go to “File” > “Save” in the menu bar. Choose a file name, select a location on your Mac, and click “Save.” Your Mac will now have the video of you and your voice, ready to share.
Method 2: Using Free Third-Party Software (OBS Studio) to Record Webcam Only
For those who need more control, customization, or higher quality, *OBS Studio* is an excellent free and open-source option. It’s incredibly powerful and widely used by streamers and content creators. While it might seem complex at first, setting it up to record webcam only is quite straightforward.
How to Record Webcam Only with OBS Studio
Step 1: Download and Install OBS Studio
Go to the official *OBS Studio* website (obsproject.com) and download the version for your operating system (Windows, macOS, or Linux). Follow the installation instructions. The auto-configuration wizard might pop up; you can close it for now as we’ll set things up manually.

Visual guide about How to Record Webcam Only
Image source: obsbot-static-resource.oss-accelerate.aliyuncs.com
Step 2: Set Up a New Scene
In *OBS Studio*, everything is organized into “Scenes.” Think of a scene as a container for all your video and audio sources. In the “Scenes” panel (bottom-left), click the “+” button to add a new scene. Give it a descriptive name like “Webcam Only” and click “OK.”
Step 3: Add a Video Capture Device Source
With your “Webcam Only” scene selected, go to the “Sources” panel (next to “Scenes”). Click the “+” button, then choose “Video Capture Device.”
- Select “Create new” and give it a name (e.g., “My Webcam”). Click “OK.”
- In the properties window that appears, select your webcam from the “Device” dropdown list.
- You can adjust settings like Resolution/FPS Type (often “Default” or “Custom” for higher resolutions), Video Format, and Color Space. Experiment to find what works best.
- Click “OK.” Your webcam feed should now appear in the preview window. You can drag its corners to resize it and position it as desired. For a full-screen webcam recording, resize it to fill the entire canvas.
Step 4: Configure Audio Input
Now, let’s make sure your audio is being captured. In the “Sources” panel, click the “+” button again and choose “Audio Input Capture.”
- Select “Create new,” name it (e.g., “My Microphone”), and click “OK.”
- In the properties window, select your microphone from the “Device” dropdown list.
- Click “OK.” You should now see an “Audio Input Capture” entry in the “Audio Mixer” panel. Speak into your mic and watch the green bar move to ensure it’s picking up sound. Adjust the volume slider if needed.
Step 5: Adjust Output Settings
Before you record webcam only, it’s a good idea to check your output settings. Go to “File” > “Settings” (or “OBS” > “Settings” on Mac).
- Output: Go to the “Output” tab. For “Output Mode,” select “Advanced.” Under the “Recording” tab, you can set the “Recording Path” (where your videos are saved), “Recording Format” (MP4 is common and widely compatible), and “Encoder” (hardware encoders like NVENC or AMD H.264 are often better than software x264 if available, as they use less CPU).
- Video: In the “Video” tab, ensure “Base (Canvas) Resolution” and “Output (Scaled) Resolution” match your desired video resolution (e.g., 1920×1080 for Full HD) and that “Common FPS Values” is set to 30 or 60.
- Click “Apply” then “OK” to save your changes.
Step 6: Start and Stop Recording
Once everything is set up, click the “Start Recording” button in the “Controls” panel (bottom-right). You’ll see the button change to “Stop Recording” and a timer will appear. When you’re done, click “Stop Recording.” Your video file will be saved to the path you specified in the settings. This is a robust way to record webcam only with professional results.
Method 3: Using Online Webcam Recorders to Record Webcam Only
If you prefer not to install any software or need a quick recording on a shared computer, online webcam recorders are a fantastic solution. These tools work directly in your web browser.
How to Record Webcam Only Using Online Tools
There are many online options, such as *Clipchamp* (now owned by Microsoft), *Veed.io*, *RecordCast*, or even simpler dedicated webcam recorders. The process is generally very similar across these platforms.
Step 1: Choose an Online Recorder
Open your web browser and search for “online webcam recorder.” Select a reputable website. For example, let’s consider a generic “Online Webcam Recorder” tool.

Visual guide about How to Record Webcam Only
Image source: i.ytimg.com
Step 2: Grant Camera and Microphone Access
When you visit the site, it will typically ask for permission to access your camera and microphone. You’ll see a pop-up in your browser (usually at the top-left). Click “Allow” or “Grant Access” to proceed. Without this, the tool cannot record webcam only.
Step 3: Adjust Settings (if available)
Many online tools offer basic settings like selecting which webcam or microphone to use if you have more than one, or choosing a video resolution. Take a moment to check these options to ensure your desired inputs are selected and the quality is appropriate.
Step 4: Start and Stop Recording
Look for a prominent “Record” button, often red. Click it to start your recording. You’ll usually see a timer counting up. When you’re finished speaking or presenting, click the “Stop” button (which usually replaces the record button).
Step 5: Download Your Video
After stopping, the online tool will process your video. Most services will then provide a download link or button, allowing you to save the recorded footage directly to your computer. Some might offer basic editing features or cloud storage options before downloading.
Pro Tips for Better Webcam Recordings
No matter which method you choose to record webcam only, these tips will help you create more polished and professional-looking videos:
- Maintain Eye Contact: Look directly into your webcam lens, not at your own image on the screen. This creates a more direct and engaging connection with your audience.
- Speak Clearly and Confidently: Enunciate your words and speak at a moderate pace. Project your voice slightly.
- Use a Teleprompter (Optional): If you have a script, consider using a teleprompter app or extension to help you read naturally while looking at the camera.
- Vary Your Expressions and Gestures: Don’t be a robot! Use natural hand gestures and facial expressions to convey emotion and keep viewers engaged.
- Practice Makes Perfect: The more you record, the more comfortable and natural you’ll become in front of the camera. Don’t be afraid to do multiple takes.
- Edit Your Videos: Even simple edits like trimming dead air at the beginning or end can significantly improve your video. Most operating systems come with basic video editors (*Photos* app on Windows, *iMovie* on Mac).
Troubleshooting Common Issues When You Record Webcam Only
Sometimes, things don’t go as planned. Here are solutions to common problems you might encounter:
Webcam Not Detected / Black Screen
- Check Connections: Ensure your external webcam is properly plugged into a USB port. Try a different USB port.
- Grant Permissions: Make sure the app or browser has permission to access your camera. Go to your operating system’s privacy settings (e.g., Windows Settings > Privacy & security > Camera; Mac System Settings > Privacy & Security > Camera).
- Close Other Apps: Only one application can typically use the webcam at a time. Close any other apps that might be using it (e.g., Zoom, Google Meet, Skype).
- Update Drivers: Ensure your webcam drivers are up to date. You can usually do this through your device manager (Windows) or by checking for system updates (Mac).
- Restart Your Computer: A classic solution, but often effective!
No Audio or Poor Audio Quality
- Select Correct Microphone: In your recording software’s settings (or the *Camera* app/ *QuickTime Player* settings), ensure the correct microphone is selected.
- Check Input Levels: Make sure your microphone’s input volume is turned up. Look for an audio mixer in *OBS Studio* or input level sliders in other apps.
- Grant Permissions: Similar to the camera, ensure the app has permission to access your microphone in your OS privacy settings.
- Test Microphone: Use your operating system’s sound settings to test the microphone independently. Speak into it and see if the input level indicator responds.
- Mute/Unmute: Ensure your microphone isn’t physically muted or muted within the software.
Poor Video Quality / Grainy Footage
- Lighting: The most common cause. Improve your lighting as discussed in the pre-recording checklist.
- Resolution Settings: In your recording software, ensure you’ve selected the highest possible resolution for your webcam.
- Webcam Quality: Built-in laptop webcams often have lower quality. An external 1080p or 4K webcam will offer superior results.
- Internet Speed (for online tools): A slow or unstable internet connection can sometimes degrade quality in online recorders.
File Size Too Large
- Resolution and Frame Rate: Recording in 4K at 60fps will produce very large files. Consider reducing the resolution (e.g., to 1080p) or frame rate (e.g., to 30fps) if extremely high quality isn’t essential.
- Compression/Encoding: In *OBS Studio*, using a hardware encoder (like NVENC) and a reasonable bitrate can help manage file size without sacrificing too much quality. For other tools, look for compression options.
- File Format: MP4 is generally a good balance of quality and file size. RAW or uncompressed formats will be massive.
Conclusion
You now have all the knowledge and tools you need to record webcam only with confidence! Whether you opt for the simplicity of built-in applications, the robust features of *OBS Studio*, or the convenience of online recorders, the power to create engaging webcam-only content is in your hands.
Remember, practice makes perfect. Don’t be discouraged if your first few attempts aren’t exactly what you envisioned. Experiment with different settings, improve your lighting, and refine your speaking style. Soon, you’ll be producing clear, professional-looking videos that effectively convey your message. So go ahead, set up your camera, strike a pose, and start creating!



