


Discover the simple steps to switch between webcams on your PC, whether you’re using multiple external cameras or a combination of built-in and external devices. This guide will walk you through managing your camera settings within popular applications like Zoom, Teams, and Google Meet, as well as leveraging your operating system’s camera controls. You’ll learn how to quickly select the perfect camera for any situation, ensuring optimal video quality for your calls and streams.
How to Switch Between Webcams on PC
Having multiple webcams connected to your PC offers incredible flexibility. Maybe you want to use a high-quality external camera for your main video, but keep your laptop’s built-in webcam for quick, informal chats. Perhaps you’re a streamer who needs different camera angles, or a presenter who wants to show both your face and a physical product simultaneously. Whatever your reason, knowing how to switch between webcams on your PC is a valuable skill that enhances your digital communication and content creation.
This comprehensive guide will walk you through everything you need to know about managing and switching between your webcams on a Windows or macOS PC. We’ll cover the most common methods, including how to select cameras within popular applications, adjust settings in your operating system, and troubleshoot any issues you might encounter. By the end of this guide, you’ll be a pro at effortlessly changing your camera setup for any occasion.
Key Takeaways
- Direct App Control: Most video conferencing and streaming applications allow you to switch between webcams directly within their settings menu, offering the most common and straightforward method.
- Operating System Influence: While individual applications usually have their own camera selection, your PC’s operating system (Windows or macOS) can also set a default camera, which some simpler applications might automatically use.
- Universal Process: The fundamental steps to switch between webcams on PC are similar across various applications: look for “Video Settings,” “Camera,” or “Devices” within the app’s preferences or during a live call.
- Check Connections & Drivers: Ensure all webcams are securely connected to your PC and that their drivers are properly installed and up to date for them to be detected.
- Troubleshoot Common Issues: Be prepared to address common problems like webcams not showing up, being “in use” by another application, or displaying poor quality by checking privacy settings and restarting applications.
- Third-Party Software Benefits: For advanced control, virtual camera features, or specific professional setups, consider using dedicated third-party webcam management software.
- Always Test First: Before any important meeting or stream, always take a moment to test your selected webcam and audio to ensure everything is working perfectly.
Before You Begin: Essential Checks
Before you attempt to switch between webcams on your PC, let’s make sure everything is properly set up. Taking these preliminary steps can save you a lot of hassle down the line.
Connect Your Webcams Securely
- USB Connection: Ensure all your external webcams are plugged firmly into your PC’s USB ports. Try different ports if one doesn’t seem to work, or if you’re using a USB hub, make sure it’s powered and functioning correctly.
- Built-in Camera: If you’re using a laptop, your built-in webcam should already be connected internally.
Install Drivers (If Necessary)
- Automatic Installation: Most modern webcams are “plug-and-play,” meaning your PC will automatically detect and install the necessary drivers when you connect them.
- Manual Installation: For some professional-grade webcams or older models, you might need to download and install drivers manually from the manufacturer’s website. Check the packaging or the manufacturer’s support page for instructions.
Check PC Detection
You can quickly check if your PC recognizes all your cameras:
- Windows: Go to Start > Settings > Bluetooth & devices > Cameras. Here, you should see a list of all detected cameras.
- macOS: Open System Settings > General > Privacy & Security > Camera. While this shows apps that have access, you can confirm cameras are detected by opening an app like Photo Booth.
Method 1: Switching Webcams Within Your Applications (Most Common)
The most frequent way to switch between webcams on your PC is directly within the application you’re using. Whether it’s a video conferencing tool, a streaming platform, or a browser-based call, almost all applications with video capabilities offer a camera selection option. Let’s look at some popular examples.

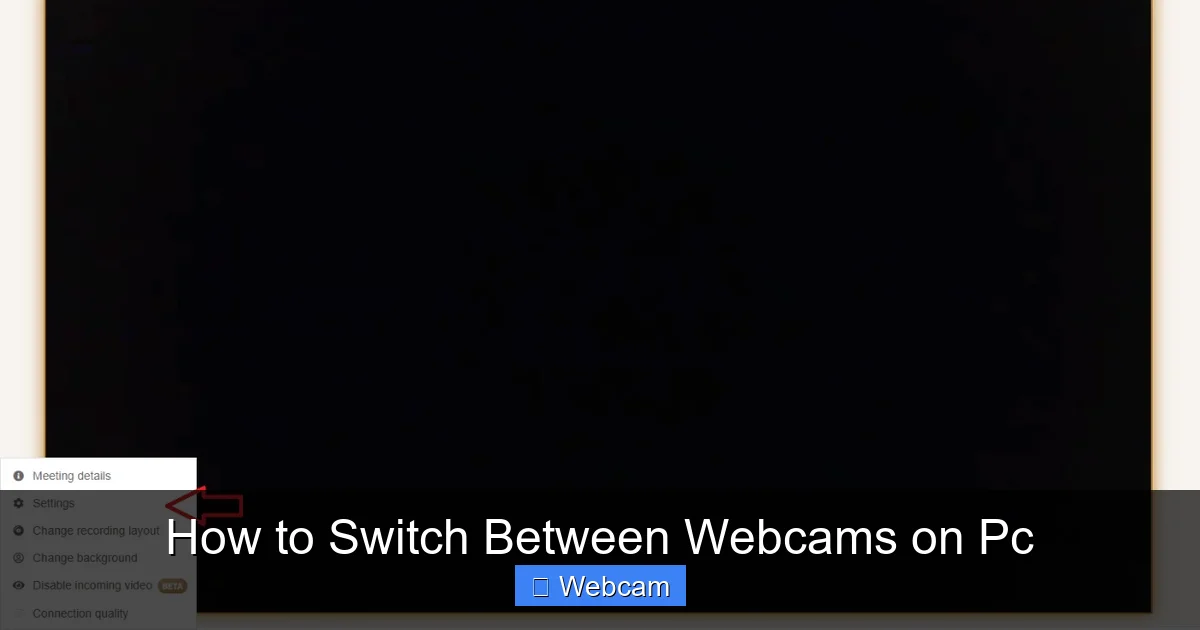
Visual guide about How to Switch Between Webcams on Pc
Image source: i.ytimg.com
How to Switch Webcams in Zoom
Zoom is one of the most widely used video conferencing tools, and it makes switching cameras very easy.
During a Zoom Meeting:
- Join your Zoom meeting.
- Look for the “Stop Video” button in the bottom-left corner of the Zoom window.
- Click the small arrow (^) next to the “Stop Video” button.
- A menu will pop up, displaying a list of all detected cameras under the “Select a Camera” section.
- Click on the name of the webcam you wish to use. The video feed will instantly switch to the selected camera.
Before a Zoom Meeting (Settings):
- Open the Zoom desktop client.
- Click on your profile picture in the top-right corner, then select “Settings.”
- In the Settings window, navigate to the “Video” tab.
- Under the “Camera” section, you’ll see a drop-down menu. Click on it.
- Select your preferred webcam from the list. You’ll see a preview of your video feed. This will set your default camera for future Zoom meetings until you change it again.
How to Switch Webcams in Microsoft Teams
Microsoft Teams also provides a straightforward way to manage your video devices.
During a Teams Call or Meeting:
- While in an active Teams call or meeting, locate the three dots (…) for “More actions” in the meeting control bar.
- Click on “Device settings.”
- In the “Device settings” pane that appears on the right side, find the “Camera” drop-down menu.
- Click the drop-down and select the webcam you want to use. Your video feed will update immediately.
Before a Teams Call (Settings):
- Open the Microsoft Teams desktop client.
- Click on your profile picture in the top-right corner, then select “Settings.”
- In the Settings window, go to the “Devices” tab.
- Under the “Camera” section, you’ll see a drop-down menu. Choose your desired webcam from the list. This camera will be used by default for all your future Teams calls.
How to Switch Webcams in Google Meet
Google Meet, being browser-based, integrates its camera selection directly into the call interface.
During a Google Meet Call:
- Once you’ve joined a Google Meet call, click on the three vertical dots (…) for “More options” in the bottom-right corner of the screen.
- Select “Settings.”
- In the settings pop-up, go to the “Video” tab.
- Under “Camera,” use the drop-down menu to select the webcam you wish to use. The preview window will show your selection.
- Click “Done” to close the settings.
Before a Google Meet Call:
- On the Google Meet pre-join screen, before you click “Join now,” you’ll see a preview of your video.
- Look for the “Settings” (gear) icon next to your video preview.
- Click the icon, go to the “Video” tab, and select your preferred camera from the drop-down menu.
- Close the settings.
How to Switch Webcams in Skype
Skype, a long-standing video communication tool, also offers easy camera switching.
During a Skype Call:
- In an active Skype call, click the “More” (three dots) icon.
- Select “Audio & Video settings.”
- Under the “Camera” section, use the drop-down menu to choose your desired webcam.
Before a Skype Call (Settings):
- Open the Skype desktop application.
- Click on your profile picture, then select “Settings.”
- Go to “Audio & Video.”
- Under the “Camera” section, you’ll find a drop-down menu to select your preferred webcam.
How to Switch Webcams in OBS Studio (for Streamers)
OBS Studio is popular for streaming and recording. Managing multiple cameras here is done through “Sources.”
- Open OBS Studio.
- In the “Sources” dock, click the “+” icon to add a new source.
- Select “Video Capture Device.”
- Choose to “Create new” or “Add existing.” Give it a descriptive name (e.g., “Face Cam,” “Desk Cam”).
- In the properties window, use the “Device” drop-down menu to select your webcam.
- If you already have a “Video Capture Device” source, right-click on it in the “Sources” dock, select “Properties,” and then change the “Device.”
- You can add multiple “Video Capture Device” sources, each assigned to a different webcam, and then easily switch between them by toggling their visibility or placing them in different scenes.
How to Switch Webcams in Web Browsers (for Web-Based Apps)
Many web-based applications (like browser versions of Teams, Meet, or specific web conferencing tools) will prompt you for camera access. Browsers typically remember your last choice or allow you to specify.
During a Web-Based Call:
Often, the web application itself will have an in-call settings menu (similar to Google Meet’s method described above) to switch cameras.
Through Browser Settings:
- Google Chrome:
- Click the three vertical dots (…) in the top-right corner.
- Go to “Settings > Privacy and security > Site Settings > Camera.”
- Here, you can select your default camera from the drop-down menu.
- You can also click the camera icon in the address bar during an active web call to manage camera access and selection for that specific site.
- Mozilla Firefox:
- Click the three horizontal lines (hamburger menu) in the top-right corner.
- Go to “Settings > Privacy & Security.”
- Scroll down to “Permissions” and find “Camera.” Click “Settings…”
- You can choose your default camera and manage site-specific permissions here.
Method 2: Switching Webcams Using Operating System Settings (Windows)
While applications usually offer direct control, your Windows PC also allows you to manage camera privacy and set a preferred default. This can sometimes influence applications that don’t offer an explicit camera selection or simply default to the system choice.

Visual guide about How to Switch Between Webcams on Pc
Image source: s3.amazonaws.com
Managing Camera Privacy and Defaults in Windows 10/11
- Go to “Start” and click on “Settings” (gear icon).
- Select “Bluetooth & devices” (Windows 11) or “Devices” (Windows 10).
- Click on “Cameras” (Windows 11) or “Camera” (Windows 10, then scroll down to “Camera privacy settings”).
- Here, you’ll see a list of your connected webcams. While Windows doesn’t always offer a straightforward “set default” button for *all* applications, you can ensure cameras are enabled and troubleshoot if they’re not appearing.
- For specific camera settings in Windows 11, you can click on an individual camera in the “Cameras” list to adjust brightness, contrast, and other features, which might persist across applications.
- Crucially, ensure that “Camera access” is enabled and that individual apps have permission to use your camera under “Let apps access your camera.” If an app isn’t listed, it might be a desktop app, which typically falls under “Let desktop apps access your camera” (Windows 10) or “Let apps access your camera > Desktop apps” (Windows 11).
Setting a “default” webcam in Windows isn’t as universal as it once was; most modern apps prioritize their own settings. However, ensuring your primary camera is listed first or configured here can help if an application is acting stubborn.
Method 3: Switching Webcams Using Operating System Settings (macOS)
Mac users also have options to control camera access, though like Windows, application-specific settings often take precedence.
Visual guide about How to Switch Between Webcams on Pc
Image source: learnabhi.com
Managing Camera Privacy in macOS
- Click the Apple menu in the top-left corner of the screen.
- Select “System Settings” (macOS Ventura and later) or “System Preferences” (earlier versions).
- Navigate to “Privacy & Security” (System Settings) or “Security & Privacy” (System Preferences).
- In the left sidebar, click on “Camera.”
- Here, you’ll see a list of applications that have requested or have access to your camera. Ensure the application you want to use is checked.
macOS doesn’t have a system-wide setting to select a default webcam in the same way Windows used to. Instead, applications typically manage the camera choice themselves. To confirm your webcams are detected, you can open an app like Photo Booth and use its “Camera” menu (found in the menu bar) to switch between available cameras.
Method 4: Utilizing Third-Party Webcam Management Software
For users who need more advanced control, virtual camera capabilities, or simply a single place to manage all their webcam settings, third-party software can be invaluable.
- Virtual Camera Software: Tools like ManyCam, SplitCam, or NVIDIA Broadcast allow you to create “virtual webcams.” You can feed multiple physical webcams into these programs, apply effects, layer them, and then output a single virtual camera that your conferencing apps recognize. This gives you immense power to switch between sources or blend them before the video even reaches Zoom or Teams.
- Webcam-Specific Control Panels: Some high-end webcams come with their own dedicated software (e.g., Logitech Capture for Logitech cameras). These applications often provide fine-grained control over exposure, white balance, zoom, and even allow you to set up multiple camera profiles or switch between multiple cameras from the same brand.
These tools are particularly useful for content creators, streamers, and professionals who demand precise control over their video output.
Practical Tips for Switching Webcams on PC
Here are some additional tips to make your multi-webcam setup smooth and effective:
- Label Your Webcams: If you have multiple identical-looking webcams, consider using a label maker or a piece of tape to clearly mark which is which (e.g., “Main Cam,” “Desk Cam”). This will help you quickly identify them in application menus.
- Test Your Setup: Always do a quick test call or open your video preview in an application before a crucial meeting or stream. This ensures the correct camera is selected and functioning as expected.
- Check Audio Settings: Remember that your webcam often includes a built-in microphone. When you switch webcams, you might also be switching your active microphone. Always verify your audio input in the application’s settings to ensure you’re using your preferred microphone.
- Optimize Lighting: Good lighting is crucial for any webcam. Position your lights strategically to illuminate your face evenly, regardless of which camera you’re using.
- Mind Your Background: When switching cameras, ensure the background for each camera angle is appropriate and free of distractions.
- Close Unused Apps: If you’re having trouble with a webcam, try closing any other applications that might be trying to access it.
Troubleshooting Common Webcam Switching Issues
Even with the best intentions, you might run into a snag or two when trying to switch between webcams on your PC. Here are some common problems and their solutions:
1. Webcam Not Appearing in the List
- Check Physical Connection: Unplug the webcam, wait a few seconds, and plug it back into a different USB port.
- Restart PC: A simple restart can often resolve detection issues.
- Update Drivers: Go to the webcam manufacturer’s website and download the latest drivers for your specific model.
- Device Manager (Windows): Open “Device Manager” (search for it in the Start Menu), expand “Cameras” or “Imaging devices.” Look for your webcam. If it has a yellow exclamation mark, there’s a driver issue. Right-click and choose “Update driver” or “Uninstall device” and then restart your PC to reinstall.
- System Settings (macOS): Ensure the application has camera permissions under “System Settings > Privacy & Security > Camera.”
2. Webcam is “In Use” or Shows a Black Screen
- Close Other Applications: Another application might be hogging your webcam. Close any other video apps (e.g., Zoom, Teams, Skype, camera apps, browser tabs using video) that might be running in the background.
- Restart the Application: Close and reopen the application you’re trying to use.
- Restart PC: Sometimes a full system restart is necessary to clear webcam resource locks.
- Privacy Settings: Double-check your Windows (or macOS) privacy settings to ensure camera access is enabled for the specific application and desktop apps in general.
3. Poor Video Quality After Switching
- Check Resolution Settings: Some applications allow you to manually select the resolution and frame rate. Go into the video settings of the application and ensure it’s not set to a very low resolution.
- Lighting: Ensure your lighting is adequate. Poor lighting can significantly degrade video quality.
- Driver Issues: Outdated or corrupted drivers can cause poor performance. Update them as described above.
- USB Bandwidth: If you have many USB devices connected, especially multiple high-resolution webcams, you might be exceeding the USB controller’s bandwidth. Try connecting webcams to different USB controllers (e.g., some to USB 2.0, others to USB 3.0 ports, or directly to your PC rather than a hub).
4. Cannot Switch Between Webcams at All
- Confirm Multiple Cameras Detected: First, ensure your PC truly detects multiple cameras in its own settings (Windows “Cameras” or macOS Photo Booth). If only one appears, the issue is with detection, not switching.
- Application-Specific Bug: Occasionally, an application might have a temporary bug. Check for updates for the application.
- Try Another Application: Test switching in a different application to determine if the issue is system-wide or confined to one app.
Conclusion
Mastering how to switch between webcams on your PC opens up a world of possibilities, from enhancing your professional video calls with diverse angles to boosting your streaming quality. While it might seem complex at first, the process is quite intuitive once you understand where to look in your favorite applications and how to perform basic system checks.
By following the step-by-step instructions in this guide, you should now feel confident in managing your webcam setup. Remember to always test your configuration before going live and don’t hesitate to troubleshoot using the provided tips. Happy video conferencing and streaming!



