


Unlock the potential of your webcam for Facebook Live streams with this comprehensive guide. Learn how to set up your equipment, optimize your environment, and use both native Facebook tools and third-party software for engaging broadcasts. Get practical tips to stream professionally and connect with your audience seamlessly.
How to Use Webcam for Facebook Live
Hey there, aspiring live streamer! Have you ever wanted to connect with your audience on Facebook in a more personal, direct way? Facebook Live is an incredible tool for doing just that, whether you’re sharing a quick update, hosting a Q&A, teaching a skill, or just chatting with friends. And guess what? You don’t need fancy, expensive equipment to get started. Your trusty webcam is often all you need!
This comprehensive guide will walk you through everything you need to know about how to use your webcam for Facebook Live. We’ll cover selecting the right gear, setting it up, preparing your environment, going live using different methods, and even troubleshooting common issues. By the end, you’ll feel confident and ready to broadcast engaging content directly from your computer using your webcam for Facebook Live.
So, let’s get your webcam ready for its starring role!
Key Takeaways
- Preparation is Key: Ensure you have a good quality webcam, stable internet, proper lighting, and clear audio before going live.
- Test Your Setup: Always test your webcam and microphone before starting a live stream to avoid technical glitches during your broadcast.
- Native vs. Third-Party Tools: You can use Facebook’s built-in Live Producer for simplicity or opt for third-party software like OBS Studio for more advanced features.
- Optimize Your Environment: Pay attention to your background, lighting, and sound to create a professional and engaging atmosphere for your viewers.
- Engage Your Audience: Interact with comments and questions in real-time to build connection and keep viewers engaged throughout your stream.
- Troubleshoot Effectively: Know common issues like webcam detection, poor video/audio, or lagging, and how to quickly address them to maintain stream quality.
- Plan Your Content: Having a clear plan or outline for your live stream helps you stay on track and deliver valuable content to your audience.
Step 1: Gather Your Essentials
Before you even think about hitting the “Go Live” button, let’s make sure you have everything in place. Having the right basic setup will make your experience much smoother when using your webcam for Facebook Live.
A Reliable Webcam
You might already have a webcam built into your laptop, and that’s perfectly fine for getting started. However, an external webcam often offers better video quality, improved low-light performance, and more flexibility in placement. Look for webcams that offer at least 1080p resolution for crisp video.
A Stable Internet Connection
This is crucial! Live streaming demands a good upload speed. A weak or inconsistent internet connection will lead to choppy video, dropped frames, and a frustrating experience for your viewers. Aim for an upload speed of at least 5-10 Mbps for reliable streaming. You can easily check your speed with a quick online test.
Good Lighting and Audio
Even the best webcam can’t fix terrible lighting. Natural light from a window is often the best and cheapest option. Position yourself facing the light source, not with the light behind you. For audio, your webcam’s built-in microphone might suffice, but an external USB microphone (even a basic one) will drastically improve your sound quality. Clear audio makes a huge difference in viewer engagement.
A Facebook Account
This might seem obvious, but you’ll need an active Facebook profile, page, or group where you have permission to go live. Make sure you’re logged in!
Step 2: Setting Up Your Webcam
Once you have your essentials, it’s time to get your webcam connected and ready to shine.
Visual guide about How to Use Webcam for Facebook Live
Image source: videopepper.nl
Connect Your Webcam
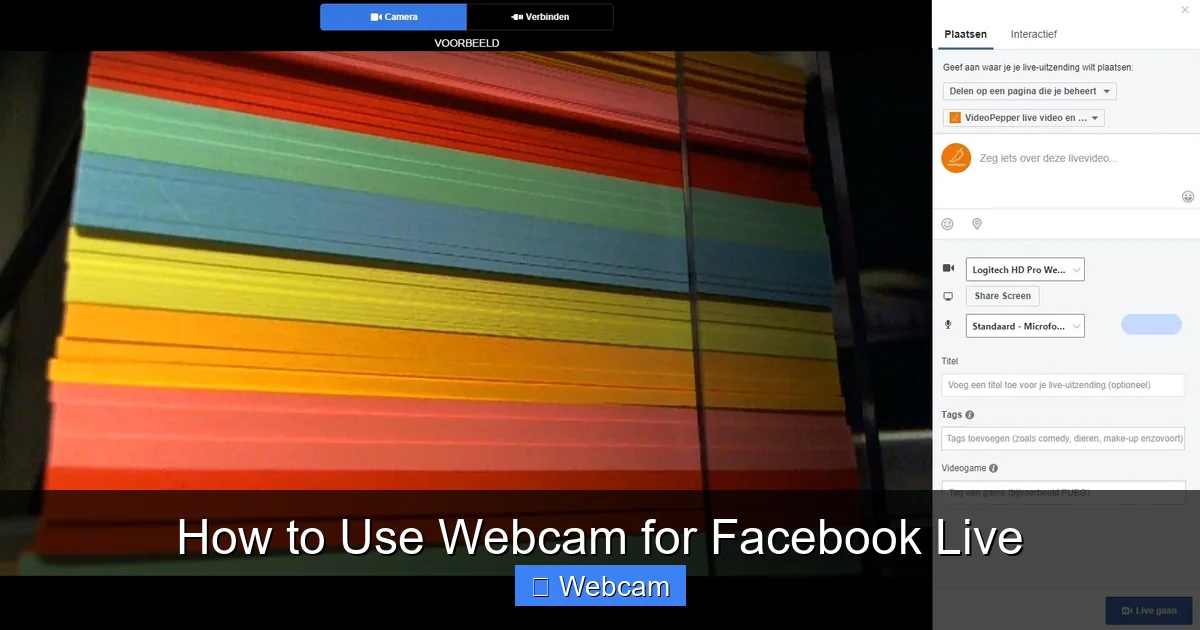
If you’re using an external webcam, simply plug it into an available USB port on your computer. Most modern webcams are “plug and play,” meaning your computer should automatically recognize and install the necessary drivers. If you have an older model or a specialized webcam, you might need to install drivers from the manufacturer’s website. Follow any instructions that came with your webcam.
Positioning Your Webcam
Where you place your webcam matters! For most live streams, you’ll want it at eye level. This creates a more natural and engaging connection with your audience. If your webcam is on top of your monitor, you might need to elevate your monitor or use a stack of books to get the right height. Avoid positioning it too low, as this can create an unflattering angle.
Test Your Webcam and Microphone
Before you go live, always test your equipment! This is super important. You can use your computer’s built-in camera app (like “Camera” on Windows or “Photo Booth” on Mac) to see your video feed. For audio, most operating systems have sound settings where you can test your microphone input levels. Speak clearly and naturally, and ensure the levels are not too low or peaking into the red.
- Windows: Go to Start > Settings > Privacy > Camera/Microphone. Make sure apps are allowed to access them. Then open the “Camera” app.
- Mac: Go to System Settings > Privacy & Security > Camera/Microphone. Ensure your browser or streaming app has access. Then open “Photo Booth.”
Step 3: Preparing for Your Live Stream
Now that your tech is ready, let’s think about what your audience will see and hear, and what you’ll talk about.
Visual guide about How to Use Webcam for Facebook Live
Image source: i.blogs.es
Optimize Your Environment
Your background should be clean, clutter-free, and ideally, reflect your brand or personality. A messy room can be distracting. Think about what’s behind you. Also, re-check your lighting. Soft, diffused light is usually best. Avoid harsh overhead lights that create shadows. If possible, have a main light source in front of you and slightly above. Good audio is paramount; try to minimize background noise from pets, traffic, or other people.
Plan Your Content
Even if it’s a casual chat, having a rough outline or a few talking points will help you stay focused and deliver valuable content. What’s the purpose of your live stream? What do you want your audience to take away? Write down a few bullet points to keep you on track. This planning helps you feel more confident when you start using your webcam for Facebook Live.
Step 4: Going Live with Facebook’s Native Tool (Live Producer)
Facebook offers a fantastic, user-friendly tool called Live Producer, which is perfect for most users. This is the simplest way to get your webcam for Facebook Live streaming.

Visual guide about How to Use Webcam for Facebook Live
Image source: restream.io
Navigate to Facebook Live
- Log in to Facebook.
- Go to your Profile, Page, or Group where you want to stream.
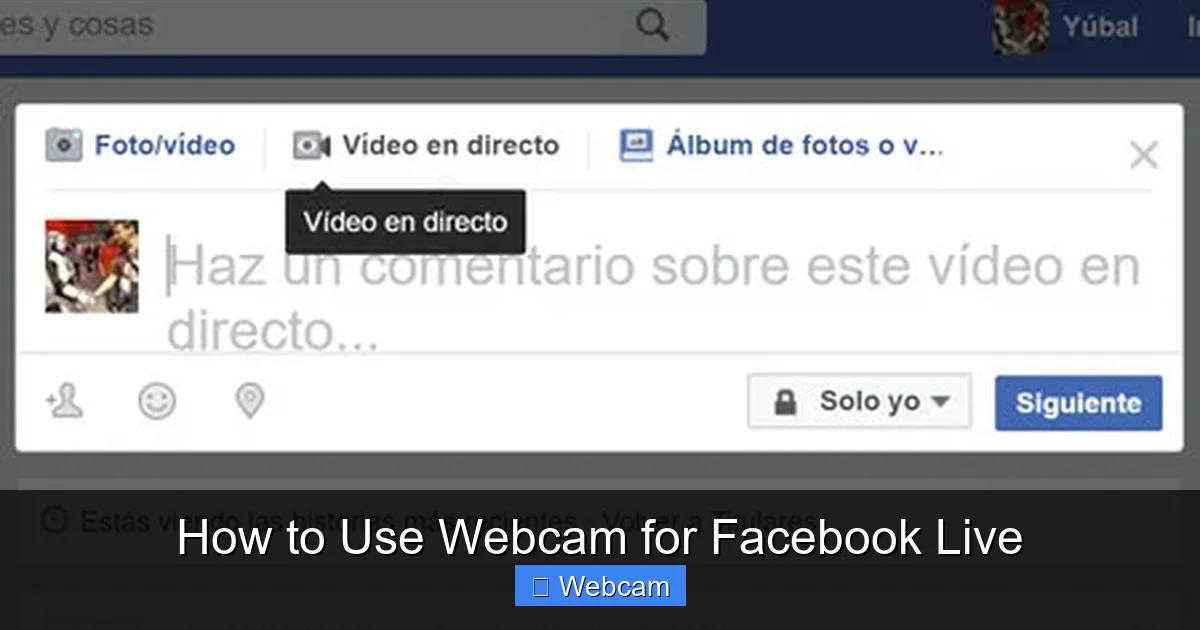
- Click on the “Live Video” option in the “What’s on your mind?” box or look for the “Live” button on your Page/Group. This will open the Facebook Live Producer interface.
Select Your Webcam as the Source
In the Live Producer, you’ll see options for your video and audio sources.
- Choose Video Source: Under the “Camera” section, make sure your webcam is selected from the dropdown menu. You should see yourself in the preview window.
- Choose Audio Source: Under the “Microphone” section, select your preferred microphone (either your webcam’s mic or an external one). Speak a bit to see the audio levels react.
Add Details to Your Live Stream
This step is crucial for attracting viewers and letting them know what your stream is about.
- Title: Create an engaging title that tells people what your stream is about. Something like “Quick Chat about My New Project” or “Live Q&A: Ask Me Anything!”
- Description: Write a brief description with more details. You can add relevant hashtags (e.g., #FacebookLive #WebcamTips) to improve discoverability.
- Audience: Choose who can see your stream (Public, Friends, Only Me for testing, etc.).
Check Your Preview and Settings
Take a moment to look at the preview window. Does your lighting look good? Is your background clear? Are your audio levels healthy? This is your last chance to make adjustments before you go live. You can also explore other settings like adding polls or graphics if you wish, though these are more advanced.
The Moment of Truth: Going Live!
Once you’re happy with everything, simply click the “Go Live” button. Facebook will give you a brief countdown (usually 3 seconds), and then you’ll be live! Remember to smile, make eye contact with your webcam, and engage with your audience.
Step 5: Using Third-Party Software (e.g., OBS Studio, Streamlabs OBS)
For those who want more control, advanced features like on-screen graphics, multiple cameras, or pre-recorded clips, third-party streaming software is the way to go. Programs like OBS Studio (free and open-source) or Streamlabs OBS (built on OBS, more user-friendly) are popular choices. Using your webcam for Facebook Live with these tools opens up many possibilities.
Why Use Third-Party Software?
- More Control: Add multiple video sources, images, text overlays, and more.
- Scene Management: Prepare different “scenes” with various layouts and switch between them seamlessly.
- Better Customization: Fine-tune audio filters, video settings, and streaming quality.
Setting Up Your Software (Brief Overview for OBS Studio)
This is a simplified overview, as each software has its own learning curve.
- Download and Install: Get OBS Studio from obsproject.com or Streamlabs OBS from streamlabs.com.
- Configure Scenes and Sources:
- In OBS, create a “Scene” (a layout for your stream).
- Add “Sources” to your scene. Click the ‘+’ button in the Sources box.
- Select “Video Capture Device” to add your webcam. Choose your webcam from the dropdown.
- Select “Audio Input Capture” to add your microphone.
- You can also add “Image,” “Text,” “Browser Source” (for chat boxes), and more.
- Adjust Audio Mixer: Use the audio mixer to set levels for your microphone, desktop audio, etc.
Connecting to Facebook Live via Stream Key/RTMP
This is where it gets a little technical but is straightforward.
- Go to Facebook Live Producer: Just like before, navigate to create a live video on Facebook.
- Select “Streaming Software”: Instead of “Camera,” choose the “Streaming Software” option.
- Copy Stream Key and Server URL: Facebook will provide you with a “Stream Key” and a “Server URL” (or RTMP URL). Keep these private!
- Paste into Your Software:
- In OBS Studio, go to File > Settings > Stream.
- Choose “Facebook Live” from the Service dropdown.
- Paste your Stream Key into the designated field. The Server URL is usually automatic, but you can enter it manually if needed.
- Click “Apply” and “OK.”
Going Live with Third-Party Software
- Start Streaming in OBS: In OBS Studio, click the “Start Streaming” button. This sends your video feed to Facebook’s servers.
- Preview in Facebook Live Producer: Go back to the Facebook Live Producer page. You should now see a preview of your stream coming from OBS.
- Add Details and Go Live: Just like with the native tool, add your title, description, and audience settings.
- Click “Go Live” on Facebook: Once your preview looks good on Facebook’s side, click “Go Live” in the Facebook Live Producer interface.
Step 6: During Your Live Stream: Tips for Success
You’re live! Now what? Here are some tips to make your stream engaging and professional when using your webcam for Facebook Live.
Engage with Your Audience
This is the beauty of live video! Read comments, answer questions, and acknowledge viewers by name. This creates a personal connection and keeps people watching. Try to respond to as many as you can.
Monitor Your Stream Quality
Keep an eye on any indicators in your streaming software or Facebook’s Live Producer that show connection health. If you see warnings about dropped frames or a weak connection, you might need to troubleshoot quickly. It’s often helpful to have your Facebook stream open on a second device (muted) to see what your viewers are experiencing.
Keep an Eye on Time
Have a rough idea of how long you want to stream. If you promised 30 minutes, try to stick to it. Give a heads-up a few minutes before you plan to wrap up so viewers don’t feel abruptly cut off.
Maintain Eye Contact
Look directly into your webcam lens, not at your screen. This creates the illusion that you’re looking directly at your audience, fostering a stronger connection.
Step 7: After Your Live Stream
Once you’ve finished your amazing broadcast, there are still a few steps to take.
Ending Your Broadcast
If you’re using Facebook’s native tool, click the “End Live Video” button. If you’re using third-party software, first click “Stop Streaming” in your software (e.g., OBS), and then click “End Live Video” on Facebook’s Live Producer page.
Reviewing and Saving Your Video
After ending, Facebook will usually ask if you want to save your video, trim it, or delete it. Your live stream will typically be posted to your profile, page, or group automatically. You can always go back and edit the post details, add a custom thumbnail, or download the video.
Engaging Post-Live
The conversation doesn’t have to end when the stream does! Go back and reply to comments you might have missed during the live session. Thank people for watching and encourage them to watch the replay.
Step 8: Troubleshooting Common Issues
Even with the best preparation, sometimes things go wrong. Don’t panic! Here are solutions for common problems when using your webcam for Facebook Live.
Webcam Not Detected
- Check Connection: Ensure your webcam is securely plugged into a USB port. Try a different USB port.
- Restart: Sometimes a simple computer restart can fix detection issues.
- Drivers: Check the webcam manufacturer’s website for updated drivers, especially for external webcams.
- Privacy Settings: Ensure your operating system (Windows/Mac) and browser have permission for apps to access your camera and microphone.
- Close Other Apps: Make sure no other application (like Zoom, Skype, or another camera app) is currently using your webcam.
Poor Video Quality
- Lighting: Review your lighting setup. Lack of light is the most common cause of grainy video.
- Webcam Resolution: Ensure your webcam is set to its highest resolution within Facebook Live Producer or your third-party software settings.
- Internet Speed: A slow upload speed will force Facebook to reduce your video quality to maintain the stream. Check your internet speed.
- Clean Lens: Wipe your webcam lens with a soft cloth. You’d be surprised how often a smudged lens causes blurriness.
Audio Problems (No Sound, Echo, Static)
- Microphone Selection: Double-check that you’ve selected the correct microphone in Facebook Live Producer or your streaming software.
- Input Levels: Ensure your microphone input levels are not too low (no sound) or too high (peaking, causing distortion). Adjust them in your computer’s sound settings or streaming software.
- Headphones: Use headphones to prevent echo, especially if you’re listening to your stream’s audio.
- Background Noise: Minimize any background noise. Consider using a dedicated external microphone for better noise rejection.
- Mute: Make sure your microphone isn’t accidentally muted on the device itself or in your software.
Lagging or Dropped Frames
- Internet Speed: This is almost always an internet issue. Ensure you have sufficient upload bandwidth. Try connecting via an Ethernet cable instead of Wi-Fi for a more stable connection.
- Close Apps: Close any unnecessary programs running on your computer that might be consuming bandwidth or CPU resources.
- Reduce Quality: As a last resort, you might need to temporarily lower your stream’s resolution or bitrate in your streaming software settings.
Conclusion
Congratulations! You now have all the knowledge to confidently use your webcam for Facebook Live. From connecting your gear and optimizing your environment to navigating Facebook’s Live Producer or advanced third-party software, you’re equipped to create engaging and professional live broadcasts.
Remember, practice makes perfect. Don’t be afraid to do a few “test streams” set to “Only Me” to get comfortable with the process. The more you go live, the more natural and confident you’ll become. So go ahead, set up your webcam, share your story, and connect with your audience on Facebook Live!



