


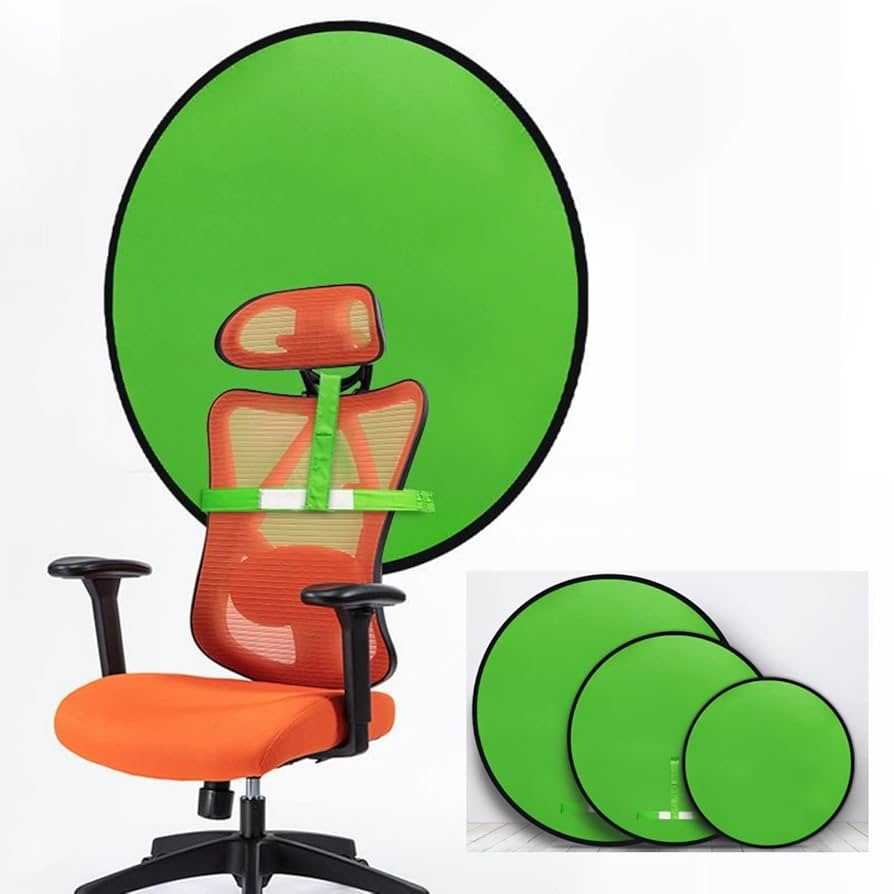
To use your webcam for a green screen background, simply set up a green backdrop behind you, connect your webcam, and use software to replace the green color with your desired background. Position yourself well in front of the green screen for best results, and adjust the settings in your chosen application to remove the green color effectively. With a bit of practice, you’ll appear as if you’re anywhere in the world!
If you want to use a webcam for a green screen background, start by setting up a bright green fabric or paper behind you. Connect your webcam to your computer and install green screen software like OBS Studio or many video conferencing tools that support virtual backgrounds. Adjust your lighting to eliminate shadows on the green screen, then use the software’s chroma key feature to replace the green color with your chosen background during video calls or recordings. It’s a simple way to instantly elevate your content or make your virtual meetings more engaging.
Using a webcam for green screen backgrounds can seem tricky at first, but once you have the right setup, it becomes second nature. Imagine creating professional-looking videos or dropping into virtual worlds without investing in expensive equipment. The key is proper lighting, a smooth green backdrop, and the right software settings. Whether you’re streaming, recording, or just having fun, mastering this technique allows you to transform your space into any setting you can imagine—brightening your content and captivating your audience effortlessly.

How to Use Webcam for Green Screen Background
Using a green screen with your webcam might sound complicated, but it is actually quite simple once you understand the process. This technique allows you to change your background easily, making your videos more fun and professional-looking. In this section, we will explore all the steps needed to set up your webcam for green screen use and get the best results.
Choosing the Right Green Screen Material
The first step is selecting a good green screen. It should be made from non-reflective, smooth fabric or paper. The color green works best because of how cameras and software recognize it easily. Make sure the green background is large enough to cover the entire area behind you that shows in your webcam view.
Watch out for wrinkles or folds in the green screen as they can cause shadows and make the chroma key process harder. A seamless, wrinkle-free surface provides the best results. You can buy pre-made green screens or make your own with a green fabric or painting a wall green.
Setting Up the Green Screen
Hang or stretch your green screen so it is flat and smooth. Use clips, tape, or a stand to keep it tight. Keep the green background a few inches away from your body and head to prevent shadows and green spill on your face.
Position the green screen behind you in a way that it covers the entire background area visible in your webcam view. Keep it evenly lit to avoid uneven colors and shadows, which can make green screen removal difficult.
Lighting Your Green Screen Effectively
Proper lighting is essential for a clean green screen. Use soft, even lights to illuminate the entire green background. This reduces shadows and ensures a uniform color. Avoid harsh direct lights that can cause hotspots or shadows.
You can use LED panel lights or softboxes for even lighting. Position the lights at 45-degree angles from the green screen and from the sides to minimize shadows. Also, light yourself separately from the green screen to prevent green spill on your face and clothes.
Positioning Your Webcam for Best Results
Place your webcam at eye level for most natural results. Keep a consistent distance from the green screen to avoid distortion or stretching. A good rule is to sit about three to five feet away from the green screen for proper chroma key effect.
Check your webcam’s field of view and ensure it captures your entire upper body with enough space around to avoid cutting off parts of your head or shoulders. Use a stable tripod or mount if necessary to prevent shaky footage.
Choosing the Right Software for Green Screen
Many free and paid softwares support webcam green screen features. Popular options include OBS Studio, XSplit, and Streamlabs. These tools allow you to replace the green background with images or videos of your choice.
Ensure your computer meets the software’s system requirements for smooth performance. Download the latest versions for better compatibility and new features. Some software also offers chroma key filters that improve the green screen removal process.
Adjusting Software Settings for Best Green Screen Effect
Open your chosen software and locate the chroma key setting. With OBS Studio, for example, right-click on your webcam source and select Filters. Add a chroma key filter and tweak the settings.
Adjust the similarity, smoothness, and key color spill reduction sliders to optimize the background removal. Start with default settings and gradually fine-tune them by previewing the effect. Make sure the background turns fully transparent without affecting your subject’s silhouette.
Choosing Background Images or Videos
Select high-quality images or videos to serve as your virtual backgrounds. Make sure they are relevant to your content or theme. For example, you could use nature scenes, cityscapes, or animated backgrounds.
Import these files into your software and position them behind your webcam feed. Adjust their size and alignment to make the scene look natural. Remember that a good background complements your video rather than distracts from it.
Fine-Tuning the Green Screen Effect
Work on refining the green screen removal until you get a clear, clean background swap. Use the software’s color spill suppression and edge smoothing features. If you notice green around your hair or body, increase spill reduction settings.
If parts of your background appear transparent or blurry, adjust the similarity or smoothness settings. You might also need to tweak your lighting setup to get the best results.
Testing and Troubleshooting Common Issues
Test your setup with different backgrounds and lighting conditions. Look for shadows, color spill, or uneven edges around your subject. Adjust lighting and software settings as needed.
If green spill occurs, add more distance between you and the green screen or increase spill suppression. If shadows appear, improve your lighting or reposition your green screen. Regular testing helps ensure consistent quality during your recordings or streams.
Additional Tips for Better Green Screen Effects
- Use a high-quality webcam for sharper images and better color accuracy.
- Ensure consistent lighting for even color capture.
- Keep your green screen wrinkle-free and well-lit.
- Maintain sufficient distance from the green screen to reduce shadows and spill.
- Choose backgrounds that do not blend with your clothing or skin tones.
Advanced Techniques for Professional Results
If you want more polished results, consider using chroma key plugins or advanced editing software like Adobe Premiere Pro or After Effects. These tools offer finer control over color keying and background removal.
Additionally, experimenting with different colors like blue or using multi-layer green screens can enhance your creative options. Remember, patience and practice lead to better green screen videos.
Maintaining Your Green Screen Setup
Regularly check your green screen and lighting setup to ensure everything remains in good condition. Keep the fabric clean and wrinkle-free. Replace worn or torn materials as needed for consistent results.
Update your software and drivers periodically to support new features and improve performance. Proper maintenance helps achieve steady, professional-looking videos over time.
Using a webcam with a green screen background can greatly improve the quality of your videos. Carefully setting up your green screen, lighting, and software ensures you get clean, clear results every time. With some patience, you can create engaging videos that look like they were shot in a professional studio.
Setting up Facecam & Green Screen for the perfect setup
Frequently Asked Questions
What are the best lighting conditions for using a webcam with a green screen background?
Ensure your environment is well-lit with even, diffused lighting to avoid shadows and hotspots on the green screen. Use soft light sources placed at 45-degree angles on either side of the background, and avoid direct sunlight or harsh lights that can create uneven illumination. Consistent lighting helps the software accurately detect and replace the green background, resulting in a cleaner composite image.
How should I position my webcam for effective green screen use?
Position your webcam at eye level and about a few feet away from the green screen to prevent shadows and reflections. Maintain a stable setup and ensure the green screen fills the background fully within the camera’s frame. Keep enough distance to avoid getting too close, which reduces the chances of shadows or green spill on your face, ensuring cleaner chroma key removal.
What are common challenges when using a webcam with a green screen, and how can I resolve them?
Common issues include shadows, uneven lighting, or green spill on your subject. To fix shadows, improve lighting setup to be more even. Adjust camera settings like exposure and white balance for better clarity. Use a high-quality green screen fabric to prevent wrinkles and reflections. If green spill occurs, consider changing your lighting angles or increasing the distance between yourself and the background. Software adjustments can also help refine the keying effect.
Final Thoughts
Using your webcam for green screen backgrounds involves setting up proper lighting and ensuring the background is vibrant and evenly lit. Install green screen software compatible with your webcam to facilitate keying. Adjust the lighting to minimize shadows for seamless integration.
Focus on positioning your webcam at an optimal angle to avoid unwanted reflections. Once set, you can replace the green background with any digital image or video.
In conclusion, knowing how to use webcam for green screen background enhances your video projects. Proper setup, lighting, and software are key for a smooth result.



