


Taking apart your Homall gaming chair can seem daunting, but it’s a straightforward process with the right tools and safety precautions. Whether for moving, deep cleaning, or replacing parts, disassembly is manageable. This comprehensive guide will walk you through each step, ensuring a smooth and successful experience as you learn how to take apart your Homall gaming chair racing office chair.
There comes a time in every gaming chair’s life when it might need to be taken apart. Maybe you’re moving to a new home, perhaps you want to give it a thorough deep clean, or maybe a part needs replacing. Whatever the reason, learning how to take apart your Homall gaming chair racing office chair can seem like a challenging task. But don’t worry, it’s often much simpler than it looks, and with the right guidance, you can tackle it confidently.
Homall gaming chairs are known for their comfort and durability, making them a popular choice for gamers and office workers alike. While they’re built to last, they’re also designed with a degree of modularity, making disassembly and reassembly feasible for the average user. This comprehensive guide will walk you through every step, ensuring you have all the knowledge and tips to successfully take apart your Homall gaming chair racing office chair.
Key Takeaways
- Safety is Paramount: Always prioritize safety by clearing your workspace, wearing appropriate protection like gloves, and using proper lifting techniques to prevent injury.
- Gather Essential Tools: Before starting, collect all necessary tools, including Allen wrenches, screwdrivers, a utility knife, and a container for small parts.
- Follow a Logical Disassembly Sequence: The most common order for taking apart a Homall gaming chair is backrest, armrests, seat mechanism, then the gas lift and base.
- Document Each Step: Take photos or videos during disassembly to serve as a visual guide, which will be incredibly helpful when you need to reassemble the chair.
- Organize Hardware Carefully: Use labeled bags or a compartmentalized container to keep screws, washers, and bolts organized, preventing loss and simplifying reassembly.
- Address Stubborn Parts Gently: For components that are stuck, apply a penetrating lubricant like WD-40 and use gentle, even pressure rather than brute force.
- Consider Your Purpose: Understand why you’re taking the chair apart (moving, cleaning, repair) to tailor your approach and ensure you disassemble only what’s necessary.
Quick Answers to Common Questions
Can I take apart my Homall gaming chair without special tools?
While some basic tools like Allen wrenches are typically included with your chair, having a full set of Allen wrenches, Phillips and flathead screwdrivers, and possibly a rubber mallet or pry tool will make the process much smoother and safer.
Is it difficult to remove the gas lift from a Homall chair?
The gas lift can be the trickiest part due to its tight friction fit. It often requires some force, penetrating lubricant like WD-40, and careful tapping with a rubber mallet to dislodge it from the chair base.
Do Homall chairs come with instructions on how to take them apart?
No, Homall chairs typically come with assembly instructions, not disassembly. This guide provides the necessary steps for taking apart your Homall gaming chair.
How long does it usually take to disassemble a Homall gaming chair?
For a first-timer, disassembling a Homall gaming chair can take anywhere from 30 minutes to an hour, depending on how stubborn some parts are and how meticulously you organize your components.
Can I reuse all the parts after taking my Homall chair apart?
Yes, assuming no parts were damaged during disassembly, all components are designed to be reused. Disassembly is often done precisely for purposes like moving or cleaning, with the intention of reassembly.
📑 Table of Contents
Why Disassemble Your Homall Gaming Chair?
Before diving into the “how-to,” it’s helpful to understand the various reasons why you might need to take apart a Homall gaming chair. Knowing your purpose can help you decide how far you need to disassemble it and what to focus on.
Moving and Storage
One of the most common reasons for taking apart a Homall gaming chair is when you’re moving. A fully assembled gaming chair can be bulky and awkward to transport, especially through doorways or tight spaces. Disassembling it into smaller components makes it much easier to pack into a car or moving truck, prevents damage during transit, and simplifies storage if you need to put it away for a while. Learning how to take apart your Homall gaming chair for a move can save you a lot of hassle.
Deep Cleaning and Maintenance
Over time, gaming chairs can accumulate dust, crumbs, pet hair, and spills. A surface clean might not be enough to tackle deep-seated grime or refresh the upholstery. Taking your Homall gaming chair apart allows you to access all the nooks and crannies, clean under the seat, and thoroughly address spills or stains that would otherwise be impossible to reach. It’s also an excellent opportunity to inspect all components for wear and tear.
Repairs and Part Replacement
Even the sturdiest chairs can experience issues. A wobbly armrest, a squeaky gas lift, or a broken caster might require you to replace specific parts. Disassembling the chair allows you to isolate the faulty component, remove it, and install a new one without having to replace the entire chair. This is a cost-effective and environmentally friendly way to extend the life of your Homall gaming chair.
Responsible Disposal
If your Homall gaming chair has truly reached the end of its life, disassembling it can make disposal easier. Many recycling centers prefer items to be broken down into their base materials (metal, plastic, foam). Taking it apart allows you to separate these materials, making responsible recycling or disposal more feasible than trying to discard a whole, bulky chair.
Essential Tools and Workspace Preparation
Preparation is key to a smooth disassembly process. Before you start, gather all the necessary tools and set up a safe and organized workspace. This will prevent frustration, lost parts, and potential injuries when you take apart your Homall gaming chair racing office chair.
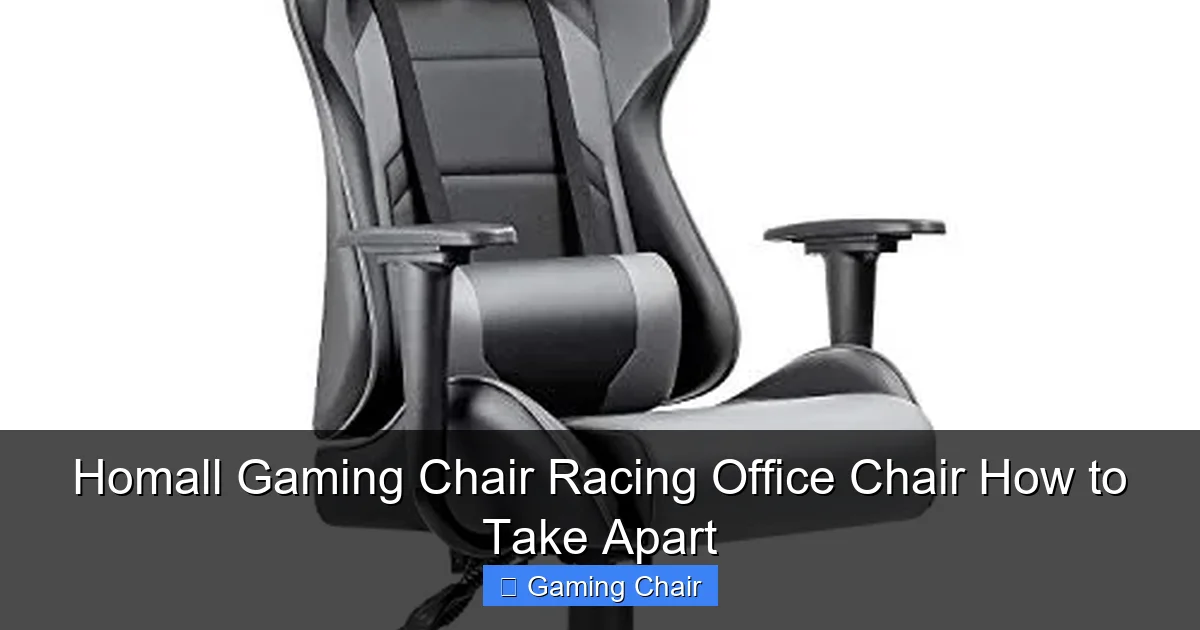
Visual guide about Homall Gaming Chair Racing Office Chair How to Take Apart
Image source: gamingchairsusa.com
Tools You’ll Need
- Allen Wrenches (Hex Keys): Most Homall chairs primarily use Allen screws. Your chair likely came with a set, but having a full set of various sizes is helpful.
- Phillips Head Screwdriver: Some components, especially plastic covers or smaller attachments, might use Phillips head screws.
- Flathead Screwdriver: Useful for prying gently or for screws with flathead slots.
- Utility Knife or Box Cutter: Handy for cutting zip ties or stubborn packaging if you’re disassembling a new chair.
- Gloves: Protect your hands from grime, sharp edges, and potential pinches.
- Pry Tool or Spatula (Optional but Recommended): For gently separating plastic covers or stubborn connections without damaging the material.
- Container for Parts: A small bowl, plastic baggies, or a compartmentalized box to keep screws, washers, and other small hardware organized and prevent them from getting lost. Labeling them as you go is a genius move.
- WD-40 or Penetrating Lubricant: For loosening stubborn bolts or parts that haven’t moved in a while, especially the gas lift.
- Rubber Mallet: Can be useful for gently tapping the gas lift out of its socket, but use with extreme care.
Preparing Your Workspace
Clear a large, open area where you can work comfortably and safely. Make sure you have enough room to lay out the chair components without tripping over them. Cover the floor with an old blanket, cardboard, or a tarp to protect it from scratches or grease. Good lighting is also crucial so you can clearly see what you’re doing and avoid missing any small screws or connections. Having a flat, stable surface for working on individual components can also be beneficial.
Safety First
Your safety is paramount. Always wear gloves to protect your hands. If you’re using a utility knife, be extremely careful. When lifting heavy components, use proper lifting techniques – bend your knees, not your back. Be mindful of pinch points, especially when dealing with moving parts or springs. The gas lift contains pressurized gas, so never attempt to disassemble the gas cylinder itself; only remove it as a whole unit. If you’re unsure about any step, consult the chair’s original manual or seek professional help.
Step-by-Step Guide: How to Take Apart Your Homall Gaming Chair
Now, let’s get to the core of it: how to take apart your Homall gaming chair racing office chair. We’ll go through the process systematically, from top to bottom. Remember to take photos or videos at each stage; they will be invaluable for reassembly.

Visual guide about Homall Gaming Chair Racing Office Chair How to Take Apart
Image source: cdn.shopify.com
Step 1: Remove the Backrest
The backrest is usually the first component to come off. Most Homall gaming chairs have the backrest attached to the seat base via metal brackets at the sides. These brackets are typically secured with two or four Allen screws on each side, often covered by plastic caps for aesthetics.
- Locate the Attachment Points: Feel around the sides of the backrest where it meets the seat. You’ll find two metal plates or brackets.
- Remove Plastic Covers (if present): Gently pry off any plastic caps covering the screws. A flathead screwdriver or a thin pry tool works well for this. Be careful not to scratch the plastic.
- Unscrew the Bolts: Use the appropriate Allen wrench to loosen and remove the bolts. It’s often easier to loosen all bolts slightly before removing any completely.
- Detatch the Backrest: Once all bolts are removed, the backrest should lift straight up and away from the seat. Place it safely aside, making sure it won’t fall or get damaged.
- Store Hardware: Immediately place the removed bolts and any washers into your labeled container, noting that they belong to the backrest.
Step 2: Detach the Armrests
Armrests on Homall chairs can be attached in a few ways: directly to the seat base, to the backrest, or to both. In many cases, they attach to the seat base and also provide support for the backrest, meaning they might already be loose if you removed the backrest. If your armrests are still attached, here’s how to remove them:
- Identify Attachment Points: The armrests are usually bolted to the underside of the seat cushion, or sometimes to the side brackets.
- Access the Screws: You might need to flip the seat cushion over to access the screws underneath.
- Unscrew the Bolts: Use your Allen wrench or Phillips head screwdriver to remove the bolts. There are typically 2-4 screws per armrest.
- Remove Armrests: Once the screws are out, gently pull the armrests away.
- Store Hardware: Place the armrest screws and washers with their corresponding armrest or in a separately labeled compartment.
Step 3: Separate the Seat from the Mechanism
The seat cushion itself is connected to the tilt and height adjustment mechanism (the metal plate) underneath it. This mechanism is then connected to the gas lift.
- Flip the Seat Over: Carefully turn the seat cushion upside down, resting it on your protected workspace.
- Locate Mounting Bolts: You’ll see a large metal plate (the mechanism) bolted to the underside of the wooden or metal base of the seat cushion. There are typically four bolts, one in each corner of the mechanism.
- Unscrew the Bolts: Use the appropriate Allen wrench or socket wrench to remove these four bolts.
- Separate Components: Once the bolts are out, the seat cushion will separate from the mechanism. Set the seat cushion aside.
- Store Hardware: Keep these bolts separate, noting they are for the seat mechanism.
Step 4: Disassemble the Gas Lift and Base
This step involves separating the gas lift cylinder from both the mechanism and the wheeled base. This can sometimes be the trickiest part as the gas lift often creates a very tight, tapered friction fit.
- Separate Gas Lift from Mechanism: The top part of the gas lift is simply inserted into the central hole of the seat mechanism. It’s usually not bolted. Often, a gentle tap or prying can help. If it’s stuck, try turning the mechanism while applying upward pressure to the gas lift, or very carefully tap the top of the gas lift with a rubber mallet from above (while the mechanism is still attached to the seat if it makes it easier to hold steady).
- Separate Gas Lift from Wheeled Base: This is where it often gets tough. The gas lift is tapered and tightly pressed into the central hole of the five-star base.
- Method 1 (Gentle Taps): Flip the base upside down. Using a rubber mallet, gently tap around the rim of the gas lift where it enters the base. Avoid hitting the central rod directly. Work your way around, applying even pressure.
- Method 2 (WD-40 and Force): If gentle taps don’t work, spray some WD-40 or penetrating oil into the gap where the gas lift meets the base. Let it sit for 10-15 minutes. Then, using a piece of wood or a block to protect the floor, hold the base firmly and tap the top of the gas lift (the part that was inside the mechanism) with a rubber mallet or even a regular hammer (use a cloth to protect the metal if using a regular hammer). The impact should drive the gas lift down and out of the base.
- Method 3 (Prying): If you have a sturdy pry bar and are careful not to damage the base, you can try to pry the gas lift out from underneath, leveraging against the base. This requires careful application of force.
- Remove the Gas Lift: Once dislodged, the gas lift will come free. Be careful not to drop it.
Step 5: Remove the Casters (Optional)
If you need to make the base even more compact, or if you’re replacing casters, you can remove them from the five-star base. They are usually friction-fit into sockets.
- Pull Firmly: Grip each caster wheel firmly and pull it straight out of its socket. It might require some force.
- Wiggle and Pull: If they are stubborn, try wiggling them from side to side while pulling.
Tips for a Smooth Disassembly and Reassembly
Taking apart your Homall gaming chair doesn’t have to be a struggle. These tips will make the process easier and ensure you can put it back together without any missing pieces or headaches.

Visual guide about Homall Gaming Chair Racing Office Chair How to Take Apart
Image source: m.media-amazon.com
Document Every Step
This tip cannot be stressed enough. As you remove each part and its corresponding screws, take a quick photo or video. This visual record will be your best friend when it comes time to reassemble the chair, helping you remember which screw goes where and the correct orientation of parts. Imagine trying to put together a puzzle without seeing the picture – that’s what reassembly can feel like without documentation.
Organize Your Hardware
Lost screws are the bane of any disassembly project. As soon as you remove a set of screws, place them in a labeled baggie or a dedicated compartment of your parts organizer. Label them clearly (e.g., “Backrest Screws,” “Armrest Bolts,” “Seat Mechanism Bolts”). This will save you immense time and frustration during reassembly, ensuring every part goes back exactly where it belongs.
Dealing with Stubborn Parts
Some parts, especially the gas lift or bolts that haven’t been touched in years, can be extremely stubborn. Don’t force anything with excessive brute strength, as this can damage components. Instead:
- Use Penetrating Oil: For rusted or seized bolts, apply a penetrating lubricant like WD-40 and let it soak for 15-30 minutes.
- Gentle Taps: For friction-fit parts like the gas lift, a rubber mallet and gentle, even taps around the connection point are often more effective than pure pulling force.
- Leverage: For tough screws, a longer handle on your Allen wrench or screwdriver can provide better leverage.
Cleaning as You Go
Since you’re taking your Homall gaming chair apart, this is the perfect opportunity for a thorough cleaning. Wipe down each component as you remove it. Clean the fabric, plastic, and metal parts before they get stored or reassembled. This makes reassembly cleaner and ensures your chair looks and feels fresh once it’s back together.
What to Do If You Get Stuck
If you encounter a particularly stubborn part and feel like you’re about to break something, stop. Revisit your chair’s original assembly manual if you still have it. Search online for videos specifically demonstrating how to take apart a Homall gaming chair or similar racing office chair models. Sometimes a different perspective or technique is all you need. If all else fails, consider taking it to a local furniture repair shop.
Post-Disassembly: Storage, Transport, and Reassembly Considerations
Once your Homall gaming chair is successfully disassembled, you’ll need to think about what comes next.
Storing Components Safely
If you’re storing the chair for a period, ensure all components are clean and dry. Wrap fabric parts in plastic or old sheets to protect them from dust and moisture. Store smaller hardware in their labeled containers in a secure place. Keep all components together to avoid losing anything.
Packing for Transport
When moving, pack the larger components (backrest, seat, base) carefully, wrapping them in blankets or moving pads to prevent scratches. Consolidate all smaller hardware and armrests into a single box, clearly labeled “Homall Chair Parts.” This organized approach will make unpacking and reassembly much smoother at your new location.
Reassembly Basics
Reassembly is essentially the reverse of disassembly. Start with the casters and base, then attach the gas lift, followed by the seat mechanism, armrests, and finally the backrest. Refer to your photos and labeled hardware. When tightening screws, make them snug but don’t overtighten, as this can strip threads or damage components. Test all functions (height adjustment, tilt, recline) before considering the job complete.
Conclusion
Learning how to take apart your Homall gaming chair racing office chair is a valuable skill that can save you money, simplify moving, and enable proper maintenance. While it might seem like a daunting task at first, by following this systematic guide, gathering the right tools, and taking necessary safety precautions, you’ll find the process manageable and rewarding. Remember, patience and organization are your best tools. So go ahead, tackle that disassembly project, and give your Homall chair the attention it deserves!
Frequently Asked Questions
What should I do if a screw is stripped while trying to take apart my Homall gaming chair?
If a screw is stripped, try using a screw extractor kit, which is designed to remove damaged screws. Alternatively, you might be able to use a rubber band over the screw head to create extra grip for your screwdriver, or carefully use a pair of pliers to turn the screw head if it’s accessible.
Is it safe to store the gas lift after I take apart my Homall gaming chair?
Yes, it is generally safe to store the gas lift as a complete unit. However, never attempt to disassemble the gas cylinder itself, as it contains pressurized gas. Store it away from direct heat and in an upright position if possible.
Can I wash the fabric parts of my Homall gaming chair once they’re disassembled?
For most Homall chairs, the fabric is not easily removable for machine washing. Once disassembled, you can more effectively spot clean or steam clean the fabric sections. Always check the care label or manufacturer’s recommendations for specific cleaning instructions to avoid damage.
What if I lose some of the screws or small parts during disassembly?
If you lose screws, first check your entire workspace thoroughly. If still missing, contact Homall customer service for replacement parts, or visit a local hardware store with an example of the remaining screws to find suitable replacements. Always organize parts well to prevent loss.
Are all Homall gaming chair models taken apart in the same way?
While the general principles and sequence for taking apart a Homall gaming chair remain similar across most racing office chair models, there might be slight variations in screw types, attachment points, or plastic covers. Always consult your specific model’s manual if available, and rely on visual cues as you proceed.
How important is it to take photos during the disassembly process?
Taking photos or videos is extremely important. It serves as a visual guide for reassembly, helping you remember the exact orientation of parts, which screws go where, and the sequence of steps. This minimizes confusion and ensures a smooth reassembly process for your Homall gaming chair.



