


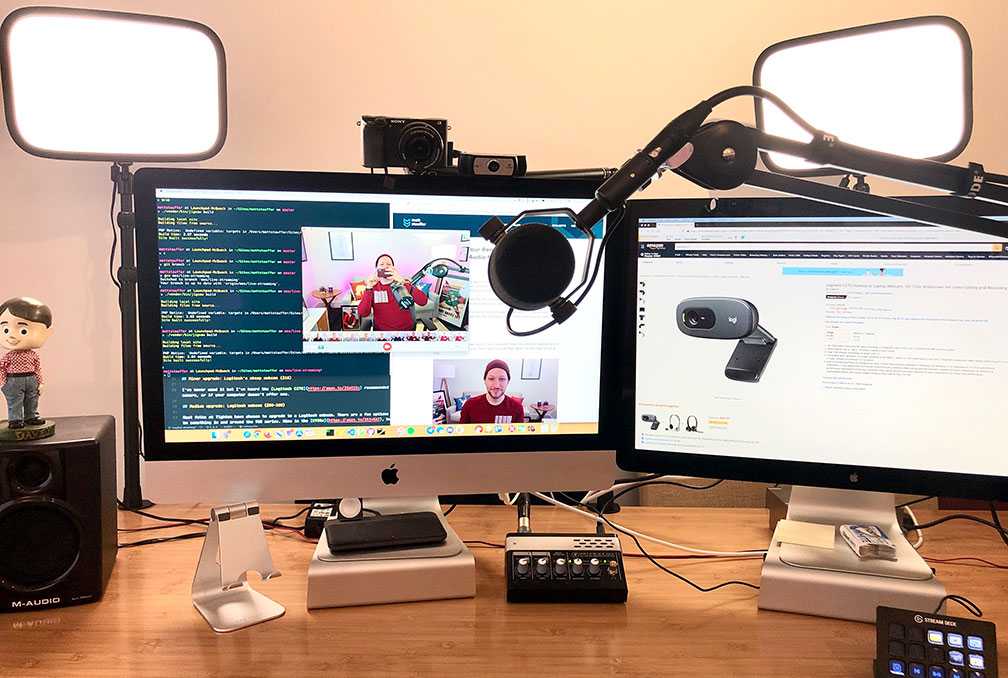
To instantly improve your YouTube videos, focus on balancing your webcam lighting. The easiest way is to use natural light or add soft, diffused artificial lights to eliminate shadows and brighten your face evenly. Adjusting your lighting setup ensures your viewers see you clearly and professionally, making your content more engaging.
In short, ensure your face is well-lit by positioning lights in front of you, rather than behind, and use soft, diffused light sources to avoid harsh shadows. Experiment with different angles and brightness levels until your face is evenly illuminated, creating a polished video appearance.
Struggling with poor webcam lighting can make even the best content look amateurish. Proper lighting is key to enhancing your video quality and maintaining viewer interest. Luckily, you don’t need expensive gear—simple adjustments can dramatically improve your footage. Natural light from a window is always a great starting point, but supplementing it with affordable ring lights or softboxes can give your videos a professional touch. Position your light source in front of you, slightly above eye level, and avoid placing bright lights behind you, which can cause unwanted glare or silhouette effects. With a few easy tweaks, you’ll be shining brightly on camera and capturing your audience’s attention effortlessly.

How to Adjust Webcam Lighting for YouTube Videos
Understanding the Importance of Proper Lighting
Good lighting is essential for creating engaging and clear YouTube videos. Proper lighting helps your viewers see your face clearly and makes your videos look professional. Without enough light, your image can appear dark, grainy, or unappealing. Adjusting your webcam lighting correctly can dramatically improve your video quality and viewer experience.
Assessing Your Current Lighting Conditions
Before making adjustments, evaluate your existing lighting setup. Notice if your face appears shadowed or washed out, and identify the main light sources in your room. Use natural light from windows or existing lamps to determine what needs improvement. This step helps you decide whether to add light, reduce glare, or reposition your webcam.
Choosing the Right Lighting Equipment
Selecting suitable lighting tools is key to enhancing your webcam videos. Consider these options:
- Ring Lights: Provide even, shadowless light around your face. They are popular among YouTubers for their simplicity and effectiveness.
- Softbox Lights: Offer diffused lighting, reducing harsh shadows. Ideal for creating a soft, natural look.
- LED Panel Lights: Adjustable brightness and color temperature for versatile lighting control.
Investing in good lighting equipment can make your videos look more polished and professional.
Positioning Your Lights Correctly
The placement of your lights dramatically affects your video quality. Follow these tips for optimal positioning:
Placement of Light Sources
- Place your main light (key light) slightly above eye level and at a 45-degree angle to your face.
- Use a fill light on the opposite side to soften shadows. This can be another lamp or a reflector.
- Position a backlight behind you to separate you from the background, adding depth to your video.
Adjusting Light Angles
Ensure lights are directed towards your face without creating glare or hot spots. Avoid placing lights directly in front of or behind your face to prevent uneven lighting.
Controlling Light Intensity and Color Temperature
Fine-tuning brightness and color can significantly improve your video quality. Follow these guidelines:
- Brightness: Increase or decrease light intensity to illuminate your face evenly. Too much light can cause overexposure, while too little results in a dark image.
- Color Temperature: Use warmer tones (around 3000K) for a cozy look or cooler tones (around 6500K) to mimic daylight. Match your lighting to your room’s ambiance for consistency.
Adjusting these settings ensures your face appears natural and vibrant on camera.
Dealing with Shadows and Glare
Shadows can obscure your facial features, and glare can cause uncomfortable bright spots. Here’s how to manage both:
- Reducing Shadows: Use diffused lighting and fill lights to soften shadows. Avoid placing lights directly above or below your face.
- Minimizing Glare: Adjust light angles or use matte surfaces for backgrounds to prevent reflective glare on glasses or shiny surfaces.
Using Natural Light Effectively
Natural light is an accessible and effective way to enhance your videos. To make the most of sunlight:
- Position yourself near a window with indirect sunlight to create soft, even lighting.
- Avoid direct sunlight, which can cause harsh shadows and overexposure.
- Use sheer curtains or blinds to diffuse sunlight for a better balance.
Natural light can be a free way to improve your webcam footage when used thoughtfully.
Adjusting Your Webcam Settings for Optimal Lighting
Many webcams have built-in settings that can be customized for better image quality with your lighting setup:
- Brightness: Increase or decrease to match your lighting intensity.
- Contrast: Adjust for clearer distinctions between light and dark areas.
- Exposure: Control how long the sensor gathers light, balancing brightness without causing blur.
- White Balance: Ensure color accuracy by matching it to your light source’s temperature.
Experiment with these settings to get the best possible image based on your lighting environment.
Testing and Fine-Tuning Your Setup
Always test your lighting setup before recording your video. Record short clips and review how your face appears under different lighting conditions. Make small adjustments to angles, brightness, and color temperature until you achieve a natural, well-lit look. Regular testing helps maintain consistent video quality over time.
Additional Tips for Perfect Webcam Lighting
To further enhance your video quality:
- Use a darker or non-reflective background to avoid distracting glare and reflections.
- Ensure your face is centered in the frame for professional-looking videos.
- Keep your light sources steady—avoid moving lights during recording.
- Maintain a comfortable temperature in your recording space to prevent sweating or discomfort, which can affect your appearance.
Consistent lighting practices can make a big difference in your YouTube video quality.
Related Topics to Improve Your YouTube Videos
Beyond lighting, other factors can enhance your video content:
Camera Quality and Settings
Use a good webcam that supports high resolution. Adjust focus, zoom, and sharpness for clearer images. Consider using external cameras for even better quality.
Background and Environment
Choose a tidy, uncluttered background that complements your content. Use greenery, artwork, or branded elements for visual interest.
Audio Quality
Clear audio is just as important. Use a quality microphone and avoid noisy environments to keep your audience engaged.
Video Editing and Post-Processing
Enhance your videos with editing tools. Adjust brightness, contrast, and color grading to perfect your look before uploading.
Properly adjusting your webcam lighting sets the foundation for high-quality YouTube videos. Take your time to experiment with different setups, and over time, you’ll find the perfect balance that makes you look confident and professional on camera.
An EASY LIGHTING Setup For Your Videos!
Frequently Asked Questions
How can I improve the overall light balance in my webcam setup for YouTube videos?
To enhance the light balance, start by positioning your light sources evenly around your face, avoiding harsh shadows. Use soft, diffused lighting such as ring lights or lamps with light diffusers. Adjust the brightness levels to match your environment, ensuring your face is well-lit without overexposure. Experiment with different angles and distances to achieve a natural and clear appearance.
What techniques help to reduce glare and reflections on my face or screen during filming?
Reduce glare by minimizing direct reflections from shiny surfaces or windows in your environment. Use matte finishes on your surroundings and avoid reflective objects near your face. Position your lights at angles that prevent direct reflections into the camera. Additionally, wearing matte makeup or avoiding shiny accessories can help maintain a clear image and prevent unwanted glare.
How does adjusting the color temperature of lights improve my video quality?
Changing the color temperature of your lights affects the warmth or coolness of the image. Use warmer tones (around 2700K-3000K) for a cozy, inviting look, or cooler tones (around 5000K-6500K) for a crisp, natural daylight appearance. Adjusting color temperature ensures your skin tone looks natural and consistent, making your videos more professional and appealing.
What are some tips for balancing natural and artificial lighting in my videos?
Combine natural light with artificial lighting by filming during times when natural light is soft, such as early morning or late afternoon. Position yourself near a window to allow natural light to fill your face evenly. Supplement natural light with artificial lights to fill shadows and maintain consistent brightness. Avoid mixed lighting sources that have different color temperatures, as this can create undesirable color casts.
How can I prevent my webcam from appearing too dark or too bright during recording?
Adjust your webcam settings or use manual controls to set the proper exposure and gain levels. Increase the ambient lighting in your room if the image is too dark, and reduce brightness or exposure if your video appears washed out. Use additional light sources if necessary and position them to evenly illuminate your face, maintaining a balanced and clear image throughout your recording.
Final Thoughts
In conclusion, adjusting webcam lighting for YouTube videos enhances video quality and viewer engagement. Use natural light whenever possible to avoid harsh shadows. Position your light source in front of you to evenly illuminate your face. Experiment with brightness and contrast settings to achieve a clear, professional look. These simple steps make “how to adjust webcam lighting for YouTube videos” straightforward and effective for creating appealing content.



