


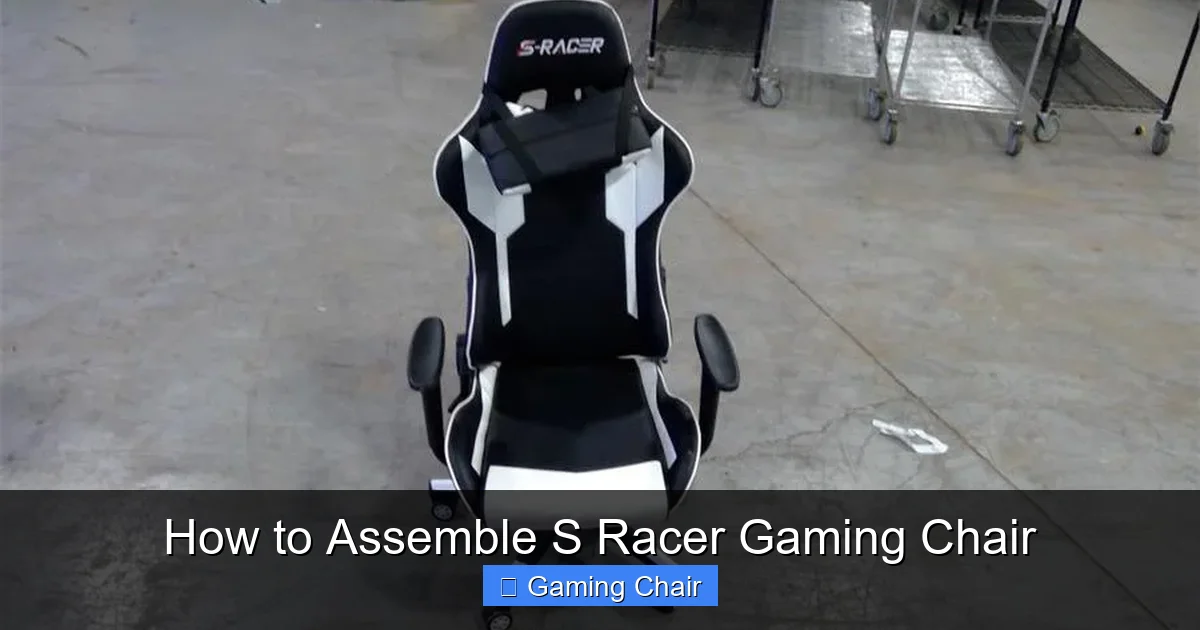
Assembling your S Racer gaming chair is a straightforward process when you follow a clear guide. Begin by carefully unboxing and verifying all components, then build the stable chair base before connecting the seat, backrest, and armrests. A final safety check and cushion attachment ensure your new S Racer gaming chair is ready for ultimate comfort and immersive gaming sessions.
How to Assemble S Racer Gaming Chair
Welcome, fellow gamer! You’ve just made a fantastic choice in upgrading your setup with an S Racer gaming chair. Known for their ergonomic design, sleek aesthetics, and robust build, S Racer chairs are a favorite among enthusiasts looking for both comfort and style during long gaming sessions. But before you can fully immerse yourself in your virtual worlds, there’s one crucial step: assembly.
Don’t let the sight of multiple parts and a bag full of screws intimidate you. Assembling your S Racer gaming chair is a surprisingly straightforward process, much like building with advanced LEGOs – only much more comfortable when you’re done! Think of this guide as your ultimate co-op partner, walking you through each step with clear instructions and helpful tips, ensuring you get your chair up and running in no time. We’ll break down every part of how to assemble an S Racer gaming chair, making it feel less like a chore and more like the exciting final quest before epic battles begin.
So, grab your box, clear some space, and let’s turn those individual components into the throne you deserve. By the end of this article, you’ll not only have a fully assembled S Racer gaming chair, but you’ll also feel a sense of accomplishment, knowing you built your own command center. Get ready to game in unparalleled comfort!
Key Takeaways
- Preparation is Paramount: Always start by clearing a spacious work area and carefully unboxing all components. Performing an inventory check against the manual ensures you have everything needed for your S Racer gaming chair assembly.
- Build the Base First: The most stable approach is to assemble the five-star wheeled base and securely insert the gas lift cylinder before moving on to the main chair body. This provides a solid foundation.
- Mind the Orientation: Pay close attention to the front and back of the seat mechanism and backrest when attaching them. Incorrect orientation is a common mistake that can hinder proper function and stability.
- Don’t Fully Tighten Initially: For components like the seat mechanism and armrests, it’s often best to hand-tighten screws at first. This allows for minor adjustments and alignment before giving a final, firm tighten once everything is in place.
- Seek Assistance for Backrest: While possible alone, attaching the backrest to the seat can be much easier with a second pair of hands. Aligning the holes simultaneously makes the process smoother and prevents frustration.
- Perform a Final Safety Check: Once assembled, thoroughly test all adjustment features (height, recline, tilt, armrests) and re-check all screws to ensure they are firmly tightened. This guarantees the safety and longevity of your S Racer gaming chair.
Quick Answers to Common Questions
Are tools included with the S Racer gaming chair?
Yes, S Racer gaming chairs typically come with all the necessary tools, usually an Allen key (hex wrench) and sometimes a basic screwdriver, to complete the assembly process.
How long does it usually take to assemble an S Racer gaming chair?
For most people, assembling an S Racer gaming chair takes between 20 to 60 minutes, depending on experience and whether they have assistance.
What if the gas lift doesn’t work after assembly?
First, ensure you removed the red protective cap from the top of the gas lift cylinder before installation. If the cap is off and it’s still not working, check that the gas lift is fully seated in both the base and the seat mechanism, and that the height adjustment lever is correctly connected to the mechanism.
My armrests feel a bit loose; what should I do?
If your S Racer gaming chair’s armrests feel loose, turn the seat upside down and firmly retighten all the screws securing the armrests to the seat base. Sometimes, they just need a bit of an extra snug.
What should I do if a part is missing or damaged from my S Racer gaming chair box?
If you discover any missing or damaged parts during your inventory check, stop the assembly and immediately contact S Racer customer support. They will assist you with replacements.
📑 Table of Contents
1. Preparation is Key: Unboxing and Inventory
Before you even think about screwing anything together, good preparation is the foundation of a smooth assembly process. This initial stage sets the tone for the entire build of your S Racer gaming chair.
Clear Your Workspace
First things first, find a spacious, flat, and clear area to work. This could be your living room floor, a garage, or any spot where you have enough room to maneuver the chair components without bumping into things. Lay down a blanket, cardboard, or the packaging foam to protect both your new S Racer gaming chair parts and your floor from scratches. Trust us, trying to assemble a large gaming chair in a cramped space is a recipe for frustration!
Unbox with Care
Carefully open the packaging for your S Racer gaming chair. Avoid using sharp objects like knives or box cutters too deeply, as you might inadvertently scratch or cut the upholstery of your new chair. Gently remove all the major components. Often, smaller parts like screws, bolts, and tools are neatly packed in a separate, labeled blister pack. Keep these organized!
Inventory Check: What’s in the Box?
This is perhaps the most important pre-assembly step. Grab the instruction manual that came with your S Racer gaming chair. It will have a detailed list or diagram of all included parts. Lay out every single component and compare it against the list.
Here’s a typical checklist for an S Racer gaming chair:
- Seat Base: The main cushioned part you sit on.
- Backrest: The tall, padded section for your back.
- Armrests: Usually two, labeled ‘L’ and ‘R’ (left and right).
- Five-Star Base: The large, star-shaped piece that forms the foundation.
- Caster Wheels: Five wheels that snap into the five-star base.
- Gas Lift Cylinder: The central pneumatic cylinder for height adjustment.
- Gas Lift Cover: A plastic sleeve that slides over the gas lift.
- Seat Mechanism/Tilt Mechanism: The metal plate that attaches to the underside of the seat, housing the levers for height and tilt.
- Side Covers: Plastic covers that hide the screws connecting the backrest to the seat.
- Lumbar Pillow & Headrest Pillow: Optional but often included for extra support.
- Hardware Pack: This will contain various screws, washers, and an Allen key (hex wrench) – sometimes a screwdriver too.
If anything is missing or damaged, stop here and contact S Racer customer support immediately. Having all parts verified upfront saves you a lot of headache later on.
2. Building the Foundation: Base and Wheels

Visual guide about How to Assemble S Racer Gaming Chair
Image source: content.propertyroom.com
With your workspace prepped and all parts accounted for, it’s time to build the rock-solid foundation for your S Racer gaming chair. This section focuses on assembling the five-star base and integrating the gas lift system.
Attaching the Caster Wheels
Take your five-star base and turn it upside down. You’ll see five holes at the end of each ‘star’ arm. Grab your caster wheels. These usually have a metal stem. Simply push the stem of each wheel firmly into one of the holes until you hear or feel a click. It might require a bit of force, but don’t be afraid to put some weight into it. Once all five wheels are in, flip the base upright. Now your S Racer gaming chair can roll!
Tip: A bit of twisting motion as you push can help the wheels snap into place more easily. Ensure they are fully seated to prevent them from falling out later.
Installing the Gas Lift Cylinder
Next, locate the gas lift cylinder. This is the stout metal cylinder, often with a red cap on the top that needs to be removed before installation. Remove this cap – it’s just for shipping protection. Now, insert the wider, tapered end of the gas lift cylinder into the central hole of your assembled five-star base. It should slide in easily and sit firmly. There’s no need to screw or bolt it in; its weight and the weight of the chair (and you!) will keep it in place.
Adding the Gas Lift Cover
The gas lift cover is a plastic sleeve, often made of three interlocking pieces or a single telescopic piece. This simply slides over the gas lift cylinder from the top. It’s purely aesthetic, designed to hide the metal cylinder and give your S Racer gaming chair a cleaner look. Ensure it rests correctly on the five-star base. If it’s a multi-piece cover, make sure the pieces are nested properly.
3. Connecting the Core: Seat, Mechanism, and Armrests

Visual guide about How to Assemble S Racer Gaming Chair
Image source: content.propertyroom.com
Now we move on to the main seating area of your S Racer gaming chair. This involves attaching the crucial seat mechanism and the armrests to the underside of the seat.
Securing the Mechanism to the Seat Base
Take your main seat base and turn it upside down, so the fabric side is on the floor (use your protective blanket!). Locate the seat mechanism. This is a heavy, metal plate with levers. Crucially, pay attention to the labels – there will usually be an arrow or “FRONT” sticker indicating which side should face the front of the chair. Align the holes on the mechanism with the pre-drilled holes on the underside of the seat.
Using the appropriate screws (typically shorter, thicker ones from your hardware pack), attach the mechanism to the seat. Insert the screws and hand-tighten them initially. You might find it easier to get all screws started before fully tightening any of them. This allows for a bit of wiggle room to ensure perfect alignment. Once all screws are in place and aligned, go back and firmly tighten them with your Allen key. Make sure they are snug but do not overtighten, as this can strip the threads.
Attaching the Armrests
Now it’s time for the armrests. Each armrest should be clearly labeled ‘L’ (left) and ‘R’ (right). Make sure you orient them correctly – they often have a slight curve or angle that matches the contour of the S Racer gaming chair. Again, place the seat upside down. Align the armrest’s screw holes with the corresponding holes on the side of the seat.
Typically, there will be 2-4 screws per armrest. Use the correct screws (often slightly longer than the mechanism screws). Similar to the mechanism, start by hand-tightening all screws for one armrest. This helps you to adjust its position slightly before fully securing it. Once all screws are in, firmly tighten them. Repeat the process for the second armrest.
Practical Tip: Some S Racer gaming chairs offer adjustable armrests (height, swivel, etc.). Ensure the adjustment buttons or levers are facing outwards or in a position that will be accessible once the chair is assembled. Don’t worry about adjusting them perfectly just yet; we’ll do that in the final steps.
Initial Tightening Tips
Throughout this stage, remember the mantra: “snug, not stripped.” You want the screws to be tight enough to hold the components firmly without any wobble, but not so tight that you risk damaging the screw heads or the chair’s internal threads. If you feel significant resistance, stop and check your alignment. A little bit of manual force is okay, but brute force is not.
4. Bringing it Together: Backrest and Final Assembly
Visual guide about How to Assemble S Racer Gaming Chair
Image source: content.propertyroom.com
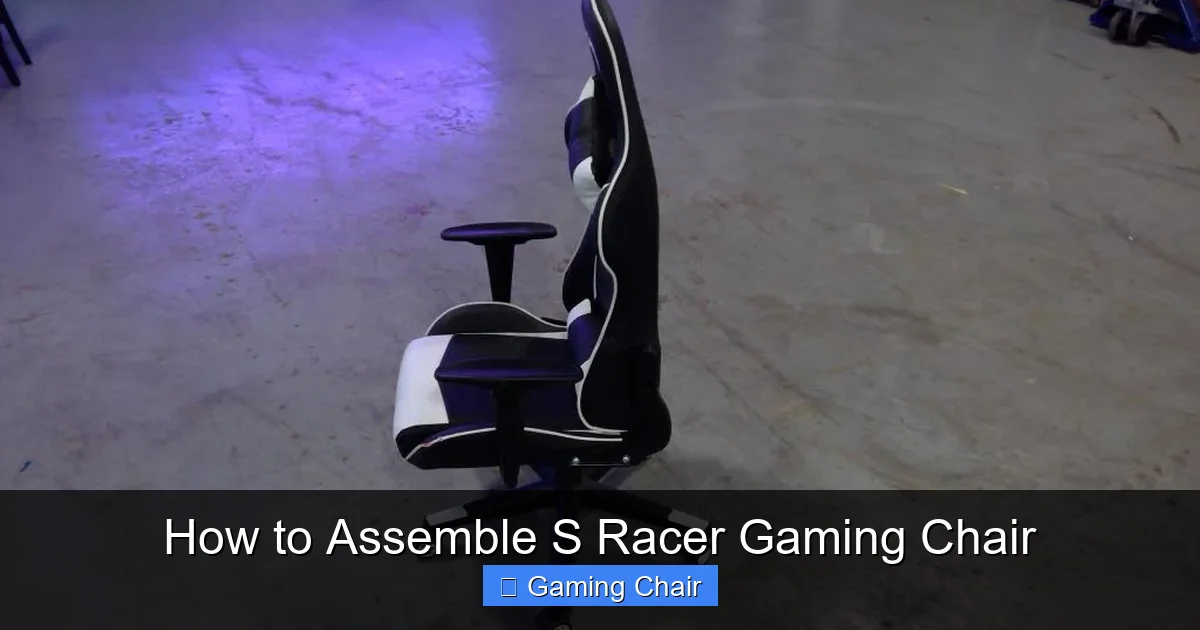
With the seat, mechanism, and armrests now unified, it’s time to bring the two major halves of your S Racer gaming chair together and then place them onto the base. This can sometimes be the trickiest part, but with patience, you’ll nail it.
Connecting the Backrest to the Seat
This step usually requires a bit of finesse. The backrest typically attaches to brackets on the armrests or directly to metal plates on the seat mechanism. Look for the screw holes on the bottom sides of the backrest that align with the corresponding holes on the armrest brackets or the side of the seat base.
Carefully lift the backrest and position it between the armrests (or align its side brackets with the seat’s attachment points). This is often where an extra pair of hands comes in handy. One person can hold the backrest in place while the other inserts the screws. If you’re doing it solo, try propping the backrest up against something stable, or even balancing it on your knees, to free up your hands.
Insert the appropriate screws (these are usually larger and often come with flat and lock washers) through the armrest brackets/side plates and into the backrest. Again, start by hand-tightening all screws on both sides. Once all screws are in and you’re satisfied with the alignment, go back and tighten them firmly with your Allen key. Ensure both sides are equally tightened to prevent uneven stress on the chair frame.
Securing the Plastic Side Covers
Once the backrest is securely attached, your S Racer gaming chair will often come with plastic side covers. These covers snap into place over the metal brackets and screws you just installed, giving your chair a clean, finished look. They usually have small pegs or clips that align with holes on the metal brackets. Gently push them into place until they click securely. Don’t force them aggressively; they should fit snugly with moderate pressure. If they don’t seem to fit, double-check your backrest alignment.
Mating the Top Half to the Base
You now have two main parts: the fully assembled top half (seat, backrest, armrests, mechanism) and the fully assembled base (five-star base, wheels, gas lift). It’s time to bring them together!
Carefully lift the assembled top half. The central hole in the seat mechanism (where the gas lift will attach) should be perfectly aligned with the top of the gas lift cylinder protruding from the five-star base. Gently lower the entire top assembly onto the gas lift. You should feel it slide down and sit firmly. Give the seat a gentle push down to ensure it’s fully seated on the gas lift cylinder. You might hear a small hiss or click as it locks into place. And just like that, your S Racer gaming chair is taking its final form!
5. The Finishing Touches: Cushions and Adjustments
You’re almost there! Your S Racer gaming chair is assembled, but a few final touches and checks will ensure maximum comfort and longevity.
Attaching Lumbar and Headrest Pillows
Most S Racer gaming chairs come with adjustable lumbar and headrest pillows.
- Lumbar Pillow: This pillow usually has two straps that wrap around the backrest. Thread the straps through the designated holes or slots on the backrest. The goal is to position the lumbar pillow to support the natural curve of your lower back.
- Headrest Pillow: Similar to the lumbar pillow, the headrest pillow also has straps. These typically go over the top of the backrest or through smaller slots near the head area. Adjust its height so it comfortably supports your neck and head.
Experiment with the placement of these pillows once you sit in the chair. Everyone’s body is different, so adjust them to your personal comfort zone.
Testing Adjustments (Tilt, Recline, Height, Armrests)
Now for the fun part – exploring all the features of your new S Racer gaming chair!
- Height Adjustment: Sit in the chair. Locate the lever, usually on the right side under the seat. Pull it up to raise the chair (when there’s no weight on it) or push it down while seated to lower it. Find your optimal height where your feet are flat on the floor and your knees are at a 90-degree angle.
- Recline Function: There’s usually a separate lever, often on the right side near the backrest. Pull this lever up to release the backrest, allowing it to recline backward. Push it down to lock the recline angle. Test various angles to find your perfect lean.
- Tilt Lock/Tension: Many S Racer gaming chairs have a rocking function. The same lever used for height adjustment can often be pushed inwards or pulled outwards to lock/unlock the tilt. There might also be a round knob underneath the seat (often at the front) to adjust the tilt tension, making it easier or harder to rock back.
- Armrests: If your armrests are 2D, 3D, or 4D, test their adjustments. There are usually buttons or levers on the armrests themselves to adjust height, pivot, or slide forward/backward.
Familiarize yourself with all these functions to truly customize your S Racer gaming chair experience.
Final Tightening and Safety Check
After testing everything, it’s a good idea to perform a final safety check. Go back over all the screws you installed – on the seat mechanism, armrests, and backrest connections – and give them one last snug tighten. Don’t overtighten, but ensure there’s no looseness or wobble.
Check that all wheels roll smoothly and that the chair feels stable when you shift your weight. Listen for any creaks or groans that might indicate a loose connection. This final inspection ensures that your S Racer gaming chair is safe, stable, and ready for countless hours of gaming, working, or simply relaxing.
Congratulations! You’ve successfully assembled your S Racer gaming chair.
Now that your S Racer gaming chair is fully assembled, take a moment to appreciate your handiwork. Not only have you built a comfortable and stylish command center, but you’ve also gained valuable experience. Remember, a properly assembled chair isn’t just about comfort; it’s about safety and durability, too. Your new S Racer gaming chair is now ready to support you through epic quests, intense competitive matches, or even just a long day of work. So, sit back, relax, and enjoy the fruits of your labor. If you faced any unique challenges or have extra tips, feel free to share them in the comments below! Happy gaming!
Frequently Asked Questions
Can one person assemble an S Racer gaming chair alone?
Yes, it is definitely possible for one person to assemble an S Racer gaming chair by themselves. However, some steps, especially attaching the backrest to the seat, can be significantly easier and quicker with a second pair of hands for support.
What’s the most common mistake people make when assembling a gaming chair?
One of the most common mistakes is attaching the seat mechanism or backrest in the wrong orientation (front to back). Always double-check the “FRONT” labels or arrows in the instruction manual before securing these components.
How do I adjust the recline tension on my S Racer gaming chair?
Many S Racer gaming chairs feature a tilt tension knob, usually a large round knob located underneath the seat, towards the front. Turning this knob clockwise will increase the tension, making it harder to recline, while turning it counter-clockwise will loosen it for easier rocking.
What’s the best way to clean my S Racer gaming chair?
For most S Racer gaming chairs made of PU leather or fabric, a damp cloth with mild soap and water is usually sufficient for cleaning. Avoid harsh chemicals or abrasive cleaners that could damage the material. For tougher stains, consult the chair’s specific care instructions.
What is the typical weight limit for an S Racer gaming chair?
The weight limit for S Racer gaming chairs can vary by model, but most standard models are designed to comfortably support individuals up to 250-300 pounds (approximately 113-136 kg). Always refer to your specific chair’s manual for the precise weight capacity.
Are replacement parts available for S Racer gaming chairs?
Yes, S Racer often provides replacement parts for their gaming chairs, such as caster wheels, gas lifts, or even armrests. If you need a specific part, it’s best to contact S Racer customer support directly and provide your chair model information for assistance.



