


Looking to share your live moments or broadcast your content directly from your Mac using your webcam? Streaming on a Mac may seem tricky, but with the right tools and steps, it’s straightforward and super accessible. To stream with your webcam on a Mac, simply install a reliable streaming software like OBS Studio or Ecamm Live, configure your webcam as the video source, and connect to your preferred streaming platform such as Twitch or YouTube. Once set up, you can start broadcasting in just a few clicks!
If you want to stream with your webcam on a Mac, the key is choosing the right software and ensuring your camera is properly connected. From setting up your streaming software to tweaking your video and audio settings, this guide will walk you through every step for a smooth and professional live broadcast. Whether you’re gaming, live chatting, or sharing tutorials, you’ll be up and running in no time.

How to Stream with Webcam on Mac
Streaming with a webcam on a Mac is easier than ever, especially with the right tools and setup. Whether you want to go live on social media, record videos, or host online meetings, knowing how to connect your webcam properly is essential. This guide will walk you through each step, from choosing the right software to optimizing your stream quality.
Choosing the Best Webcam for Your Mac
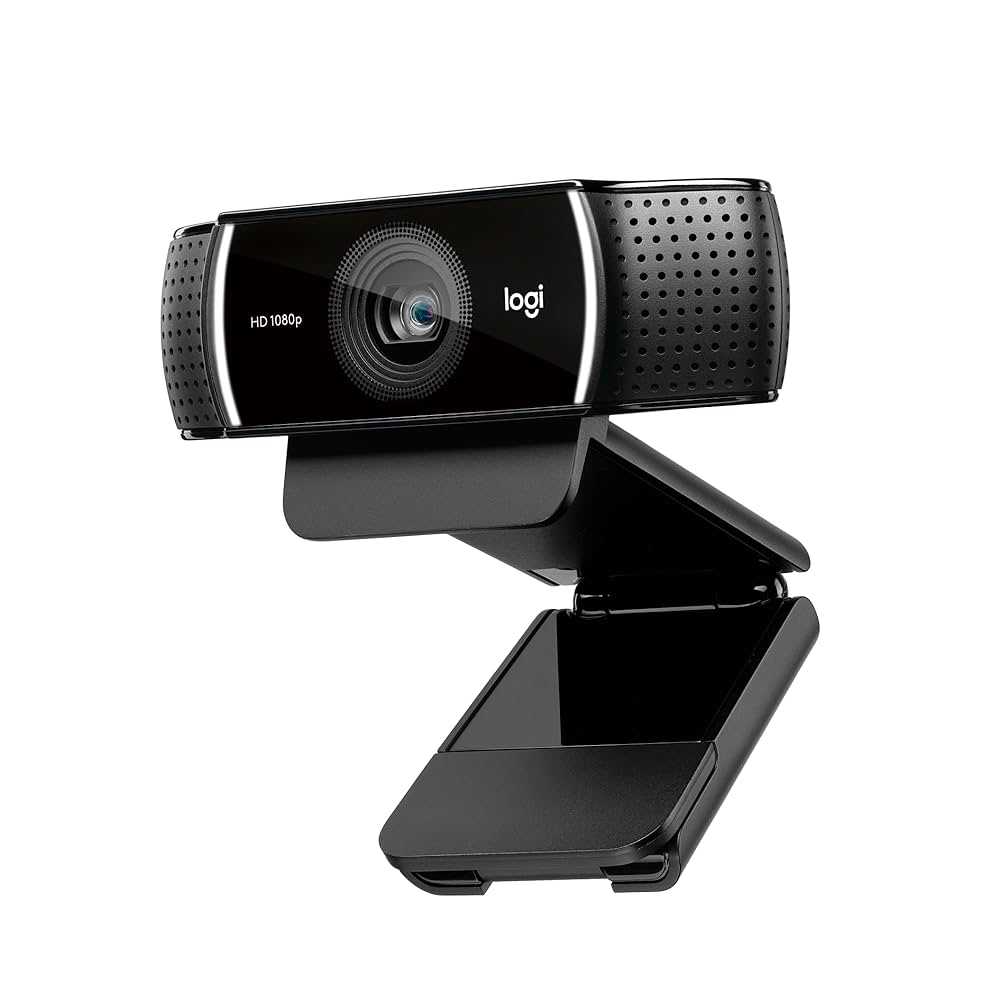
Selecting a good webcam is the first step towards a clear and professional stream. Look for webcams that are compatible with macOS and offer high resolution, such as 1080p or higher. Popular options include Logitech C920, Logitech Brio, and Razer Kiyo.
- Ensure your webcam is plug-and-play for easy setup.
- Check compatibility with your streaming software.
- Opt for webcams with built-in microphones for better audio quality.
- Consider webcams with adjustable mounts for flexible positioning.
Setting Up Your Webcam on Mac
Connecting your webcam to your Mac usually involves a simple USB plug-in. Once connected, your Mac should recognize the device automatically.
Step-by-step connection process:
- Plug the webcam into an available USB port.
- Allow your Mac to recognize the device; you may see a notification.
- Test the webcam using built-in apps like FaceTime or Photo Booth.
- Adjust your camera angle to ensure a good framing of your face.
Choosing Streaming Software for Mac
Several programs work well on macOS for live streaming and recording.
- OBS Studio: Free, open-source, supports multiple sources and scenes.
- Ecamm Live: Paid, user-friendly, offers professional features tailored for Mac.
- Streamlabs OBS: Customizable, integrates with popular streaming platforms.
Each of these options supports webcam integration and offers different features depending on your needs.
Configuring Your Webcam with Streaming Software
Once you choose your software, the next step involves setting up your webcam within it.
Steps for setting up in OBS Studio:
- Open OBS Studio and go to the ‘Sources’ box.
- Click the ‘+’ button and select ‘Video Capture Device.’
- Name your device and click ‘OK.’
- In the properties menu, choose your webcam from the device list.
- Adjust resolution, frame rate, and other settings as needed.
Ensure your webcam feed looks clear before proceeding to go live.
Optimizing Webcam Settings for Better Streaming Quality
To produce a professional-looking stream, tweak your webcam settings for brightness, contrast, and focus.
Key settings to consider:
- Resolution: Prefer 1080p for high quality, but 720p works well for slower connections.
- Frame Rate: 30 frames per second (fps) offers smooth video; 60 fps if your hardware supports it.
- Focus: Set a fixed focus or auto-focus depending on your distance from the camera.
- Lighting: Use soft, even lighting to eliminate shadows and improve clarity.
Avoid harsh backlighting and cluttered backgrounds for a more professional look.
Using External Microphones for Clearer Audio
Good audio quality is just as important as video. Consider connecting an external microphone to your Mac for better sound.
- USB microphones like the Blue Yeti or Audio-Technica ATR2100x are popular choices.
- Test your microphone levels within your streaming software.
- Position the microphone close to your mouth for clarity.
- Adjust gain and volume settings to avoid distortion or background noise.
Clear audio helps retain viewer engagement and makes your stream more professional.
Preparing Your Streaming Environment
Creating an optimal environment ensures your stream looks and sounds great.
Lighting tips:
- Use natural light or softbox lights to illuminate your face evenly.
- Avoid bright windows directly behind you to prevent silhouettes.
- Consider ring lights or LED panels for consistent lighting.
Background considerations:
- Keep your background tidy or use virtual backgrounds available in streaming software.
- Incorporate personal branding or relevant visuals.
- Ensure your background doesn’t distract viewers from your content.
Testing and Going Live
Practice makes perfect; do test runs to check audio and video quality. Most streaming platforms allow you to do a private or unlisted test before going public.
Common streaming platforms:
- Facebook Live
- Twitch
- YouTube Live
- Zoom and other conferencing tools for meetings
Configure your platform’s settings to match your stream resolution and quality preferences.
Tips for a Smooth Streaming Experience
To avoid interruptions, ensure your internet connection is stable and fast.
- Use an Ethernet cable if possible for a more reliable connection.
- Close unnecessary applications to free up system resources.
- Adjust streaming quality settings to match your upload speed.
- Keep your Mac and streaming software updated for the latest features and security.
Monitoring your stream in real-time helps you catch issues early and adjust as needed.
Enhancing Your Stream with Additional Features
Add overlays, alerts, or multiple scenes to make your stream more engaging.
Popular features include:
- Custom graphics and overlays for branding.
- Chat windows to interact with viewers.
- Scene transitions for a professional touch.
- Sound effects or background music to set the mood.
Most streaming software supports these features, making it easy to personalize your broadcast.
Maintaining Your Streaming Setup
Regularly check your equipment and software for updates and performance issues.
- Clean your webcam lens periodically for clear video.
- Test audio equipment before each session.
- Update your streaming software regularly for new features and security patches.
Good maintenance ensures consistent quality for your viewers.
Summary of Key Points
To successfully stream with a webcam on your Mac:
- Choose a compatible high-quality webcam.
- Connect and test your webcam with your Mac and streaming software.
- Configure streaming software settings for optimal video and audio quality.
- Enhance your environment with proper lighting and tidy backgrounds.
- Practice and do test runs before going live to avoid technical issues.
Paying attention to these details will help you produce professional, engaging streams.
Additional Resources and Tips
Explore tutorials and communities dedicated to streaming for Mac users. Watching how others set up their environments can provide new ideas to improve your streams.
- Join online forums like Reddit’s r/Twitch or r/Streaming.
- Follow streaming tutorials on YouTube for Mac-specific guides.
- Read software documentation for advanced features and troubleshooting.
Remember, creating quality streams takes practice, but with patience, you’ll see noticeable improvements over time.
By following these steps and tips, you’ll be well on your way to confidently streaming with your Mac and webcam. Whether you’re sharing your gameplay, hosting tutorials, or chatting with friends, a good setup makes all the difference.
Iphone as webcam on mac book pro #brandonwavetech
Frequently Asked Questions
What software options are available for streaming with a webcam on Mac?
There are several applications you can use to stream with a webcam on Mac, including OBS Studio, Ecamm Live, and Streamlabs Desktop. OBS Studio is free and widely used, offering customizable options for streaming and recording. Ecamm Live provides an intuitive interface with features tailored for live broadcasting, while Streamlabs Desktop combines streaming tools with additional integrations. Choose the software that best aligns with your streaming needs and technical comfort level.
How can I ensure my webcam is properly configured for live streaming on Mac?
Start by connecting your webcam securely to your Mac using a compatible port or adapter. Open your chosen streaming software and navigate to the settings or preferences menu. Select your webcam from the device list, and verify that the video feed is displaying correctly. Adjust camera parameters like resolution and frame rate based on your streaming requirements. Testing your setup before going live helps confirm everything works smoothly.
Are there any specific settings I should tweak for better webcam quality on Mac?
Yes, adjusting the resolution, frame rate, and exposure settings can improve your webcam quality. Set the resolution to match your stream’s target quality, typically 720p or 1080p. Maintain a frame rate of 30 fps for smooth video. If available, tweak exposure and focus settings for clarity, especially in varied lighting conditions. Proper lighting in your environment also significantly enhances video quality, so consider using additional light sources if needed.
Can I use external microphones with my webcam on Mac for streaming?
Absolutely. Many webcams have onboard microphones, but using an external microphone often produces better audio quality. Connect your external microphone via USB or audio jack, then select it in your streaming software’s audio settings. Test the audio levels before going live to ensure clear sound. Investing in a good microphone makes a noticeable difference in your overall stream quality.
Is it necessary to install additional drivers for my webcam on Mac?
Most webcams are plug-and-play on Mac and do not require additional drivers. When you connect the device, macOS usually detects it automatically. However, some advanced webcams or specialized features may require drivers or software provided by the manufacturer. Check the webcam’s documentation to determine if extra software is necessary and follow the installation instructions if needed.
Final Thoughts
To stream with webcam on Mac, start by selecting a compatible streaming software like OBS Studio or Ecamm Live. Connect your webcam and configure the video and audio settings to ensure high quality. Adjust your scene layout and add any necessary overlays or sources to enhance your stream.
Test your setup to avoid technical issues during live sessions. When ready, click “Start Streaming” and engage with your audience confidently. For an effective streaming experience, mastering how to stream with webcam on Mac is essential for smooth broadcasts.



