


Disassembling your gaming chair base is simple with the right approach. Whether you’re moving, cleaning, or replacing parts, safety and preparation are key. You’ll typically need to remove the seat mechanism, separate the gas lift from both the seat and the base, and keep track of all hardware. This guide provides clear, easy-to-follow steps to help you successfully take base off gaming chair without stress.
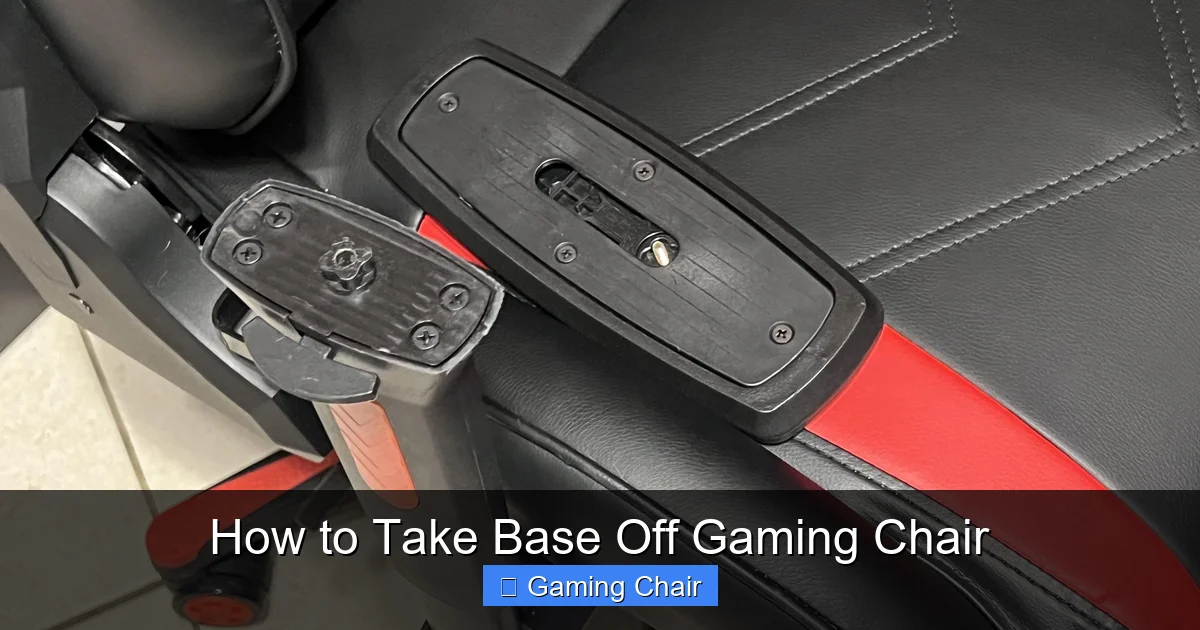
How to Take Base Off Gaming Chair
Hey there, fellow gamer! Have you ever found yourself needing to move your awesome gaming chair, only to realize it’s just too big to fit through a doorway or into your car? Or maybe you’re giving it a deep clean, replacing a wobbly part, or even upgrading some components. Whatever the reason, knowing how to take base off gaming chair is a super handy skill. It can save you time, effort, and even some potential damage during transport.
Disassembling a gaming chair might seem a bit daunting at first. You see all those bolts, levers, and mechanisms, and it’s easy to feel overwhelmed. But don’t worry! It’s actually a straightforward process once you understand the basic steps and have the right tools. Think of it like a puzzle. With a little patience and this friendly guide, you’ll be able to successfully remove your gaming chair’s base without breaking a sweat. We’ll walk through everything you need to know, from gathering your tools to the actual disassembly, making sure you feel confident every step of the way.
In this comprehensive article, we’ll dive deep into why you might need to perform this task, what tools you’ll absolutely need, and a clear, step-by-step process for how to take base off gaming chair. We’ll also throw in some useful tips and tricks to make the job even easier. So, let’s get your workspace ready and turn that intimidating task into a simple DIY project. You’ve got this!
Key Takeaways
- Preparation is Crucial: Before you start, gather all necessary tools like wrenches, screwdrivers, a rubber mallet, and lubricant. A clean, spacious workspace is also essential.
- Safety First: Always wear appropriate protective gear, such as gloves and eye protection. Be mindful of pinch points and the weight of components.
- Document Your Process: Taking photos at each stage of disassembly can be immensely helpful for successful reassembly later, ensuring you remember where every screw and part goes.
- Identify Chair Components: Understand the main parts – the seat, mechanism plate, gas lift cylinder, and the five-star base – to approach disassembly systematically.
- Gas Lift Removal Can Be Tricky: The gas lift often requires a bit of gentle persuasion (like a rubber mallet and lubricant) to separate from both the seat mechanism and the base due to a tight, conical fit.
- Organize Hardware: Keep all screws, bolts, and small parts organized in labeled containers or bags to prevent loss and simplify the reassembly process.
- Don’t Force It: If a part is stuck, re-evaluate your approach. Use lubricant or a mallet gently rather than brute force, which can cause damage.
Quick Answers to Common Questions
Can I take the base off my gaming chair without any tools?
While some parts might come off with just hand strength, the gas lift and mechanism plate are typically pressure-fitted or bolted, requiring tools like wrenches and possibly a rubber mallet for safe and effective disassembly.
Is it safe to store a gaming chair disassembled?
Yes, it’s very safe to store a gaming chair disassembled. In fact, it’s often preferred for long-term storage or moving, as it protects components from damage and reduces the space required.
How do I know if my gas lift is stuck?
A gas lift is considered stuck if it doesn’t separate from the seat mechanism or the five-star base with reasonable pulling or pushing by hand. It usually requires gentle tapping with a rubber mallet and possibly some lubricant.
What if I lose a screw during disassembly?
If you lose a screw, check the manufacturer’s website for replacement parts or specifications. You might be able to find a suitable replacement at a local hardware store by matching the type, length, and thread size.
Can I put the base back on later?
Absolutely! The process for reattaching the base is generally the reverse of how you took it off. Just ensure you align everything correctly and tighten all bolts securely.
📑 Table of Contents
Why You Might Need to Remove Your Gaming Chair’s Base
There are several good reasons why you might need to separate the base from your gaming chair. It’s not just for when you’re moving house! Understanding these reasons can help you decide if disassembly is the right choice for your current situation.
Moving and Storage
This is probably the most common reason. Gaming chairs, especially the racing-style ones, can be quite large and bulky. Their wide five-star bases often prevent them from fitting through standard doorways or into vehicle trunks without hassle. By learning how to take base off gaming chair, you can reduce its footprint significantly. This makes it much easier to transport the chair to a new home, store it in a smaller space, or even ship it if you’re selling it. It protects both your chair and your walls from dings and scratches.
Cleaning and Maintenance
Sometimes, a deep clean is in order. Dust, pet hair, and crumbs love to hide in all the nooks and crannies of your chair, especially around the base and caster wheels. Taking the base off allows you to access these hard-to-reach areas more easily. You can thoroughly clean the caster wheels, lubricate moving parts, and even clean the gas lift cylinder itself. This kind of detailed maintenance can extend the life of your chair and keep it functioning smoothly.
Replacing Damaged Parts
Is your chair wobbling? Are the wheels not rolling smoothly anymore? Or maybe the gas lift isn’t holding its height? Often, only one component needs replacement, not the entire chair. If your five-star base is cracked, a wheel is broken, or the gas lift is faulty, knowing how to take base off gaming chair means you can easily isolate and replace just that specific part. This is much more cost-effective and eco-friendly than buying a whole new chair. It’s a smart way to perform repairs.
Upgrading Components
Perhaps you want to upgrade your chair’s wheels to smoother, quieter rollerblade style casters. Or maybe you’re eyeing a more robust aluminum base instead of the standard plastic one. To swap out these parts, you’ll need to disassemble the chair. Being able to remove the base gives you the flexibility to customize and enhance your gaming setup. You can tailor your chair to your specific needs and preferences.
Essential Tools You’ll Need

Visual guide about How to Take Base Off Gaming Chair
Image source: down-ph.img.susercontent.com
Before you even think about grabbing your chair, let’s talk tools. Having the right equipment makes all the difference. It ensures a smooth process and prevents frustration or damage to your chair.
Safety First
Always prioritize safety. Even a seemingly simple task like taking a base off a gaming chair can have minor hazards.
- Gloves: Protect your hands from grime, pinched fingers, or sharp edges.
- Eye Protection: Small parts can sometimes fly off, so goggles are a good idea.
- Clear Workspace: Make sure you have plenty of room to work without tripping or bumping into things.
The Right Wrench/Socket Set
Most gaming chairs use hexagonal bolts to attach the mechanism plate to the seat. You’ll likely need a wrench or a socket set. A common size is 13mm, but it can vary, so having a set with multiple sizes is ideal. An adjustable wrench can also work in a pinch.
Screwdrivers (Phillips, Flathead)
Some chairs might have Phillips head screws, especially for decorative covers or armrest attachments. A good quality screwdriver set is always useful to have on hand.
Rubber Mallet (Optional but helpful)
This is your best friend when dealing with a stubborn gas lift! The gas lift cylinder is often seated very tightly in the base and the seat mechanism. A rubber mallet allows you to apply force without damaging the metal components. A regular hammer with a block of wood can also work as a substitute.
Lubricant (WD-40 or similar)
For particularly stubborn gas lifts or corroded bolts, a penetrating lubricant like WD-40 can work wonders. A quick spray and a few minutes of waiting can loosen things up significantly, making the removal process much easier.
Container for Parts
Trust me on this one! Get a small bowl, a few zip-top bags, or even a magnetic parts tray. You’ll have screws, washers, and other small bits. Keeping them organized prevents them from getting lost and makes reassembly a breeze. Labeling the bags can be extra helpful.
Step-by-Step Guide: How to Take Base Off Gaming Chair

Visual guide about How to Take Base Off Gaming Chair
Image source: officialgamingchair.com
Alright, you’ve got your tools, your workspace is clear, and you’re ready to go. Let’s get down to the actual process of how to take base off gaming chair. Follow these steps carefully, and you’ll be done in no time.
Step 1: Prepare Your Workspace
Start by laying down a blanket or an old towel on your clear workspace. This protects both your chair and your floor from scratches. Position the chair upside down or on its side so you can easily access the underside of the seat and the base. You need good visibility of the mechanism plate and the gas lift.
Step 2: Remove the Chair Back (if necessary)
Some gaming chairs come apart more easily if the backrest is removed first. This reduces the overall weight and makes the seat easier to handle. Look for bolts on either side where the backrest attaches to the seat base or armrests. Use your wrench or socket to loosen and remove these bolts. Carefully lift the backrest away and set it aside. Not all chairs require this, but it can make the next steps simpler.
Step 3: Detach the Armrests (if necessary)
Similar to the backrest, removing the armrests can sometimes make the seat unit lighter and more manageable. Look for bolts attaching the armrests to the seat. These are usually visible from underneath the seat or on the side. Remove them with your wrench or screwdriver, depending on the bolt type. Again, this step is optional but can be helpful.
Step 4: Disconnect the Mechanism Plate from the Seat
Now we’re getting to the core. The mechanism plate is the metal component directly under the seat cushion. It’s usually a rectangular or square plate with several levers. This plate is bolted directly to the underside of the chair seat.
- Locate the bolts: There are typically four bolts, one in each corner of the mechanism plate. They usually have hexagonal heads.
- Loosen and remove: Use your wrench or socket to loosen these bolts. Turn counter-clockwise. Once loose, fully remove all four bolts.
- Separate the mechanism: Carefully lift the seat away from the mechanism plate. The gas lift cylinder will still be attached to the mechanism plate at this stage. Place the seat cushion aside.
Remember to put these four bolts into your labeled container! This is a crucial step in how to take base off gaming chair effectively.
Step 5: Separate the Gas Lift from the Seat Mechanism
This is often the trickiest part. The gas lift cylinder is typically tapered and pressure-fitted into the hole of the mechanism plate. It doesn’t use bolts here.
- Position the mechanism: Place the mechanism plate (with the gas lift still attached) on your protected surface. You want the narrow top part of the gas lift facing upwards.
- Apply lubricant (if needed): If it feels very stuck, spray some penetrating lubricant like WD-40 around the top rim of the gas lift where it meets the mechanism plate. Let it sit for 5-10 minutes.
- Use the mallet: Hold the mechanism plate firmly. With your rubber mallet, gently but firmly tap around the top rim of the gas lift cylinder where it meets the plate. Don’t hit the very top of the gas lift itself. Rotate the mechanism plate and keep tapping. The goal is to gradually loosen the tapered fit.
- Separate: After several taps, the gas lift should start to slide free. You might need to flip the mechanism over and tap the top of the gas lift (where the seat attaches) to push it down and out. It might take a bit of effort, but avoid excessive force.
Once separated, set the gas lift and the mechanism plate aside. You’re making great progress on how to take base off gaming chair.
Step 6: Remove the Gas Lift from the Five-Star Base
You’re almost there! Now you have the gas lift cylinder still stuck in the five-star wheel base. This connection is also a tapered, pressure fit, similar to the previous step.
- Invert the base: Turn the five-star base upside down. The wider part of the gas lift will be visible, sticking out from the center of the base.
- Apply lubricant (if needed): Again, if it’s stubborn, spray lubricant around the top edge of the gas lift where it meets the base. Wait a few minutes.
- Use the mallet: Support the arms of the five-star base on a stable surface, leaving the gas lift hanging freely. Alternatively, hold two opposing arms of the base. With your rubber mallet, firmly tap on the top (now bottom, since it’s inverted) of the gas lift cylinder. Focus your taps directly on the cylinder itself.
- Wiggle and pull: As you tap, the gas lift should gradually move down and out of the base. You might need to wiggle it a bit as you tap. It might pop out suddenly, so be prepared.
And there you have it! The gas lift is now separated from the base. You have successfully learned how to take base off gaming chair!
Step 7: Final Inspection and Storage
Once everything is apart, take a moment to inspect all the components. Check for wear, damage, or areas that might need cleaning or lubrication before reassembly or storage. Store all parts safely in bags or boxes, especially if you’re moving. Keep the small hardware separate and clearly labeled.
Tips for a Smooth Disassembly Process
Visual guide about How to Take Base Off Gaming Chair
Image source: i.redd.it
To make your experience even smoother and more successful, here are a few extra tips from someone who’s been there!
Take Pictures!
This is probably the most underrated tip. Before you remove anything, take photos from different angles. Take more photos as you remove each component. These visual aids will be invaluable when it comes time to reassemble your chair, reminding you exactly where each screw, washer, and lever goes. It’s like having a personalized instruction manual for your specific chair.
Keep Screws Organized
We mentioned this before, but it bears repeating. Use separate labeled bags or a multi-compartment tray for the bolts from the backrest, armrests, and mechanism plate. Losing even one small screw can halt your reassembly process. Seriously, label those bags!
Don’t Force It
If a bolt isn’t turning, or a part isn’t separating, stop. Forcing it can strip screws, break components, or cause injury. Re-evaluate. Is there a hidden fastener? Are you turning the wrench in the wrong direction? Is it just really stuck? A bit of lubricant and patience almost always works better than brute force.
Clean as You Go
Since you have your chair apart, it’s the perfect time for a deep clean. Wipe down the base, clean out any gunk from the caster wheels, and clean the gas lift cylinder. This not only keeps your chair looking good but also helps prevent future issues like sticky wheels or a gritty gas lift.
Consider Lubrication for Reassembly
When putting things back together, a tiny bit of grease or lubricant on the threads of bolts can make them easier to tighten and prevent seizing later. For the gas lift, ensure the tapered surfaces are clean and dry for a secure fit.
Reassembly Tips
Once you’ve mastered how to take base off gaming chair, putting it back together is usually the reverse process. Here are a few pointers for a successful reassembly.
Reverse the Steps
Use your photos and common sense to put the chair back together. Start by reattaching the gas lift to the five-star base, then the gas lift to the mechanism plate, followed by the mechanism plate to the seat, and finally the armrests and backrest if you removed them.
Tighten Everything Securely
Make sure all bolts are tightened firmly, but don’t overtighten. Over-tightening can strip threads or crack plastic components. A snug fit is sufficient. You don’t want any wobbles.
Test Functionality
Before you sit down for a long gaming session, give your chair a quick test. Check the height adjustment, tilt, and swivel. Make sure the wheels roll smoothly and there are no strange noises or excessive wobbling. Sit in it and move around a bit.
Conclusion
Congratulations! You’ve successfully learned how to take base off gaming chair. It’s a valuable skill that empowers you to move, maintain, repair, and even upgrade your beloved gaming companion. From navigating tight doorways to swapping out a worn-out gas lift, you now have the confidence and knowledge to tackle the job.
Remember, the key is preparation, patience, and using the right tools. Don’t rush, take plenty of photos, and keep those small parts organized. Your gaming chair is an investment in your comfort and gaming experience, and knowing how to care for it through disassembly and reassembly ensures it stays in top condition for years to come. So, next time you need to move or tinker with your setup, you’ll know exactly what to do. Happy gaming, and enjoy your newly mobile or refurbished chair!
Frequently Asked Questions
What is the most challenging part of removing a gaming chair base?
The most challenging part for many people is often separating the gas lift cylinder from both the seat mechanism and the five-star base. This is because it’s typically a tapered, pressure-fit connection that can become very tight over time, sometimes requiring a rubber mallet and lubricant.
Do all gaming chairs have the same disassembly process?
While the general steps are quite similar across most gaming chairs (removing seat, mechanism, then gas lift from base), there can be minor variations. Some chairs might have different bolt types, fewer or more components to detach, or different ways their armrests or backrests attach.
Can removing the base damage my gaming chair?
If done improperly or with excessive force, removing the base can potentially damage components like stripped screw threads or bent metal. However, following a careful, step-by-step guide and using the right tools minimizes this risk significantly, making it a safe process.
How long does it typically take to remove a gaming chair base?
For someone with basic DIY experience and the right tools, removing a gaming chair base can typically take anywhere from 15 to 45 minutes. The time largely depends on how stubborn the gas lift is and how many other components (like armrests or back) need to be removed.
What should I do if the gas lift won’t come out even with a mallet and lubricant?
If the gas lift is extremely stubborn, try reapplying lubricant and letting it sit for an hour or even overnight to allow it to penetrate deeply. You can also try twisting the base while tapping. If all else fails, a professional repair shop or locksmith might have specialized tools to help, but this is rarely necessary.
Is it necessary to remove the armrests or backrest to take off the base?
It’s not always strictly necessary to remove the armrests or backrest, as the core process involves the seat, mechanism, and gas lift. However, removing these components can make the seat lighter and easier to maneuver, providing better access and reducing strain during the main disassembly steps.



