


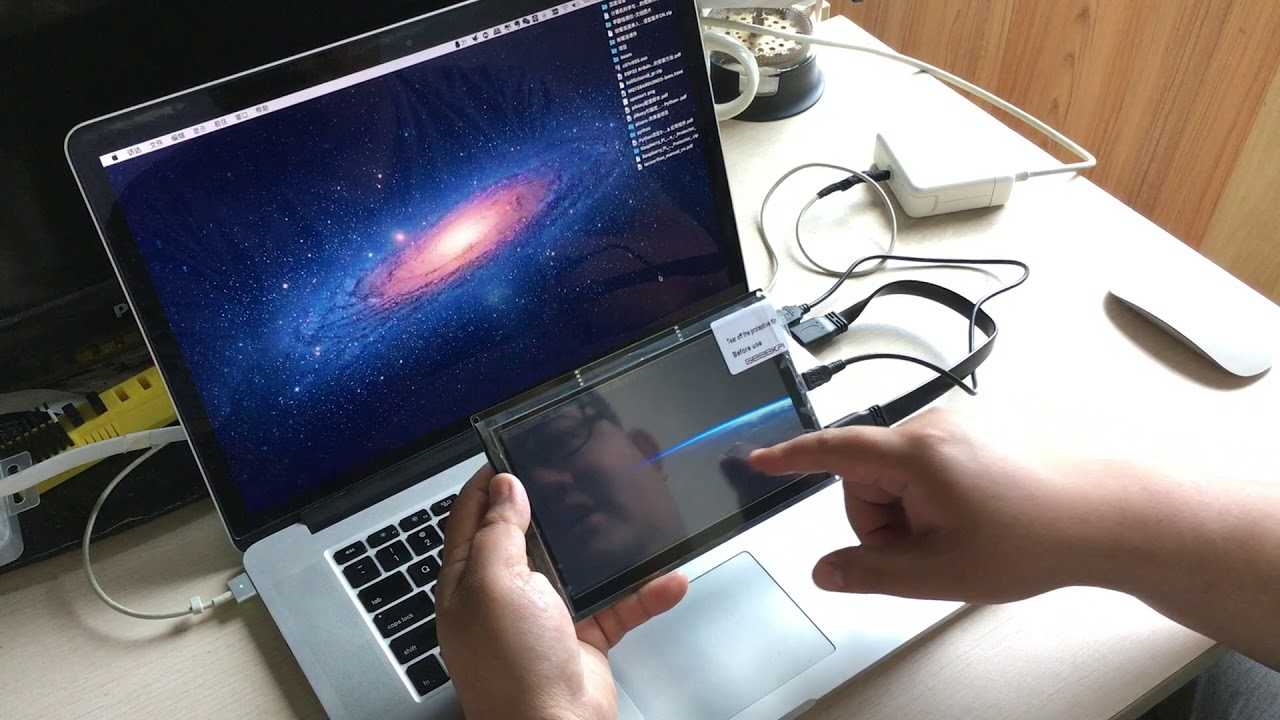
To connect a touchscreen monitor to your laptop, simply identify the compatible ports on both devices, connect them using the right cable (HDMI, DisplayPort, or USB-C), and install any necessary drivers if prompted. Once connected, adjust your display settings to enable touch functionality. With these quick steps, you’ll have your touchscreen monitor up and running smoothly in no time.
Connecting a touchscreen monitor to your laptop might seem daunting, but it’s quite straightforward once you know the steps. Whether you want to enhance your productivity or just enjoy a sleek new interface, understanding how to link your devices is key. First, determine which ports are available on your laptop and the monitor—common options include HDMI, DisplayPort, or USB-C. Then, physically connect the two with the appropriate cable. In some cases, you might need to install or update drivers so the touch features work properly. Once everything’s set up, configure your display settings to optimize the resolution and enable touch input. It’s a simple process that can significantly improve your computing experience.

How to Connect Touchscreen Monitor to Laptop
Connecting a touchscreen monitor to your laptop can seem complicated at first, but with the right steps, it becomes straightforward. This process allows you to enjoy a larger display and interactive features that boost productivity and entertainment. Here, we will explore each step in detail to help you connect your touchscreen monitor smoothly.
Check Compatibility of Your Laptop and Touchscreen Monitor
Before starting, ensure your laptop supports an external touchscreen monitor. Most modern laptops feature HDMI, DisplayPort, or USB-C ports, but it’s important to confirm. Similarly, verify that your touchscreen monitor is compatible with your laptop’s connection options.
Look at the specifications of both devices. Your laptop’s user manual or specifications sheet will list available video output ports. The touchscreen monitor’s packaging or manual will mention compatible connection types. Confirming compatibility prevents unnecessary purchases or errors during setup.
Identify the Right Connection Ports on Your Laptop and Monitor
Common Laptop Ports for Connecting External Displays
- HDMI (High-Definition Multimedia Interface): Most common, supports high-definition video and audio.
- DisplayPort: Offers high resolution and refresh rates, popular for gaming or high-quality visuals.
- USB-C with DisplayPort support: Modern laptops often use USB-C for video output, with support for power and data transfer.
- VGA and DVI: Older ports still found on some laptops and monitors, suitable for basic displays.
Touchscreen Monitor Connection Types
- HDMI or DisplayPort: Used for video and touch input transfer; most newer monitors support these.
- USB for Touch Functionality: Some monitors require a separate USB connection to transmit touch input data.
Gather Necessary Cables and Adapters
Based on the ports identified, gather the appropriate cables and adapters. For example, if your laptop has USB-C and your monitor supports HDMI, you may need a USB-C to HDMI adapter. Keep the following in mind:
- Use high-quality cables for the best image quality and reliable touch performance.
- If your devices have different port types, adapters or converters will be necessary.
- Ensure that the adapters support video and touch data transfer, especially for touchscreen functions.
Connect the Hardware Step-by-Step
Step 1: Turn off Your Laptop
It’s safer to connect the monitor while your laptop is turned off, preventing electrical issues and ensuring compatibility during setup.
Step 2: Connect the Video Cable
Use the appropriate cable (HDMI, DisplayPort, or USB-C) to connect the monitor to your laptop’s video output port. Make sure the connection is snug and secure.
Step 3: Connect the Touch Input Cable
If your monitor requires a separate USB cable for touch features, connect it to an available USB port on your laptop. Confirm that the cable is properly inserted for accurate touch response.
Step 4: Power On Both Devices
Turn on your monitor first, then power on your laptop. The system should detect the new display automatically.
Configure Display Settings for Optimal Performance
Adjust Screen Resolution
Access your laptop’s display settings to set the resolution that matches the monitor’s native resolution. This improves image clarity and touch accuracy.
Set Display Mode
Choose between extending the display, duplicating the screen, or using the monitor as the primary display. To do this, navigate to your display settings and select the preferred mode.
Calibrate the Touchscreen
Calibration ensures touch accuracy. Follow your operating system’s calibration process, which typically involves touching specific points on the screen when prompted.
Troubleshooting Common Connection Issues
Monitor Not Detected
- Check all cable connections are secure.
- Restart your laptop and monitor.
- Update your graphics drivers to ensure compatibility.
Touch Function Not Working
- Ensure the USB cable is properly connected.
- Reinstall or update the touchscreen driver software.
- Run calibration again to improve touch accuracy.
Display Resolution or Refresh Rate Issues
- Adjust resolution settings in display preferences.
- Check the monitor’s manual for supported refresh rates and set accordingly.
Additional Tips for a Seamless Setup
- Keep your device drivers updated for smooth operation.
- Use high-quality, certified cables to avoid signal loss.
- Place your monitor at an ergonomic height for comfortable use.
- Regularly clean your touchscreen to maintain responsiveness.
Related Topics to Explore
If you want to enhance your experience, consider exploring topics like connecting multiple displays, adjusting display color settings, or using a docking station for multiple peripherals. These can further improve your workspace and productivity.
Learning how to connect a touchscreen monitor to your laptop becomes easier with each step. Taking the time to choose the right equipment and follow these instructions ensures a smooth, functional setup. Once connected, you can enjoy a larger, more interactive screen that makes work and play more enjoyable.
Connect Touch Monitor to Laptop by HDMI Port (Windows10 Touch Screen Trouble Shooting)|GeChic
Frequently Asked Questions
What types of cables are needed to connect a touchscreen monitor to a laptop?
To connect a touchscreen monitor to your laptop, you typically need an HDMI, DisplayPort, or VGA cable for video transmission. For touchscreen functionality, ensure the monitor supports USB connectivity, so you’ll also need a USB cable—such as USB-A or USB-C—depending on the monitor’s ports. Using the correct combination of these cables ensures both display output and touch responsiveness work properly.
How can I configure the display settings after connecting my touchscreen monitor?
Once you connect the monitor, go to your laptop’s display settings. On Windows, right-click on the desktop and select “Display settings.” Here, you can choose to extend or duplicate your screen and set the touchscreen monitor as the main display if desired. Adjust the resolution and orientation to match the monitor’s specifications. On macOS, navigate to System Preferences > Displays to configure these options.
What should I do if the touchscreen feature is not responding after connection?
If the touchscreen isn’t responding, first verify that you’ve connected the USB cable correctly, as it’s typically needed for touch functionality. Make sure your drivers are up to date—visit the manufacturer’s website for the latest drivers and software updates. Restart your laptop and check device manager for any hardware conflicts. If issues persist, test the monitor on another computer to determine if the problem lies with the monitor or the laptop.
Final Thoughts
To connect a touchscreen monitor to a laptop, start by checking the ports on both devices. Use the appropriate cable, such as HDMI, DisplayPort, or USB-C, to establish a physical connection. Then, power on the monitor and laptop, and select the correct input source on the monitor.
Next, configure the display settings on your laptop to detect and extend or duplicate your screen as needed. Install any required drivers or software to enable touchscreen functionality.
In conclusion, how to connect touchscreen monitor to laptop involves connecting the right cable, selecting the correct input, and configuring display and drivers properly. This ensures your touchscreen monitor works seamlessly with your laptop for an optimal experience.



